On one of my visits back to the US, I walked into a bagel shop and bought cream cheese to take back to London. Yes, I’m serious. Scallion cream cheese, specifically. What you might call spring onion and Philadelphia if you’re not American (or Canadian?). It was a really good scallion cream cheese. And it was $5 for a small carton that I wasn’t even sure would survive an 8 hour flight.
Once I’d finished every last speck, the mourning process began. Wistful flight searches. Daydreams about when I could next get a creamy, oniony, freshly made smear onto my bagels. Then I started thinking big. What if I could make my own scallion cream cheese?
Something to rival those neighborhood bagel shops from back home.
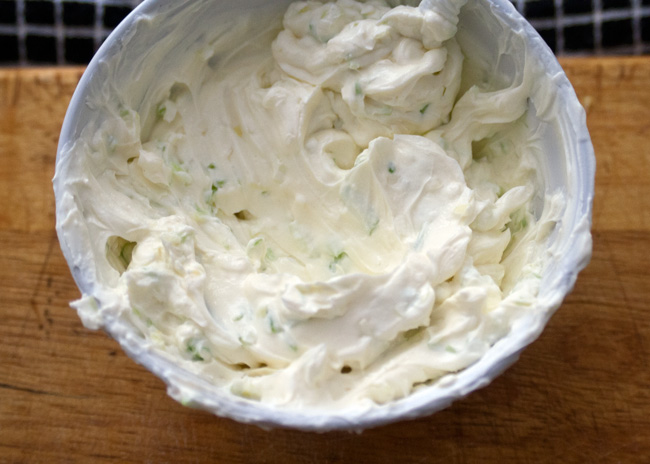
And so I set out to whip up a scallion cream cheese recipe for those of us who can’t get this wonder spread.
The fridge stable 8 month old pre-packaged stuff is not the same and I’m not going to pretend it is. Keep on keeping on if you love it, I don’t want to stomp on your flower garden. But really, this is so much better.
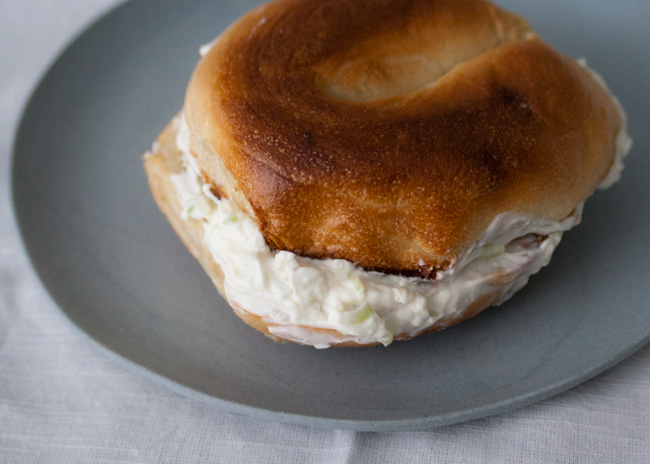
Put me, this scallion cream cheese and a few bagels in a room together, and I can guarantee there won’t be any left. But I know everyone isn’t like me, so I’ve come up with other easy ways to polish off your pot of scallion cream cheese.
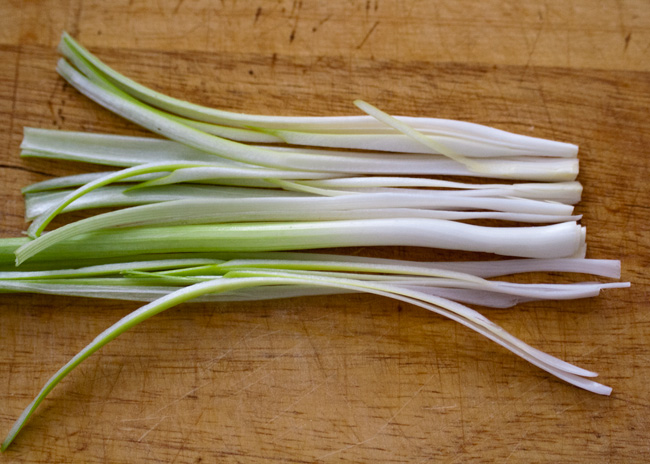
Quarter scallions lengthwise, then finely chop them. Combine with milk, salt and cream cheese and that’s it! If you have the patience, let it sit in the fridge for a few hours before digging in.
 Bonus: Rainbow bagel, because it was so ridiculous I just had to.

Ideas for using up your scallion cream cheese
Stir it into a quiche. Stir it into the eggy quiche mix, then layer it with your favorite quiche ingredients. Maybe spinach or ham, or whatever you have in the fridge.
Layer it into your 5-6-7 layer dip and break out the tortilla chips.
Stir it into vegetable pasta.
Option 1: Cook up some asparagus or tender stem broccoli (or both) in garlic, then add a squeeze of lemon juice and lemon zest. Stir the cream cheese into pasta, gently incorporate the green vegetables and top with grated parmesan.
Option 2: Pump up a super-easy lasagne-style pasta bowl.
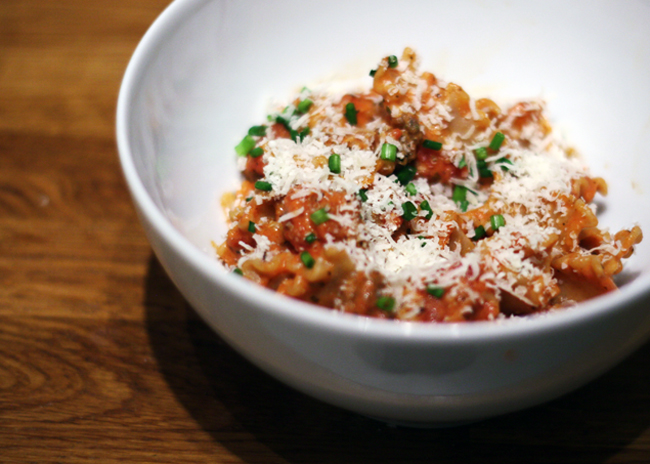
Pile it onto a baked potato, sweet or otherwise. Top with chopped bacon, pan fried mushrooms or just fresh herbs.

Stuff it into chiles, cover them in bread crumbs and bake for pepper poppers.

Serves 2 tbsp
5 minPrep Time
5 minCook Time
10 minTotal Time
On the Counter
- 180g (8 oz) container of cream cheese (I use Philadelphia)
- 2 scallions/spring onions
- 1 tsp milk
- 1/4 tsp salt
What to Do
- Quarter the spring onions, lengthwise. Slice them finely
- Scoop the cream cheese into a bowl, and add the milk. Break up the cream cheese then stir to combine and thin out the cheese.
- Add in the salt and spring onions, and stir until the spring onions are evenly distributed.
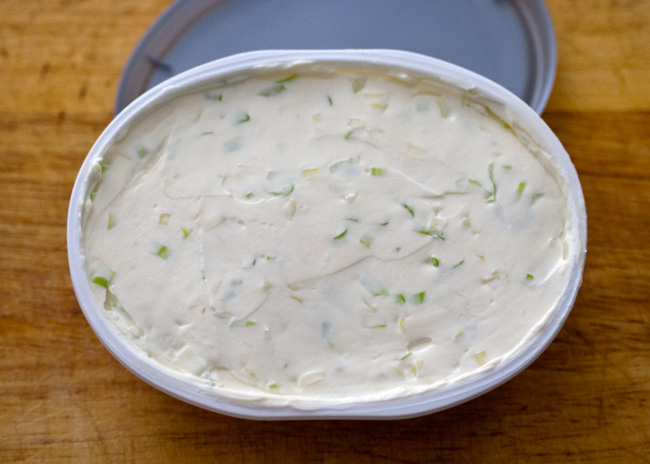
- Put the cream cheese back into its container and refrigerate.
- It's good right away but tastes a lot better if you let it chill for at least a few hours.
Do you like granola? I like granola. But I hate paying £4 for a box with 3 pieces of walnut and one cranberry. If you’re with me, join me by making your own! And might I suggest you give my granola recipe a try…
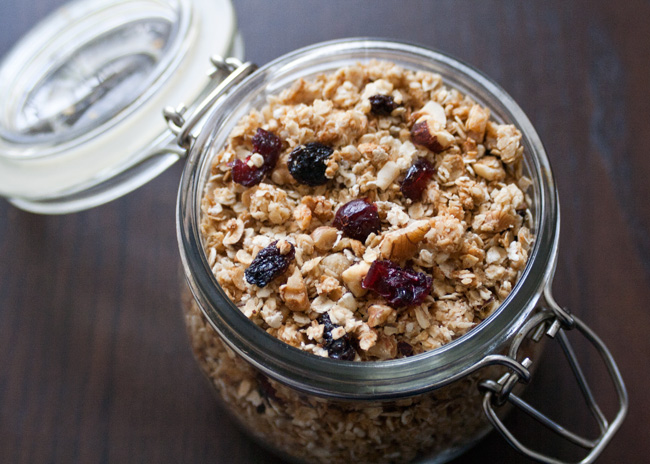
It’s really easy to scale your granola making up or down. You can also create your very own granola blend. Once you have the proportions down, anything is possible. Mine is lightly sweetened, but you can amp it up to your taste. More sweetener will also give you bigger clusters. For a vegan version, sub in maple syrup – but use less, as maple syrup tends to taste sweeter.
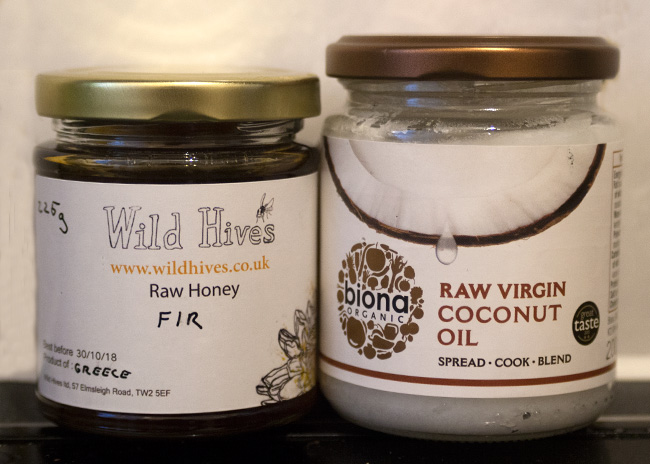
You can use different kinds of nuts, too. I’ve made it with hazelnuts and pecans, Brazil nuts and walnuts, and have even gone as far as a three-nut combo. Crazy, I know.
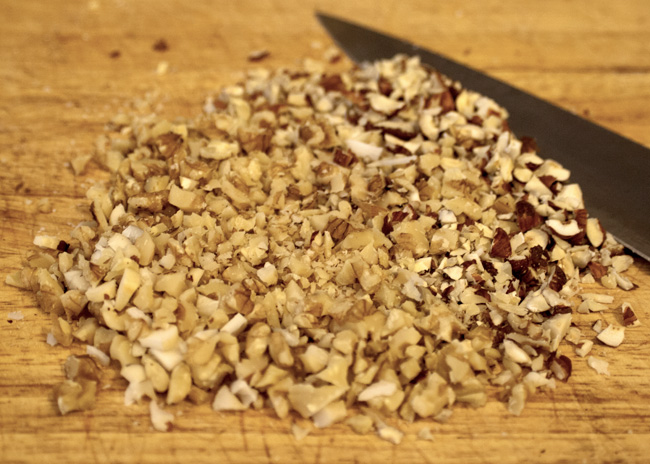
Add in your own flavorings – a sprinkle of cinnamon or a few drops of vanilla go a long way. Get creative with your crunchy granola self!
Once you have a vat of toasted granola, you might wonder what to do with it besides shoving it straight into your mouth.
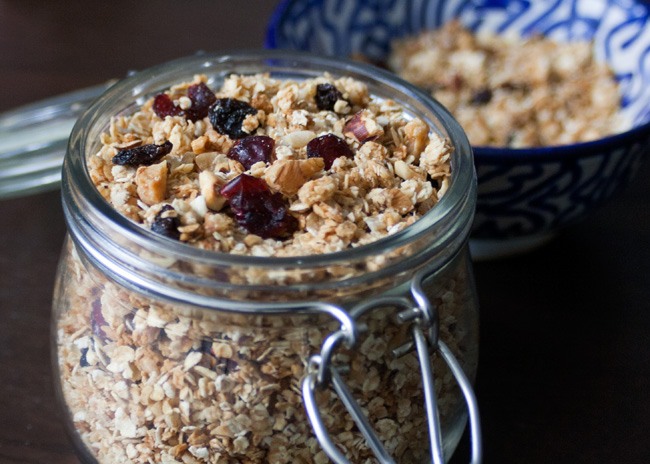
Sprinkle that sweet, nutty, homemade granola on top of plain (full fat obviously) Greek yogurt with jam. Sometimes I go off the deep end into DIY territory, but hear me out. You can turn that yogurt into any flavor you want it to be. Strawberry, apricot, blackberry bourbon… just try telling me dyed-pink yogurt sounds better.
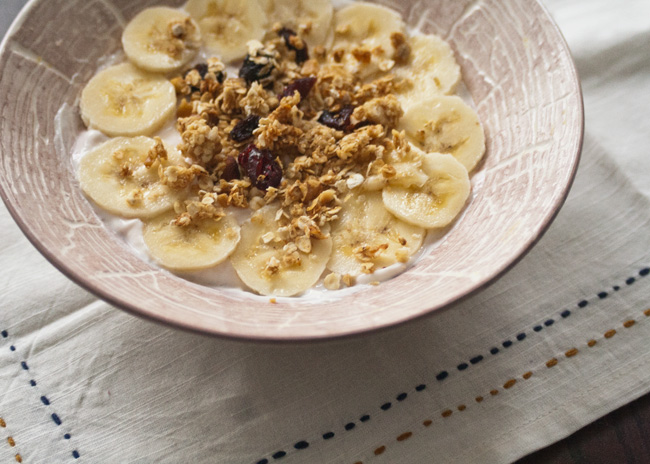
Pour some milk on it, cow or otherwise. Sprinkle it onto ice cream. Put it on a fruit crumble. Tweak your cranachan. (If you have any other suggestions, I’d be happy to try them.)
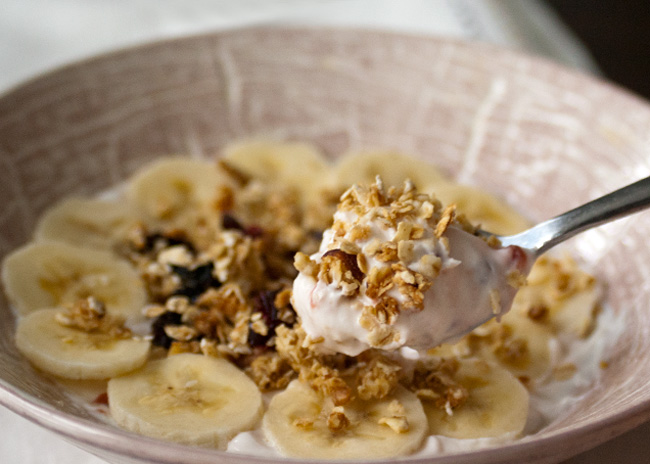
Feel like everything is out of your control? Start small with granola. Then take that slow-release energy out there and tackle the world.
On the Counter
- 200 g oats
- 75 g nuts
- 1 tbsp honey
- 1.5 tbsp coconut oil
- 75 g dried fruit
What to Do
- Optional first step: Sieve the oat dust from your oats.
- Preheat the oven to 160C/gas mark 3/325F.
- Combine the coconut oil and honey. On very low heat, melt them until the mix is thin and runny. This is especially handy if it's cool in your kitchen or your honey is crystallized. Stir to combine.
- Chop the nuts into pieces about the same size (or slightly larger than) an oat.
- In a large bowl, combine the oats and nuts.
- Drizzle the oil and honey on top, stirring the oat mix as you go. Stir until evenly coated. Dig deep!
- Spread the mix evenly onto two baking sheets.
- Bake for 10 minutes.
- Gently mix in the dried fruit and bake for another 10-15 minutes. Don't let it go further than lightly golden brown.
- Cool before storing.
- Mix your granola into yogurt, on top of ice cream, or enjoy it as a cereal with milk.
It has been a busy summer, and I wish I had more time to blog, or truthfully, to actually finish one of the 10 half-posts that have been hanging around. This is my attempt at getting back on the blogging wagon. Recently, I had a request for some gluten-free, meat-free recipes. I immediately thought of this post, patiently waiting in my drafts section. Three (or has it been four?) weeks later, here it is. Spiced up roasted cauliflower and zucchini with tahini dressing. And it’s vegan!
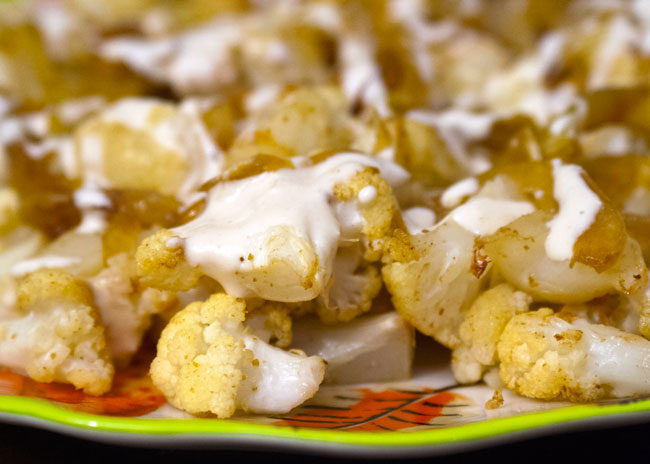
Plant-based foods have a lot going for them. You’re unlikely to have to worry about them poisoning you if they’re undercooked. They’re easy for weeknight meals and generally forgiving of your cooking skills. On top of that, they don’t normally include parts that make you think “ew, I’m not going to eat that” (Here’s looking at you, brains.)
Instead you can eat veggies that look like brains without all the weird thoughts about neurological diseases (yum).
Cauliflower is pretty low on my list of choice vegetables. But sometimes life gives you cauliflower, and you have to accept the challenge. The best way to handle the hardship of cauliflower is to roast and top it with lots of other nice things.
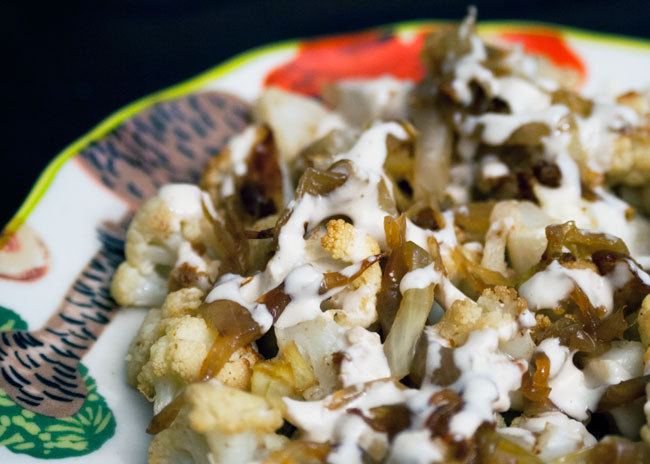 Like almost any veggie, some time in the oven with fat and spices makes everything better.
Add some sweet slow cooked onions and nutty, savory tahini dressing for a winner. I also like to add extra color in the form of courgettes (zucchini, whatever), because it’s (technically still) summer and there are too many of them anyway.
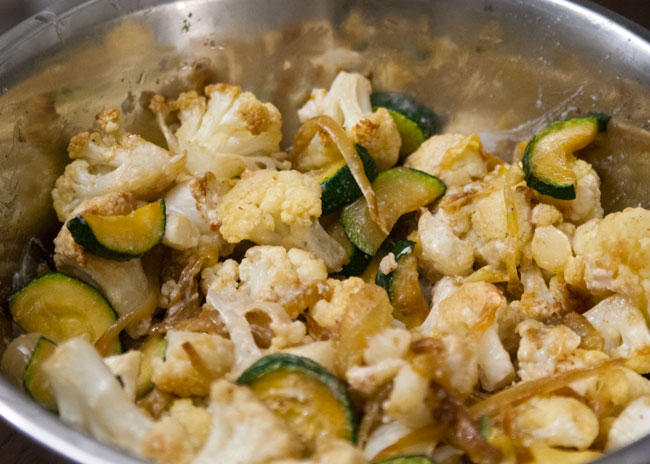
This recipe is adapted from This is a Cookbook: Recipes for Real Life, by Max and Eli Sussman, given to me by a very good friend back in the States.
Serves: 4
15 minPrep Time
30 minCook Time
45 minTotal Time
On the Counter
- 4 tbsp (90mL) olive oil (extra virgin if you have it) plus 1 tsp
- 2 medium onions, thinly sliced
- 1 cauliflower head (300g/10.5 oz), cut into 1 in (2.5 cm) pieces, including the stems
- 2 small, or supermarket sized in the UK, courgettes (zucchini)
- 2 tsp ground cumin
- 2 tsp paprika (sweet, hot, smoked - your choice)
- small handful of fresh flat leaf parsley, chopped (optional)
- 100 g (1/3 cup) tahini
- juice from 1/4 lemon
- 1 tsp cider vinegar
- 1 garlic clove, finely minced
- table salt to taste
What to Do
- Preheat the oven to 230C (450F).
- In a large bowl, toss the cauliflower pieces, courgette/zucchini, 1 tsp drizzle of oil, dash of salt, cumin and paprika together, until the vegetables are evenly coated.
- Heat 1 tbsp olive oil in a saute pan over medium heat, until it's just shimmering.
- Add in the onions.
- Lower the heat, stir in 1 tsp salt, and stir frequently.
- Keep the onions going over low heat until they're soft and sweet, at least 20 minutes. If you want to fully caramelize them, it will be around 45 minutes.
- Meanwhile, on a baking sheet, drizzle the remaining olive oil and spread it along the tray.
- Put the cauliflower and zucchini/courgette pieces in one layer on the tray. Try to ensure they're not piled on top of each other. Season with salt and freshly cracked black pepper.
- Roast the veggies for 10 minutes to start, and check on them. They'll likely need another 5 minutes before they're lightly toasty brown. Once they are, toss them around and roast for another 10 minutes.
- To serve, combine the roasted vegetables and soft onions. Toss them gently to spread the seasoning around. Drizzle the tahini dressing (below) on top, and then sprinkle on the fresh parsley.
- In a small bowl, whisk together tahini, 100mL (1/3 cup) water, 1 tsp salt, lemon juice, vinegar and garlic.
Between this and cauliflower cheese, maybe there’s hope for cauliflower yet.
Happy greens season! It’s that time of year when all the foodie instagrams, newspaper articles and veg boxes are talking about the stinky green leaves of wild garlic (known in the US as ramps).
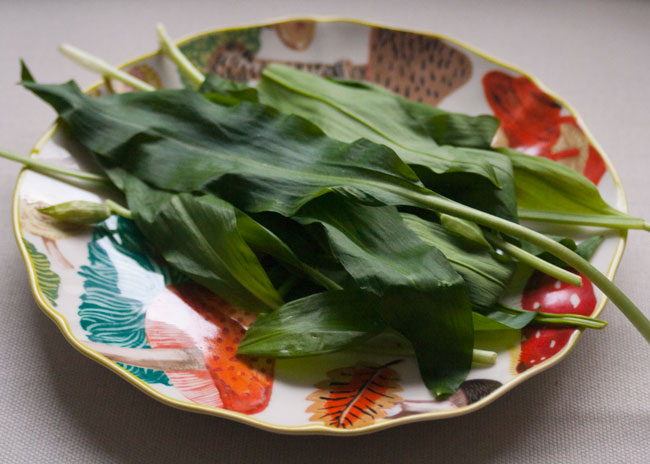
The cynic in me notices the apparent trendiness and members-club-feel of foraged greens. My more charitable side wants to justify the excitement.
These are the first edible, native plants that we are seeing and it’s easy to get over-enthusiastic. It’s been a long winter of potatoes, carrots and Chilean vegetables that have traveled further than I ever have. (Future post: are your veggies better traveled than you?)
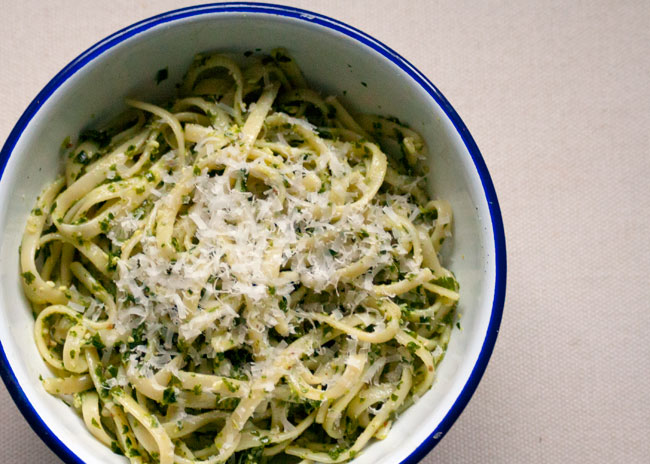
I’m going choose to be excited – and run with it. This is a recipe for wild garlic pesto made entirely with British produce. From the hard cheese to the oil… everything in it can be grown, harvested or produced within the UK.
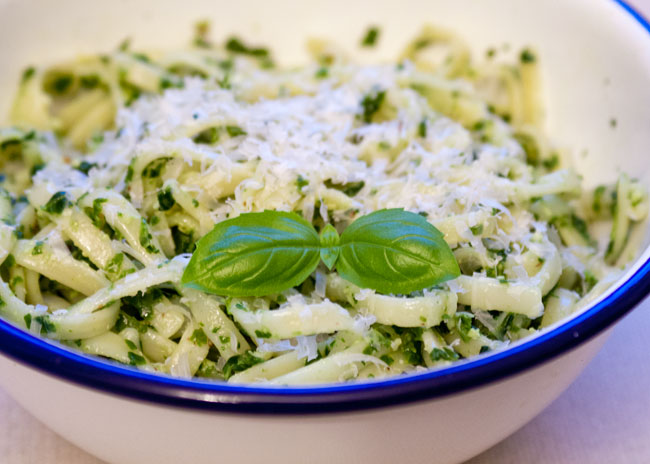
I was directed to a hard sheep’s cheese at Androuet in Spitalfields, London. I think it’s even tastier than Parmesan(!). Instead of citrus I use cider vinegar, and I lightened the garlickiness with steamed kale.
A big inspiration for this whole recipe came from a recent event where a professor of food policy insisted Britain should grow more nuts. I went for hazelnuts – unfortunately of mixed origins.
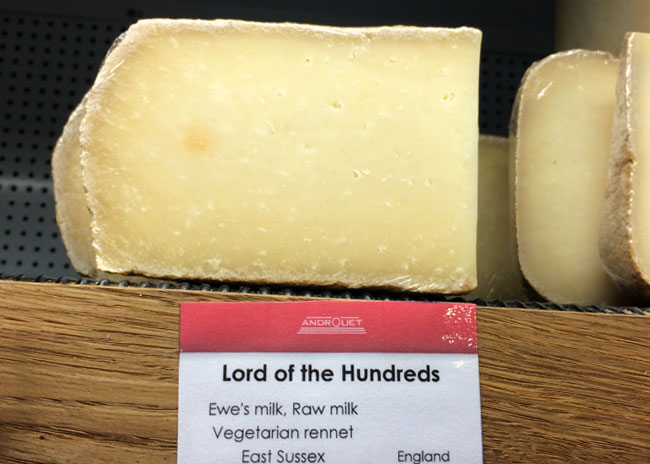
As with any pesto, you can swirl it into pasta, mix it into cream cheese and make a dip, add it to mashed potatoes or toss some roasted vegetables in it. Or just eat wild garlic pesto straight out of the bowl. Your choice.
I have never tried to make this with US produce, but with it being the largest exporter of walnuts in the world, and the existence of the California olive oil industry – I’m sure it’s can be done. If you are in the US and take on the challenge… please let me know!
On the Counter
- 50 g kale, after being stripped from stems
- 30 g wild garlic
- 15 g hazelnuts
- 10 g hard sheep's cheese
- 2.5 tbsp cold-pressed rapeseed oil
- 1 tbsp cider vinegar
- 1/2 tsp salt, and more to taste (Cornish sea salt if you want to go all out)
What to Do
- Steam the kale for 5 minutes
- Roughly chop the hazelnuts.
- In a food processor, or mortar and pestle, break up the hazelnuts even more, then add kale and wild garlic in bunches, pulsing between.
- Add in the oil, vinegar and salt.
- The last step is to add in the cheese.
- If you're freezing the pesto, convention says you should freeze it without the cheese and just add it when you serve it. I freeze it with cheese and haven't noticed a change in quality.
- Break the cheese into small pieces (or pre-grate it), and add it to the food processor/mortar.
Last year, when I was in Marrakech with a good friend, we had a Moroccan carrot salad among other mezze before a delicious chicken and olive tagine. My first bite of these tart, tender carrots gave me heart-eyes. I was in food love. The other salads, all made of cooked and marinaded veggies and pulses like zucchini, roasted peppers and lentils.
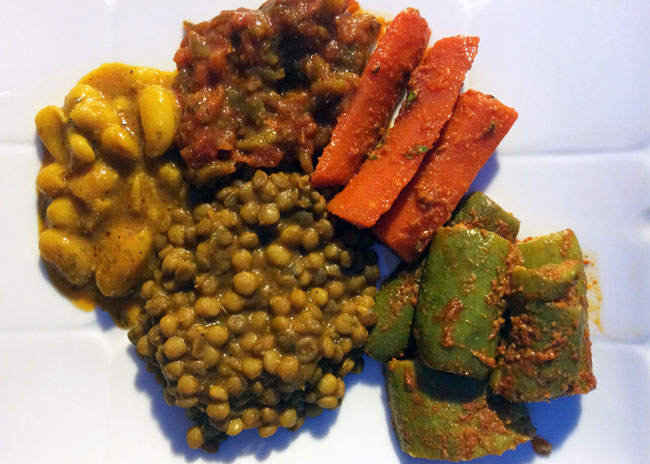
I’ll be working on some of them in the future.
Sometimes the cold starter plates are the best part of the meal. Just enough to pique your hunger, they’re often addictive flavor-bombs. Spicy Korean kimchi, creamy Mexican guacamole, smoky Turkish baba ghanoush… and earthy, zesty Moroccan carrots.
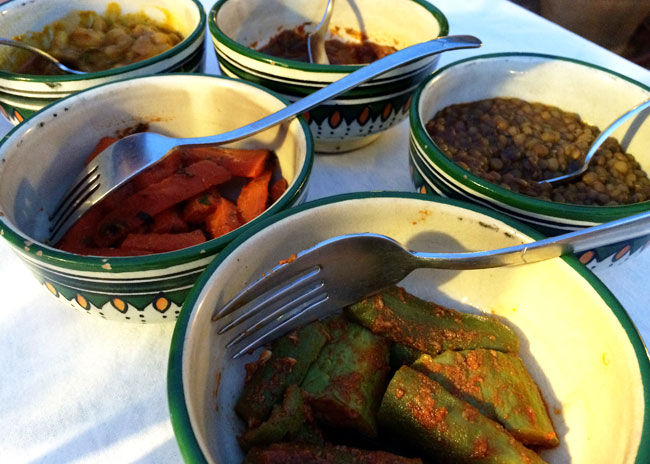
Even in the still heat of Morocco in August, it was hard to stop myself from gorging on tangy, spiced vegetables and stay level-headed about the tagine to come.
I’m still not sure mine will ever live up in my mind to the carrots we enjoyed on a Marrakesh rooftop on that hot summer’s night, but I don’t want them to. Traveling is about oversized memories of otherwise mundane moments.
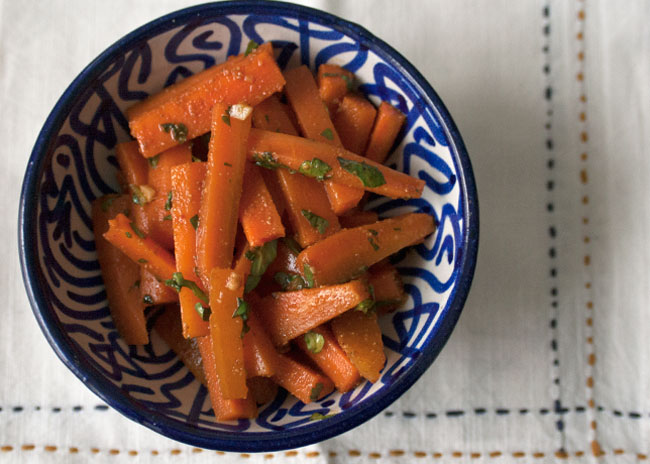
You don’t need a full on North African meal to enjoy your own Moroccan carrot salad – it’s a lovely side to have for lunch with a sandwich, or with a roast beast (or veggie beast) for dinner.
The carrots need at least a few hours to soak up all that spice and tang. It’s worth it to be rewarded with complexity that’s hard to find in a typical cooked carrot.
I compared a few different ways of making these, and steaming and boiling gave me the same results in texture and flavor, so I prefer to steam them to keep nutrients from being thrown away with the boiled water.
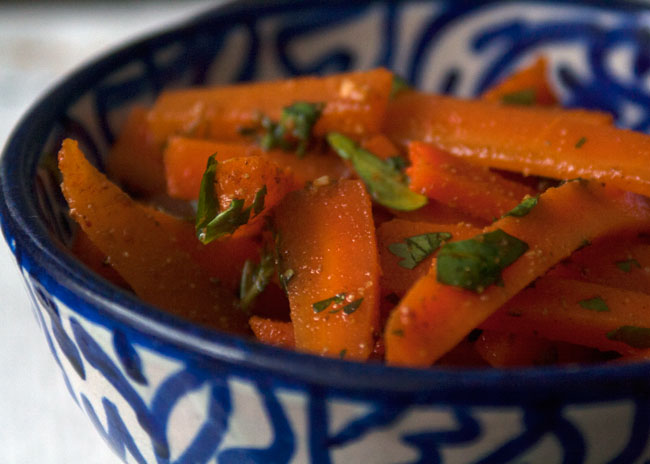
This recipe was adapted from one in a Moroccan cookbook that, unfortunately, I don’t know the name of. (But thanks to Mimouna for sharing it with me!)
Serves 4
10 minPrep Time
10 minCook Time
2 hr, 20 Total Time
On the Counter
- 500 g (~1 lb) carrots
- 1 tbsp lemon juice
- 1 tbsp cider vinegar
- 1 tbsp olive oil
- 1 tsp ground cumin
- 1 tsp sweet paprika
- 1 clove finely minced garlic
- fresh parsley, chopped finely
- 1/2 tsp milled or table salt
What to Do
- Lightly salt the carrots.
- Steam them for 5-7 minutes, until crispy-tender.
- Mix up a dressing with the olive oil, cumin, paprika, garlic, salt, lemon juice and vinegar
- Rinse the carrots under cold water, then shake them as dry as you can.
- Toss them with the dressing and fresh parsley.
- Let the carrots marinade in the refrigerator for at least an hour, but they will taste better if you can leave them in for longer. I actually prefer them even more the next day.
Cranachan (pronounced cran-ock – apparently). It’s a lightly creamy, slightly crunchy, sweetly tart Scottish dessert. It’s built for summer. The thing is – it’s definitely not summer, and it’s absolutely not raspberry season. But with Burns Night around the corner, I’m not letting that stop me. This is my Winterised Cranachan.

If you know what I mean by Burns Night, you’re welcome to just skip on down the post. It’s a celebration of the life and work of Scottish poet Robert Burns, whose birthday is on January 25. Dinner usually involves haggis, Scottish whisky, poetry and dessert (obviously).
A traditional cranachan combines fresh raspberries, whipped cream and toasted oats. For Burns Night, I’ve combined a few of my favorite Scottish things into a seasonally appropriate, rich and boozy version. It combines a whisky-spiked custard, macerated frozen raspberries and crumbled shortbread cookies into a winter cranachan fit for a chilly evening.

You don’t have to use whisky for the custard but … why wouldn’t you? My preference is Glenmorangie 10 year. Its floral, delicate flavor doesn’t overpower the creaminess of the custard or the tartness of the raspberries. Even though I love everything smoky, in this case I would steer clear of a peated whisky, as you risk the taste of barbecued dessert.
You can make everything in advance and construct it just before serving.
Note: I know a few people who can’t eat eggs (understandable) or hate custard (not understandable), so I’ve included a little note about a substitution if you fall into either of those categories.
Winter cranachan
Serves: 2-4, depending on how generous your portions are
Whisky-soaked raspberries
100 grams frozen raspberries
1 tsp honey (heather honey if you have it)
20 mL (just over 1 tbsp) Scottish (non-peated) whisky
Mix the raspberries, honey and whisky in a jar and let it sit in the refrigerator for at least an hour and up to 1 day. After the first 30 minutes, crush the raspberries down to ensure they’re all sitting in liquid.
Whisky custard*
2 egg yolks
30 g (2 tbsp) granulated sugar
1/2 tsp vanilla extract
120 mL double (heavy) cream
1 tsp Scottish (non-peated) whisky (optional)
Set a small, heavy bottomed sauce pan on to very low heat. Add the cream and vanilla, and heat it until bubbles start to form or it starts to noticeably thicken. This will take a few minutes, but don’t walk away!
Meanwhile, in a medium sized bowl, whisk egg yolks and sugar together until smooth.
Once your cream is ready, take the pan off the heat. Very slowly pour a thin stream of warm cream into the egg, occasionally whisking, until about half the cream is incorporated into the egg.
Still off the heat, slowly pour the egg/cream mix back into the saucepan and whisk them together.
Put the pan back on the heat and keep whisking.
It’s ready when it coats the back of a spoon, but you can keep cooking for longer for a thicker custard. (It will thicken even more in the refrigerator.)
Off the heat, stir in the whisky and refrigerate until you’re ready to construct.
Construction
50 g shortbread cookies
Crush up the shortbread cookies until you have rough pieces. Don’t turn them into dust.
In dessert dishes or lowball drinking glasses, alternate layers of raspberries, custard and crushed shortbread. Save your bigger pieces of shortbread for the topping.
* Whisky whipped cream
120 mL double/heavy cream
2 tbsp caster (superfine) sugar
1 tsp Scottish whisky
1/4 tsp vanilla extract
Combine the cream, sugar, whisky and vanilla. Whisk by hand or use an electric mixer, until you get stiff peaks.
]]>I can’t promise these will fit into everyone’s New Year resolutions. If you’re planning to waste less food – yes. If you’re intending to read more books… probably not. Vegetarian/vegan for January? Trying to eat healthier? I got you. Want to donate more to charity? You’re probably better off here or here.
These are nachos, but not the kind you get at a baseball game, or from a pub with a loose definition of the term nachos. They can be as home-made (and as healthy) as you want them to be. You can buy most of the ingredients pre-made. You do what you gotta to enjoy your nachos.


Here’s what I do, and I’ll try to clue you in on where you can save time or keep from buying a load of ingredients.
Whenever we have burritos, there always seem to be tortillas leftover from a pack of 8. I hate wasting food, so I often freeze the remainders until they’re ready for future burritos, or turn them into baked tortilla chips. Sometimes it’s hard to keep them for long enough to turn them into nachos because they’re so addictive. You’ve been warned.

Note for vegan eaters: If you can get your hands on a smooth cashew spread, it’s a delicious cheese alternative. And this is coming from an avowed cheese addict! Just dollop some on top of your nachos, or use it on the side as a dip. I first tried Gozo, a great option for those local to London.
New Year’s Resolution Nachos
Serves: 2 as a main, 4 as a snack
baked tortilla chips (see below)
200 g refried beans
5 or 6 pickled jalapenos, chopped (optional)
50 mL (1.5 oz) sour cream (optional)
guacamole or…
2 avocados, peeled, seed removed and chopped
the juice of 1/4 lime
pinch of salt
jarred salsa or… homemade pico de gallo
10 cherry tomatoes, diced
1 shallot or 1/4 medium red onion, diced
a small bunch of fresh cilantro (coriander) leaves, chopped
1 red chile pepper, chopped (leave the seeds in if you like it spicier)
the juice of 1/4 lime
pinch of salt
grated cheddar cheese or… cheese sauce
50 grams (1.7 oz) cheddar cheese, grated
2 tbsp milk
1 tbsp butter
1 tsp flour
What to Do
Mix the pico de gallo ingredients together and set aside. It’ll taste better if it’s had some time to sit.
Combine the avocado, lime juice and salt. Crush it up and set it aside.
Heat the refried beans, either in the microwave or on the stove top. I add a splash of water to loosen them up a bit. On the stove top, it should take about 5 minutes on low-medium heat.
In an oven-safe dish, spread your tortilla chips out so they’re in as few layers as possible. Top with hot refried beans, pico de gallo, cheese sauce and guacamole. (If you’re using grated cheese, top with beans, pico de gallo (or salsa) and sprinkle the cheese on top, then put them in the grill/broiler for a few minutes to melt the cheese.)
Top with japalenos and dollops of sour cream. Serve immediately.
Baked Tortilla Chips
4 10-inch (25.4 cm) whole wheat tortillas
2 tbsp olive oil
1/2 tsp salt
What to Do
Preheat the oven to 150C/300F.
Slice the tortillas into triangles, or as close as you can get to triangles. You can get about 10 chip-sized pieces per tortilla.
Put the pieces in a bowl and add oil and salt. Top the bowl with a plate or another bowl, hold tight and shake to coat the tortilla pieces.
Spread the tortilla pieces in one layer on a baking sheet (or a few, depending how big your sheets are).
Bake for 5 minutes, then check on them. If they’re not brown and crunchy yet, check on them every 2 minutes. They go from perfect to burned in no time.
]]>I haven’t had a lot of energy or creative cooking inspiration lately, for whatever reason. I can’t pin down exactly what it is, but I feel like time is slipping by and I can’t figure out where it’s going. Lately when it comes to cooking, I just to get it done and relax.
In that spirit, and because maybe you’re feeling the same, here’s my my cheaty cheesy sauce. The only caveat – you need to use an actually-flavorful goat cheese. (Step away from the cheap stuff.) Try to get some delicate tasting goat-milk cheeses that don’t have the “goatiness” of a French chevre. Mine is from the local Wobbly Bottom Farms, a new favorite. (Also… that name!)

Cheese is one of the greatest creations of all time. Truly. It’s up there with the internet, Mad Men and contactless credit cards. Did you know that one of the oldest cheeses ever found was from 2300 BCE? So while Stonehenge was being built in England, cheese was being eaten in Egypt.
Cheese is a marvel, I tell you.

Gnocchi with Cheaty Cheesy Sauce (and veggies)
Serves: 4
Total time: 30 mins including chopping and cooking
Note: This recipe is easy to halve, or even make for 1, and uncooked gnocchi is freezable
Cheaty Cheesy Sauce
120 mL (1/2 cup) creme fraiche or sour cream
50 g (2 oz) soft goat cheese
2 tbsp milk
1/4 tsp finely milled salt (or table salt)
Gnocchi with Spinach and Mushrooms
1 kg (2 lbs) gnocchi
60 g (2 cups) fresh spinach, chopped
75 g (about 1 cup) mushrooms, your choice, sliced
1 clove garlic, finely chopped
1 knob of butter (about 1 tbsp)
1/2 leek, halved lengthwise and thinly sliced
1 tbsp of fresh chopped parsley (optional)
In a wide, flat skillet or frying pan, melt the butter until it’s liquid and hot. If you sprinkle a bit of water on it, it should sizzle.
Throw in the leeks and sweat them over low heat until they soften, about 5 minutes. Make sure to stir them frequently so they don’t burn.
Add in the mushrooms and cook them until they release all their liquid. At that point, turn up the heat slightly and cook them for a few minutes longer.
Add in the garlic, stir it up and cook for another 30 seconds, until you can smell that lovely garlicy perfume.
Then toss in the spinach for another 30 seconds, until just wilted.
Take your veggies off the heat.
If you’ve made your own gnocchi – great work! If you haven’t, don’t worry, it still cooks the same way. In a pot of boiling salted water, cook your gnocchi until it floats, which usually takes about 2-3 minutes.
Drain the gnocchi, saving the water (for now), and add it back into the pot. Add in the veggies.
If you’re feeling super-cheaty, you can stir in the creme fraiche, then the milk, then the goat cheese, until it’s melted and incorporated. Stir carefully, not vigorously, or you’ll end up with mashed potatoes. If it feels a little dry, add a tablespoon at a time of the gnocchi water.
Otherwise, quickly combine all the cheaty cheesy sauce ingredients in a small bowl, stir them together and then in with the gnocchi and veg.
If you have parsley on hand, sprinkle it over each serving of gnocchi. And … you’re done!
]]>You may have noticed, if you’ve here, that I like food. I like writing about it, reading about it, taking photos of it and even eating it.
One of the basics when it comes to being passionate about all this is understanding where the things that become food come from.
On a blog where I try to focus on relatively easy recipes with accessible ingredients, I don’t want to start preaching to everyone about how they should eat. I’m also the kind of person who wants to be sure of what I’m saying before I go on acting like I’m an expert in anything, and advocating for things I don’t understand.
But I’ve thought about this a lot, and I’ve done my homework. (There are some great resources out there for understanding what this all means on a grand scale.) You can do good things by thinking about how sustainable it is to grow something. Whether that something is cherries or chickens, it really is worth it, for the sake of being able to keep producing food, and to have land and water that can support its own ecosystems, among many other reasons.
To me, sustainability means a few things. It means that I try to eat organically for the environmental impact, seasonally and locally for the small business impact (and for the environment…), and with animal welfare in mind for the animals (and, well, the environment for this one, too).
I’m not perfect, by any means. I still really like avocados, even though they definitely don’t grow anywhere near England, and I don’t ask the people at the cheap-and-cheerful market stalls near my office where their meat comes from. But it doesn’t have to be all or nothing. There is nothing wrong with doing what you can afford, and thinking more carefully about what you consume and why.

Starting out
If you’re thinking about how you can #eatclean in the way it matters most, for sustainability and welfare, but not sure exactly where to begin – start small. The first food I made a serious commitment on was eggs. They’re affordable and versatile, and I learned quickly that moving up to higher welfare eggs wasn’t going to significantly change how much they cost, but makes a huge difference for the environment, the chickens, and the taste of my scrambled eggs.

Let’s travel together into the way-back machine, when I was first introduced to the happiest chickens I’ve ever met. Labor Day 2010, Catskills, NY. Handsome Brook Farms.
Our introduction came early. They crashed through the bushes and tried to follow us into the house, then joined us on walks through the fields. The hens of Handsome Brook spent time wherever they pleased; real ladies of leisure. With beautiful, glossy feathers and an active social life, I had truly never seen chickens who seemed so happy to be alive.

The chickens had run of the farm.
Then, we sampled the freshest eggs at breakfast, in French toast and on their own, and it was obvious how the freedom these chickens had to pick at insects, plants and whatever else they wanted to eat affected the quality of what showed up on our plates.
After that trip, I said no to battery cage eggs, and “free range” hens who have never seen the sun. It costs more but not a huge amount more, and I can just think about those chickens and understand why doing something, however small, is better than doing nothing.
So instead of skirting the issue, I am going to start addressing it in my posts. I can’t afford to make everything I eat the most local or sustainable, but when I can, I will. And if I can offer suggestions for people who want to do the same, then I will.
Eating sustainably
This is a luxurious and easy breakfast that showcases farm-fresh eggs, but still includes a guilty-ish pleasure ingredient, avocado. You can find organic, sustainable avocados, though it’s unlikely they’ll be local. This one came in our veg box from Riverford and was grown in Mexico.
Scrambled eggs with avocado and feta
Serves: 2
On the Counter
4 free-range organic eggs
4 tsp milk
1 avocado, sliced thinly, or into chunks
2 oz (55 g) feta cheese, crumbled
1/4 tsp (or a dash) of salt
1 tsp unsalted butter
2 slices of bread, your choice
You’ll need
wide/flat pan or skillet
whisk or fork
wooden spoon or rubber spatula
What to Do
Whisk the eggs, milk and salt together until well combined.
If you’re making toast, put the toast down now.
In a skillet, melt the butter over medium/low heat. Once it’s melted, swish it around the pan until it’s covered the bottom. Add in the egg mixture.
Immediately as it starts to set, push the eggs from the edge of the pan to the middle and keep doing so, making sure that you don’t get giant curds of egg. Once you don’t have any more liquid egg mixture, but they eggs are still a bit wet, you’re ready. It should only take 2-3 minutes until your eggs are finished.
Top the toast with avocado, then egg, then sprinkle on the feta cheese. Serve!
]]>I’ve been lucky to be exposed to Caribbean food through friends back home in the US (specifically amazing dishes from the Dominican Republic), and it reminds me of home when I get the chance to recreate some of it, and use the same flavors and ingredients.
While a lot of Caribbean food has meat, there are some amazing side dishes that don’t, and you can easily turn a humble side dish into the main star. This time, I’m going to share one of my favorite comforting rice dishes – it’s really easy, and you can bump up the complexity with just 5 extra minutes of time, by starting the coconut milk off with a few bonus flavors.

You might have already guessed from the photos and the title, but this not-so-mystery dish is Jamaican coconut rice with black beans. You could also make it with kidney beans or pigeon peas (the traditional Jamaican way) but I had black beans in the cupboard, and I really like them, so in they went.
With a few cupboard staples, you can pull this together about 20 minutes. It’s rich and savory, comforting and exotic, versatile and unmistakable. You can serve it alongside spicy baked chicken, or make it into a vegetarian meal with some spiced up sauteed peppers and onions, and maybe a salad, on the side.

Thanks to Grace Foods for providing the rich, silky coconut milk and the super flavorful and heavenly-smelling hot curry powder in a great basket of treats to celebrate Caribbean Food Week. I also used Grace black beans, but they just happened to be in my cupboard, because they have a great texture and are a great price. The recipe, and the feelings about what I’ve made and used, are entirely my own.
Serves: 4
Time: 5 minutes preparation, 20 minutes cooking
On the Counter
200 g (1 cup) dried white, long grain rice
1 400 mL (14 oz) can of Dunns River coconut milk
1 400 mL (14 oz) can of Dunns River black beans, drained and rinsed
1 large clove garlic, chopped finely
1/2 tbsp Dunns River Jamaican Hot Curry Powder
1 dried bay leaf
2 tsp coarsely ground salt (or kosher salt)
What to Do
Combine the coconut milk, garlic, hot curry powder and bay leaf in a medium sauce pan, and simmer it on very low heat for at least 5 minutes. It shouldn’t get anywhere near boiling.
Give the rice one quick rinse and drain, and then add it to the coconut milk. The rice should be 1/2 the volume of the coconut milk. Add in a little more water if you think it needs it. I use the can, so I can make sure to get all the coconut into the pot. Stir in the salt.
Cook the rice in the coconut milk, covered, on medium/low heat for between 10 and 12 minutes, testing it. You can stir it occasionally to make sure it doesn’t stick. When the liquid is mostly absorbed and the rice is still very slightly chewy, stir in the rinsed and drained black beans. Heat it all up for about 5 more minutes, until some of the black bean-ness incorporates with the rice, and everything is hot.
And that’s it! Spoon it onto the plate or into a big bowl for family-style sharing.
Join me in sharing the Caribbean Food Week fun on Twitter and Facebook.
]]> Save Recipe