On one of my visits back to the US, I walked into a bagel shop and bought cream cheese to take back to London. Yes, I’m serious. Scallion cream cheese, specifically. What you might call spring onion and Philadelphia if you’re not American (or Canadian?). It was a really good scallion cream cheese. And it was $5 for a small carton that I wasn’t even sure would survive an 8 hour flight.
Once I’d finished every last speck, the mourning process began. Wistful flight searches. Daydreams about when I could next get a creamy, oniony, freshly made smear onto my bagels. Then I started thinking big. What if I could make my own scallion cream cheese?
Something to rival those neighborhood bagel shops from back home.
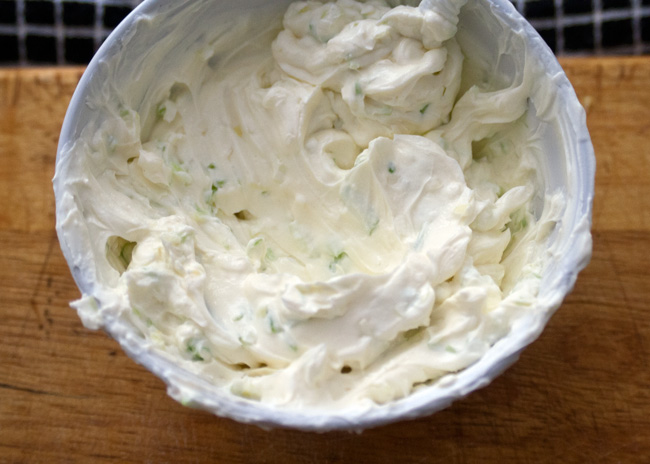
And so I set out to whip up a scallion cream cheese recipe for those of us who can’t get this wonder spread.
The fridge stable 8 month old pre-packaged stuff is not the same and I’m not going to pretend it is. Keep on keeping on if you love it, I don’t want to stomp on your flower garden. But really, this is so much better.
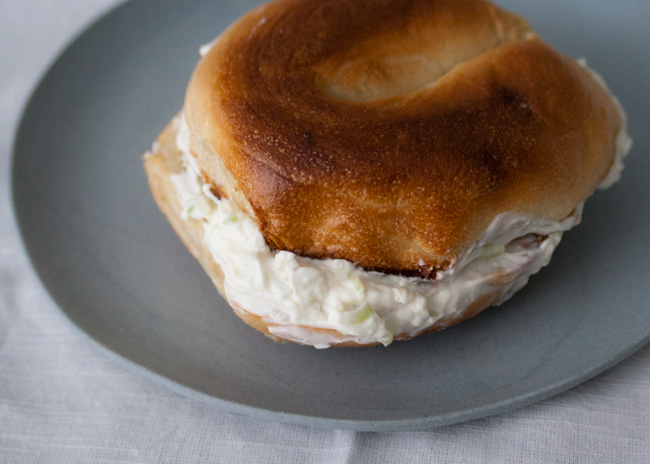
Put me, this scallion cream cheese and a few bagels in a room together, and I can guarantee there won’t be any left. But I know everyone isn’t like me, so I’ve come up with other easy ways to polish off your pot of scallion cream cheese.
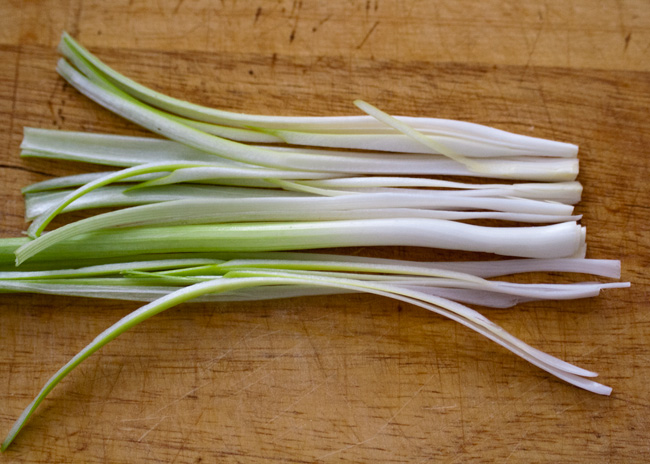
Quarter scallions lengthwise, then finely chop them. Combine with milk, salt and cream cheese and that’s it! If you have the patience, let it sit in the fridge for a few hours before digging in.
 Bonus: Rainbow bagel, because it was so ridiculous I just had to.
Ideas for using up your scallion cream cheese
Stir it into a quiche. Stir it into the eggy quiche mix, then layer it with your favorite quiche ingredients. Maybe spinach or ham, or whatever you have in the fridge.
Layer it into your 5-6-7 layer dip and break out the tortilla chips.
Stir it into vegetable pasta.
Option 1: Cook up some asparagus or tender stem broccoli (or both) in garlic, then add a squeeze of lemon juice and lemon zest. Stir the cream cheese into pasta, gently incorporate the green vegetables and top with grated parmesan.
Option 2: Pump up a super-easy lasagne-style pasta bowl.
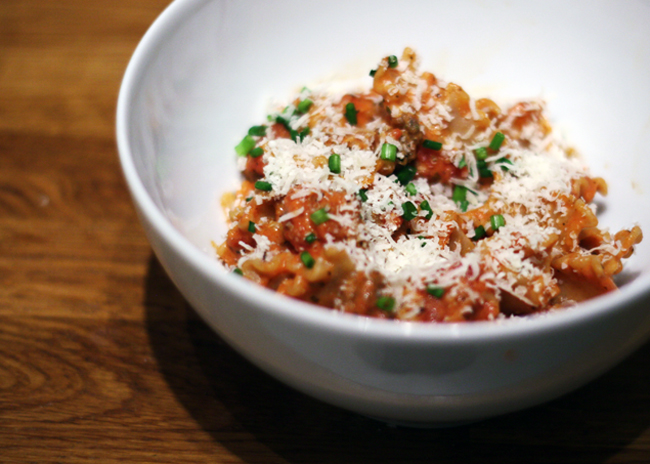
Pile it onto a baked potato, sweet or otherwise. Top with chopped bacon, pan fried mushrooms or just fresh herbs.

Stuff it into chiles, cover them in bread crumbs and bake for pepper poppers.

Serves 2 tbsp
5 minPrep Time
5 minCook Time
10 minTotal Time
On the Counter
- 180g (8 oz) container of cream cheese (I use Philadelphia)
- 2 scallions/spring onions
- 1 tsp milk
- 1/4 tsp salt
What to Do
- Quarter the spring onions, lengthwise. Slice them finely
- Scoop the cream cheese into a bowl, and add the milk. Break up the cream cheese then stir to combine and thin out the cheese.
- Add in the salt and spring onions, and stir until the spring onions are evenly distributed.
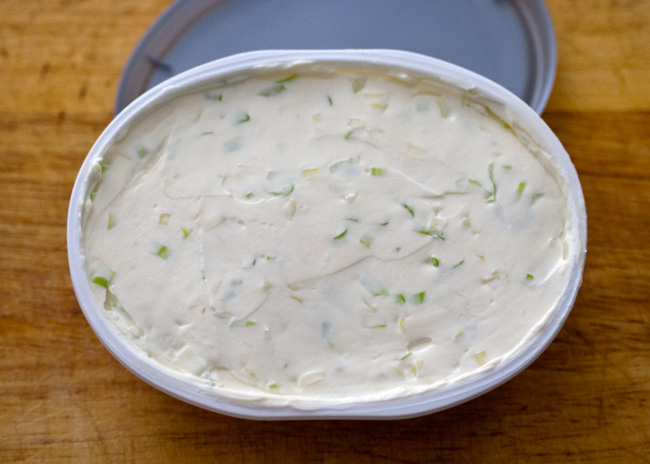
- Put the cream cheese back into its container and refrigerate.
- It's good right away but tastes a lot better if you let it chill for at least a few hours.
Happy greens season! It’s that time of year when all the foodie instagrams, newspaper articles and veg boxes are talking about the stinky green leaves of wild garlic (known in the US as ramps).
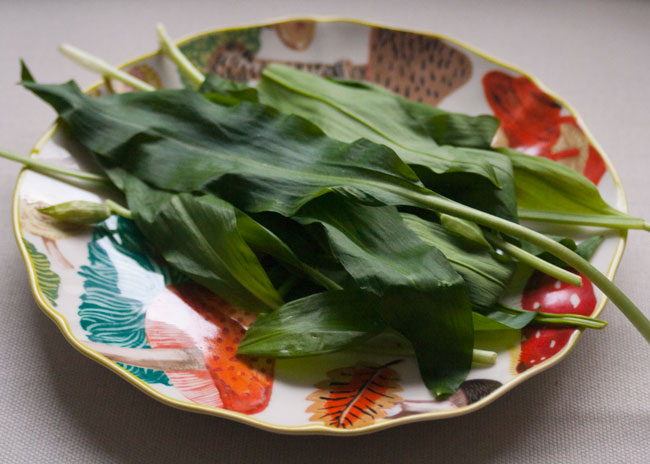
The cynic in me notices the apparent trendiness and members-club-feel of foraged greens. My more charitable side wants to justify the excitement.
These are the first edible, native plants that we are seeing and it’s easy to get over-enthusiastic. It’s been a long winter of potatoes, carrots and Chilean vegetables that have traveled further than I ever have. (Future post: are your veggies better traveled than you?)
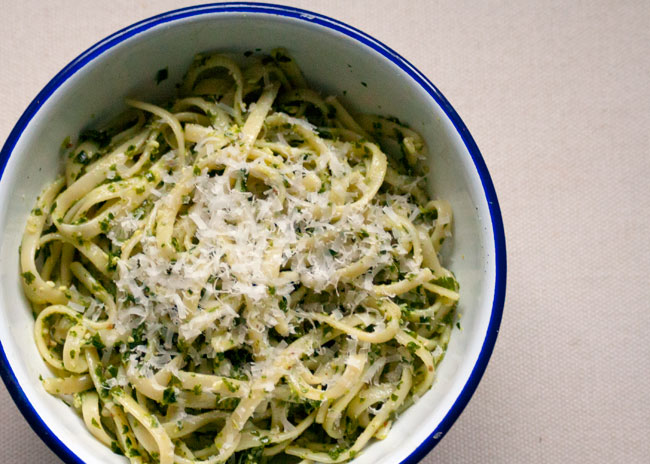
I’m going choose to be excited – and run with it. This is a recipe for wild garlic pesto made entirely with British produce. From the hard cheese to the oil… everything in it can be grown, harvested or produced within the UK.
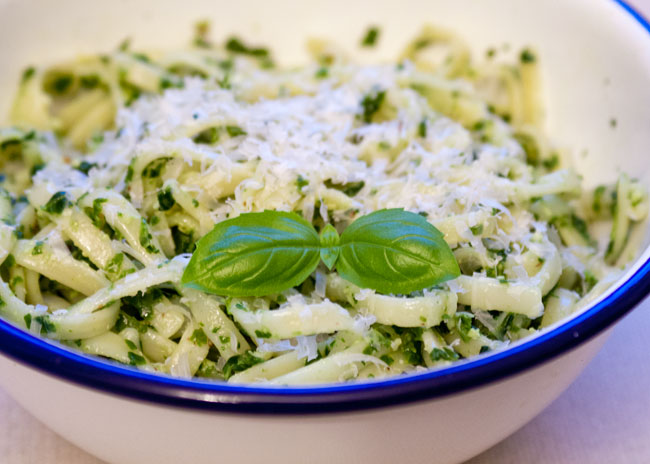
I was directed to a hard sheep’s cheese at Androuet in Spitalfields, London. I think it’s even tastier than Parmesan(!). Instead of citrus I use cider vinegar, and I lightened the garlickiness with steamed kale.
A big inspiration for this whole recipe came from a recent event where a professor of food policy insisted Britain should grow more nuts. I went for hazelnuts – unfortunately of mixed origins.
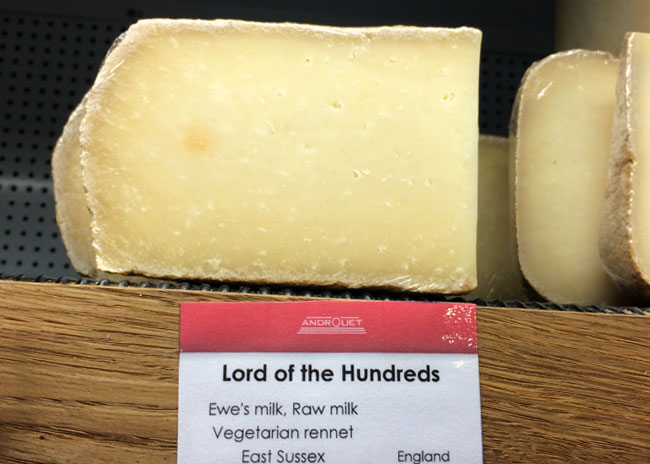
As with any pesto, you can swirl it into pasta, mix it into cream cheese and make a dip, add it to mashed potatoes or toss some roasted vegetables in it. Or just eat wild garlic pesto straight out of the bowl. Your choice.
I have never tried to make this with US produce, but with it being the largest exporter of walnuts in the world, and the existence of the California olive oil industry – I’m sure it’s can be done. If you are in the US and take on the challenge… please let me know!
On the Counter
- 50 g kale, after being stripped from stems
- 30 g wild garlic
- 15 g hazelnuts
- 10 g hard sheep's cheese
- 2.5 tbsp cold-pressed rapeseed oil
- 1 tbsp cider vinegar
- 1/2 tsp salt, and more to taste (Cornish sea salt if you want to go all out)
What to Do
- Steam the kale for 5 minutes
- Roughly chop the hazelnuts.
- In a food processor, or mortar and pestle, break up the hazelnuts even more, then add kale and wild garlic in bunches, pulsing between.
- Add in the oil, vinegar and salt.
- The last step is to add in the cheese.
- If you're freezing the pesto, convention says you should freeze it without the cheese and just add it when you serve it. I freeze it with cheese and haven't noticed a change in quality.
- Break the cheese into small pieces (or pre-grate it), and add it to the food processor/mortar.
I don’t know how you feel about French onion soup.
Honestly, sometimes I don’t know how *I* feel about French onion soup. It can be delicious. Warming, rich, sweet and savory all at once. Sometimes it’s hugely disappointing. Flat, overly sweet, only passable because of the cheesy bread on top.
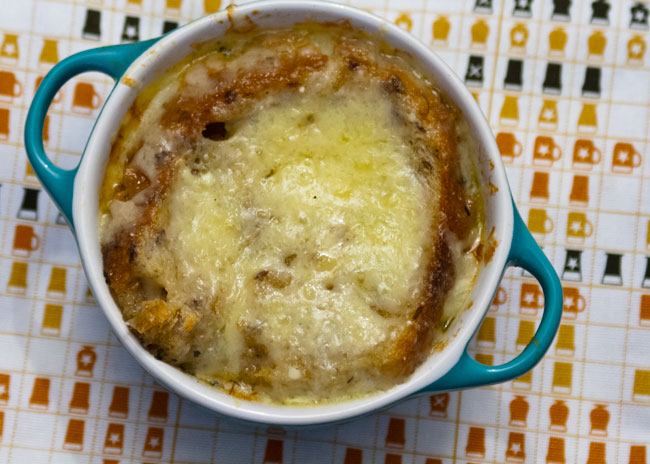
Generally speaking, the ingredients are pretty cheap. Onions, stock made from leftover bones. A few herbs or spices. So maybe it’s a lack of love, or an over-reliance on bad ingredients that has made so many French onion soups lackluster.
It’s easy to understand why you wouldn’t bother making it at home. It takes an age to caramelize onions, and there’s no point in making it with beef stock if it’s not real stock. (No cubes… seriously.)
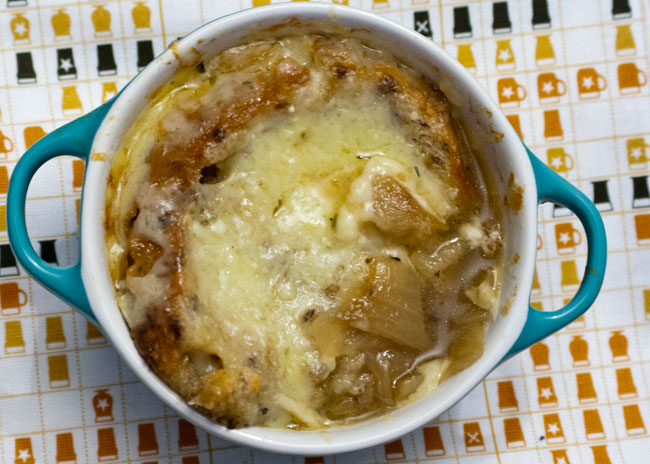
But I’m going to turn it all upside down. I offer you my totally-not-traditional French onion soup made with chicken (!) stock and roasted (!!) onions. (If you don’t believe me on the chicken stock, what about Serious Eats?)
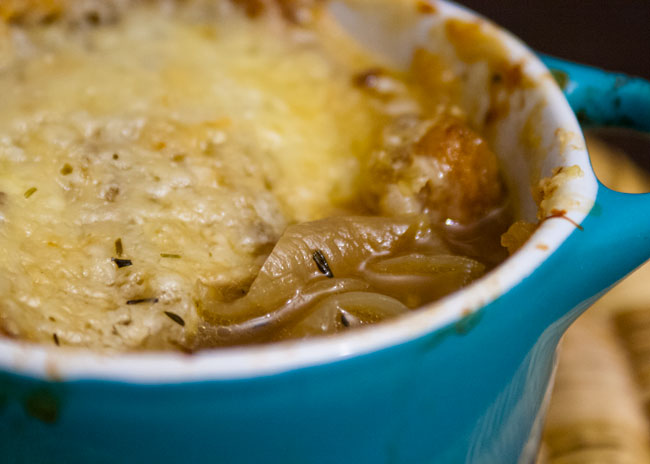
After comparing the taste of lovingly (read: impatiently) caramelized onions versus casually roasted onions, I can tell you there are differences. But they’re not deal-breakers, especially if you would rather make a soup without staring at onions cooking for an hour. The roasting takes the same amount of time, but it’s hands off. You could even boil a quick chicken stock while you wait.
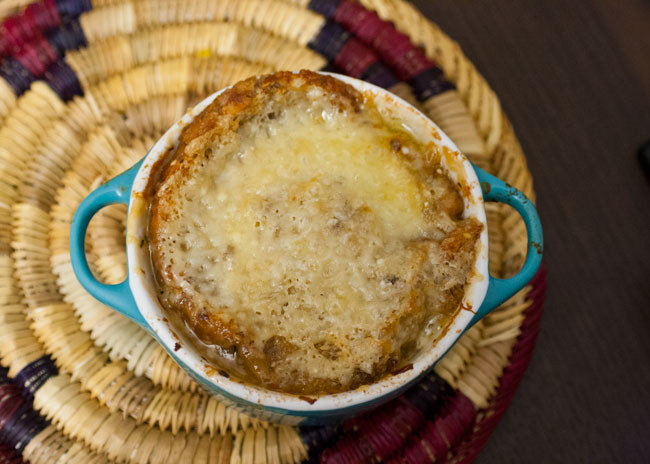
So while this cold weather hangs around at the party for too long, why not make yourself a steamy pot of cheaty French onion soup, and think about all that effort you didn’t spend on it?
4 portions
On the Counter
- 900 g onion
- 1.5 L (6 cups) chicken stock, preferably homemade
- 1 tbsp olive oil (separated)
- 1 tbsp butter
- 1 tsp Worcestershire sauce
- 100mL dry (NOT sweet) vermouth (You can substitute this with 3x as much dry white wine)
- 1 tsp dried thyme
- 2 bay leaves
- 1 teaspoon salt
- 1/2 teaspoon freshly ground black pepper
- 1 slice of crusty baguette or sourdough bread per person
- 25g (1 oz) of freshly grated gruyere cheese per person
What to Do
- Remove the outer layer of onion skin from each onion, keeping just the inner layer of papery skin. Cut off the pointy top of the onions so that just a small amount of onion is visible. Keep the root side on.
- Place the onions in a baking sheet, cut side up. Drizzle each onion with a total of 1 tbsp olive oil and top with a small knob of butter.
- Roast for an hour at 150C (300F)
- Let the onions cool slightly, then peel and slice them from pole to pole into thin strips.
- In a large soup pot or Dutch oven, melt 1 teaspoon butter over medium heat.
- Fry the onions on medium heat for 5 minutes, stirring constantly.
- Add wine/vermouth. Raise the heat to high, and let it bubble away until almost all the liquid has evaporated. This should take 5 or 10 minutes (depending if you used vermouth or wine), but keep an eye on it.
- Add the chicken stock, thyme, bay leaves and Worcestershire sauce. Give it a good stir.
- Bring it to a boil, then lower the heat so that the soup is just simmering. Cook uncovered, until some of the liquid has evaporated, about 30 minutes. Taste it to be sure it's as flavorful as you want. Stir in a pinch or two of salt if needed.
- PS: Don't forget to fish out the bay leaves.
- If you're using slightly stale bread, don't worry about the next step.
- Lightly toast the bread slices under the grill (broiler). Turn once to ensure both sides are just crisp.
- Ladle soup into your bowls.
- If you have oven-safe soup bowls or big ramekins, put the bread slices on top and generously sprinkle the cheese on top. Carefully transfer the bowls to a rimmed baking sheet and put it all under the grill.
- Melt the cheese until it's bubbly and lightly golden.
- If you don't have oven safe bowls, sprinkle the cheese on top of your toast slices, and put them back under the grill (broiler) until bubbly and lightly golden. Transfer them on top of the soup bowls.
]]>
I can’t promise these will fit into everyone’s New Year resolutions. If you’re planning to waste less food – yes. If you’re intending to read more books… probably not. Vegetarian/vegan for January? Trying to eat healthier? I got you. Want to donate more to charity? You’re probably better off here or here.
These are nachos, but not the kind you get at a baseball game, or from a pub with a loose definition of the term nachos. They can be as home-made (and as healthy) as you want them to be. You can buy most of the ingredients pre-made. You do what you gotta to enjoy your nachos.


Here’s what I do, and I’ll try to clue you in on where you can save time or keep from buying a load of ingredients.
Whenever we have burritos, there always seem to be tortillas leftover from a pack of 8. I hate wasting food, so I often freeze the remainders until they’re ready for future burritos, or turn them into baked tortilla chips. Sometimes it’s hard to keep them for long enough to turn them into nachos because they’re so addictive. You’ve been warned.

Note for vegan eaters: If you can get your hands on a smooth cashew spread, it’s a delicious cheese alternative. And this is coming from an avowed cheese addict! Just dollop some on top of your nachos, or use it on the side as a dip. I first tried Gozo, a great option for those local to London.
New Year’s Resolution Nachos
Serves: 2 as a main, 4 as a snack
baked tortilla chips (see below)
200 g refried beans
5 or 6 pickled jalapenos, chopped (optional)
50 mL (1.5 oz) sour cream (optional)
guacamole or…
2 avocados, peeled, seed removed and chopped
the juice of 1/4 lime
pinch of salt
jarred salsa or… homemade pico de gallo
10 cherry tomatoes, diced
1 shallot or 1/4 medium red onion, diced
a small bunch of fresh cilantro (coriander) leaves, chopped
1 red chile pepper, chopped (leave the seeds in if you like it spicier)
the juice of 1/4 lime
pinch of salt
grated cheddar cheese or… cheese sauce
50 grams (1.7 oz) cheddar cheese, grated
2 tbsp milk
1 tbsp butter
1 tsp flour
What to Do
Mix the pico de gallo ingredients together and set aside. It’ll taste better if it’s had some time to sit.
Combine the avocado, lime juice and salt. Crush it up and set it aside.
Heat the refried beans, either in the microwave or on the stove top. I add a splash of water to loosen them up a bit. On the stove top, it should take about 5 minutes on low-medium heat.
In an oven-safe dish, spread your tortilla chips out so they’re in as few layers as possible. Top with hot refried beans, pico de gallo, cheese sauce and guacamole. (If you’re using grated cheese, top with beans, pico de gallo (or salsa) and sprinkle the cheese on top, then put them in the grill/broiler for a few minutes to melt the cheese.)
Top with japalenos and dollops of sour cream. Serve immediately.
Baked Tortilla Chips
4 10-inch (25.4 cm) whole wheat tortillas
2 tbsp olive oil
1/2 tsp salt
What to Do
Preheat the oven to 150C/300F.
Slice the tortillas into triangles, or as close as you can get to triangles. You can get about 10 chip-sized pieces per tortilla.
Put the pieces in a bowl and add oil and salt. Top the bowl with a plate or another bowl, hold tight and shake to coat the tortilla pieces.
Spread the tortilla pieces in one layer on a baking sheet (or a few, depending how big your sheets are).
Bake for 5 minutes, then check on them. If they’re not brown and crunchy yet, check on them every 2 minutes. They go from perfect to burned in no time.
]]>I haven’t had a lot of energy or creative cooking inspiration lately, for whatever reason. I can’t pin down exactly what it is, but I feel like time is slipping by and I can’t figure out where it’s going. Lately when it comes to cooking, I just to get it done and relax.
In that spirit, and because maybe you’re feeling the same, here’s my my cheaty cheesy sauce. The only caveat – you need to use an actually-flavorful goat cheese. (Step away from the cheap stuff.) Try to get some delicate tasting goat-milk cheeses that don’t have the “goatiness” of a French chevre. Mine is from the local Wobbly Bottom Farms, a new favorite. (Also… that name!)

Cheese is one of the greatest creations of all time. Truly. It’s up there with the internet, Mad Men and contactless credit cards. Did you know that one of the oldest cheeses ever found was from 2300 BCE? So while Stonehenge was being built in England, cheese was being eaten in Egypt.
Cheese is a marvel, I tell you.

Gnocchi with Cheaty Cheesy Sauce (and veggies)
Serves: 4
Total time: 30 mins including chopping and cooking
Note: This recipe is easy to halve, or even make for 1, and uncooked gnocchi is freezable
Cheaty Cheesy Sauce
120 mL (1/2 cup) creme fraiche or sour cream
50 g (2 oz) soft goat cheese
2 tbsp milk
1/4 tsp finely milled salt (or table salt)
Gnocchi with Spinach and Mushrooms
1 kg (2 lbs) gnocchi
60 g (2 cups) fresh spinach, chopped
75 g (about 1 cup) mushrooms, your choice, sliced
1 clove garlic, finely chopped
1 knob of butter (about 1 tbsp)
1/2 leek, halved lengthwise and thinly sliced
1 tbsp of fresh chopped parsley (optional)
In a wide, flat skillet or frying pan, melt the butter until it’s liquid and hot. If you sprinkle a bit of water on it, it should sizzle.
Throw in the leeks and sweat them over low heat until they soften, about 5 minutes. Make sure to stir them frequently so they don’t burn.
Add in the mushrooms and cook them until they release all their liquid. At that point, turn up the heat slightly and cook them for a few minutes longer.
Add in the garlic, stir it up and cook for another 30 seconds, until you can smell that lovely garlicy perfume.
Then toss in the spinach for another 30 seconds, until just wilted.
Take your veggies off the heat.
If you’ve made your own gnocchi – great work! If you haven’t, don’t worry, it still cooks the same way. In a pot of boiling salted water, cook your gnocchi until it floats, which usually takes about 2-3 minutes.
Drain the gnocchi, saving the water (for now), and add it back into the pot. Add in the veggies.
If you’re feeling super-cheaty, you can stir in the creme fraiche, then the milk, then the goat cheese, until it’s melted and incorporated. Stir carefully, not vigorously, or you’ll end up with mashed potatoes. If it feels a little dry, add a tablespoon at a time of the gnocchi water.
Otherwise, quickly combine all the cheaty cheesy sauce ingredients in a small bowl, stir them together and then in with the gnocchi and veg.
If you have parsley on hand, sprinkle it over each serving of gnocchi. And … you’re done!
]]>You may have noticed, if you’ve here, that I like food. I like writing about it, reading about it, taking photos of it and even eating it.
One of the basics when it comes to being passionate about all this is understanding where the things that become food come from.
On a blog where I try to focus on relatively easy recipes with accessible ingredients, I don’t want to start preaching to everyone about how they should eat. I’m also the kind of person who wants to be sure of what I’m saying before I go on acting like I’m an expert in anything, and advocating for things I don’t understand.
But I’ve thought about this a lot, and I’ve done my homework. (There are some great resources out there for understanding what this all means on a grand scale.) You can do good things by thinking about how sustainable it is to grow something. Whether that something is cherries or chickens, it really is worth it, for the sake of being able to keep producing food, and to have land and water that can support its own ecosystems, among many other reasons.
To me, sustainability means a few things. It means that I try to eat organically for the environmental impact, seasonally and locally for the small business impact (and for the environment…), and with animal welfare in mind for the animals (and, well, the environment for this one, too).
I’m not perfect, by any means. I still really like avocados, even though they definitely don’t grow anywhere near England, and I don’t ask the people at the cheap-and-cheerful market stalls near my office where their meat comes from. But it doesn’t have to be all or nothing. There is nothing wrong with doing what you can afford, and thinking more carefully about what you consume and why.

Starting out
If you’re thinking about how you can #eatclean in the way it matters most, for sustainability and welfare, but not sure exactly where to begin – start small. The first food I made a serious commitment on was eggs. They’re affordable and versatile, and I learned quickly that moving up to higher welfare eggs wasn’t going to significantly change how much they cost, but makes a huge difference for the environment, the chickens, and the taste of my scrambled eggs.

Let’s travel together into the way-back machine, when I was first introduced to the happiest chickens I’ve ever met. Labor Day 2010, Catskills, NY. Handsome Brook Farms.
Our introduction came early. They crashed through the bushes and tried to follow us into the house, then joined us on walks through the fields. The hens of Handsome Brook spent time wherever they pleased; real ladies of leisure. With beautiful, glossy feathers and an active social life, I had truly never seen chickens who seemed so happy to be alive.

The chickens had run of the farm.
Then, we sampled the freshest eggs at breakfast, in French toast and on their own, and it was obvious how the freedom these chickens had to pick at insects, plants and whatever else they wanted to eat affected the quality of what showed up on our plates.
After that trip, I said no to battery cage eggs, and “free range” hens who have never seen the sun. It costs more but not a huge amount more, and I can just think about those chickens and understand why doing something, however small, is better than doing nothing.
So instead of skirting the issue, I am going to start addressing it in my posts. I can’t afford to make everything I eat the most local or sustainable, but when I can, I will. And if I can offer suggestions for people who want to do the same, then I will.
Eating sustainably
This is a luxurious and easy breakfast that showcases farm-fresh eggs, but still includes a guilty-ish pleasure ingredient, avocado. You can find organic, sustainable avocados, though it’s unlikely they’ll be local. This one came in our veg box from Riverford and was grown in Mexico.
Scrambled eggs with avocado and feta
Serves: 2
On the Counter
4 free-range organic eggs
4 tsp milk
1 avocado, sliced thinly, or into chunks
2 oz (55 g) feta cheese, crumbled
1/4 tsp (or a dash) of salt
1 tsp unsalted butter
2 slices of bread, your choice
You’ll need
wide/flat pan or skillet
whisk or fork
wooden spoon or rubber spatula
What to Do
Whisk the eggs, milk and salt together until well combined.
If you’re making toast, put the toast down now.
In a skillet, melt the butter over medium/low heat. Once it’s melted, swish it around the pan until it’s covered the bottom. Add in the egg mixture.
Immediately as it starts to set, push the eggs from the edge of the pan to the middle and keep doing so, making sure that you don’t get giant curds of egg. Once you don’t have any more liquid egg mixture, but they eggs are still a bit wet, you’re ready. It should only take 2-3 minutes until your eggs are finished.
Top the toast with avocado, then egg, then sprinkle on the feta cheese. Serve!
]]>A few bank holidays ago, (May 2, 2015, to be precise) the gent and I visited the Melton Mowbray Artisan Cheese Fair, with no idea what to expect. The things we knew were: it was on for 2 days, it was in May, and there would be cheese. How much of it, and how good it would be we decided to take a chance on.
Spoiler alert.
There was a lot of cheese, and it was very good. And there was gin. It was also very good.

Welcome to Melton Mowbray
First, a little about Melton Mowbray. It’s a small town that’s known for two very big foods in Britain, though if you’re reading this from Britain, you probably already knew that.
I have to confess that I’m not a big pork pie fan, generally… I’d never been convinced that they were worth eating. The examples I’ve had were always too fatty, with really dense, lardy crust and cold pork in the middle. Honestly, even the best pork pie is probably not going to convince me that any of those things aren’t true. However, when in Melton Mowbray… We split a stilton pork pie, and the sharp earthiness of blue cheese really helped balance the fattiness and richness of the pork/pastry combination.

The fair itself was interesting and busy, but not too over-crowded. It only cost £2 to enter, which is apparently twice the price of previous years, but well worth it.
The weather the day we visited was pretty terrible, so that might have scared a few people away. There is a lot of jostling and pushing forward for samples, which can be a bit trying when you want to sample something, talk to the producer or take a photo, which is why some of my photos ended up being at pretty weird angles.
If you got the opportunity to speak to them, most of the producers were friendly and keen to talk about their wares. Most of the people there really were small (or fairly small) providers that you wouldn’t necessarily find in your local supermarket, so it was nice to get insight into the joys of cheese making, gin distilling and making cheese-making kits.
There were around 75 different stalls across the cattle market and they included cider, bread, ice cream, wine, and cheese of course… there was no lack of great British products.

A soft, white unpasteurized cheese, and my favorite of the fair, from Chalke Valley Cheese.

Even after a train ride home, the Dorset White was perfect. Creamy, spreadable and so delicious.

Loosehanger had very dedicated cheesers manning their stall, and a lovely blue goat cheese.

Stichelton’s unpasteurized stilton definitely came home, too. Complex in flavor and so pretty to look at.
We ended up taking 6 cheeses home, and it took serious willpower to not buy more than that. There was the creamy Dorset White from Chalke Valley, a blue goat cheese called Nanny Williams from Loosehanger Cheese in Salisbury, a beautiful brie-styled cheese from Tunworth in Hampshire, a traditionally full flavored blue (yeah, there’s a theme) from Cote Hill in Lincolnshire, a deliciously strong, aged Red Leicester made by Leicestershire Handmade Cheese, and finally, a beautiful Stichelton, which is exactly a stilton, but made with unpasteurized milk.
There were also some very interesting talks on, most notably a history of Stilton cheese, from one of the UK’s big stilton producers. It was a great explanation of how the Midlands became a home base for many foods (as it was a natural stopping point for people traveling through the country), how much of an effect war rationing had on cheese production (immense) and what makes a stilton a stilton.

But I can’t wrap up this overview without talking about the two gin distilleries we tried, both of which were fantastic. Recently I’d had a bad run of picking gins without tasting them, but we were very confident about taking both of these home… after sampling them. Burleigh’s Gin has robust flavor and uses citrus and spices to great effect.

The second tried-and-loved distiller is called Da Mhile, from Wales. While there’s an interesting version with seaweed as a botanical, we stuck to the regular gin, which is made with mint. I was skeptical at first, but the mint isn’t overpowering at all, and adds an interesting fresh dimension to a g&t.

As a final note, it must be said that there was a great ukelele orchestra, playing hits from across the decades.

The Melstrum Ukulele Band got a lot out of their ukes.
if you find yourself with the opportunity to visit the Melton Mowbray Artisan Cheese Fair, I would recommend it, but only if you’re willing to wander around for a few hours, sampling cheese, alcohol and pies, and coming home loaded with goodies. You’ve been warned!
]]>I think, as time goes on, I’ve becoming more of a homebody. I love having people over, or visitings a friend’s place, for dinner and drinks, and spending time having great conversation around a home-cooked meal (or homemade cocktails) has become more appealing than it ever was before. It’s also a good excuse to have something you wouldn’t necessarily make on a regular basis, like, say … a big bowl of gooey mac and cheese loaded with chorizo.

Serve mac and cheese with garlicky greens to make it… slightly… less decadent.
When making mac & cheese with friends, the number one rule is to use as many utensils for mixing as there are people, so everyone can lick the spoon – and the host gets first dibs on the pan.
Thanks to fellow food blogger Amanda at My Jersey Kitchen for suggesting I write up this recipe!

A crunchy cheese topping is a must.
On the Counter
75 g/3 oz Spanish spicy chorizo, diced
1 tsp olive oil
100 g smoked Gouda
100 g mature cheddar
2 tsp smoked paprika
2 cloves garlic, minced
1/2 onion, chopped
1 green chili, diced [optional]
350 g/3/4
lb shell pasta (conchiglietti)
115 mL / 1/2 cup room temperature milk
2 tbsp flour
2 tbsp butter
dash of salt
a few grinds of white (or black) pepper
Equipment
whisk
bowl for mixing topping
spoon for stirring
spoon for tasting
saucepan big enough to cook pasta
buttered casserole dish, around 26 cm (10 in) long
What to Do
In the olive oil, sauté the onions until they’re just softening, then add the garlic, green chili and chorizo. You shouldn’t need any more oil, as the chorizo will give off plenty. Fry until the chorizo starts to darken, about 5 minutes.
Meanwhile, cook your pasta in heavily salted water, for about 3 minutes less than the package requests. Just before or at al dente is ideal. Once it’s cooked, rinse it with water and set aside. Give the pot a quick rinse.
Set the chorizo aside, and start your cheese sauce.
Heat the butter in your pasta pot until it’s melted and bubbly, add flour bit by bit and whisk together until you get doughy strings. It should take less than a minute.
Off the heat, slowly add in the room temperature milk. Put it back on very low heat (nearly as low as you can get it) and keep whisking until the bechamel (white sauce) thickens. You will notice a difference in the texture, and it should take about 3 or 4 minutes of whisking.
Preheat your oven to 180 C/350 F.
At that point, slowly pour the cheese into the white sauce, and keep stirring until all the cheese is melted. At this point, if you need a little more milk, adding it should not be a problem.
Add in the paprika, the garlic/chorizo/onion/chili, and some salt and pepper. Stir to combine, and then add the pasta in, mixing thoroughly to coat.
Spoon the cheesy macaroni into a buttered casserole dish, and smooth it flat. Top with cheesy panko topping. (below)
Bake for 25 minutes. Then, move to the broil/grill for 5 minutes to toast the topping.
Cheesy Panko Topping
1/2 cup (30 g) Panko bread crumbs
1 tsp smoked paprika
1/4 tsp salt
1/2 cup (50 g) grated cheddar and Gouda
Stir to combine.
PS: Check out My Kitchen Counter on instagram, where you can get a preview of things that will show up on the blog, plus a few other things that don’t quite make the recipe list.
]]>
With summer winding down, it’s the right time to enjoy the last of the warm-weather barbecues, picnics and salads-as-main-dishes before the season of pumpkins, blustery walks and wooly sweaters comes in. I think pearl couscous salad is a fitting farewell to summer.
I’m sure it helps that pearl couscous is one of my new favorite things to eat. I can’t get enough! It takes no time at all (well, ok, maybe a few minutes) and it’s just perfect for a light lunch or as a side for a barbecue. Protip: Try it with lamb.
I have no idea what made me want it so intensely, I saw a recipe online and I decided that I absolutely had to have it … and I just keep going back for more bags of it. Giant/pearl/Israeli couscous is surprisingly different from regular couscous, even if it’s made from the same stuff, semolina flour. The chewy, springy texture makes a big difference, and it holds its own with other ingredients.
In the UK, you can find it at Waitrose and Tesco – probably the other shops too, but I haven’t tried. I’ve been getting my 500 g bags from Tesco at £0.89 each… not a bad investment for what ends up being quite a bit of couscous. Those suckers really grow in size.
There are so many different things you can pair with this big, chunky couscous, but I’ve decided to show you what I’ve been doing with it lately.
I think Greek/Mediterranean flavors work really well in the summer – even when I’m stuck inside a flat in the middle of London, I can imagine sitting by the beach with a big plate of couscous, cucumber and feta. (Everyone daydreams about that… right?) Since I’m not sure a warm, sunny holiday is in the cards this year, I think I’m just going to have to keep on indulging in chewy couscous and summery ingredients.

On the Counter
Serves: 4
200g (8 oz) pearl couscous
1/2 tbsp. extra virgin olive oil + 2 tbsp reserved
200mL (1 cup) water
1/2 medium red onion, diced
1 small cucumber (or 1/2 English cucumber) diced
1 roasted red pepper
50g (2oz) feta cheese
10 Greek olives, pitted and chopped
3 sprigs fresh parsley (or coriander/cilantro), chopped
2 tbsp. fresh lemon juice
salt
pepper
Other ingredients I’ve used:
baby spinach
bok choy
cherry tomatoes
super-crispy bacon
diced chorizo
What to Do
Heat the 1/2 tbsp. olive oil in a saucepan until shimmering. Add in the couscous, and stir frequently until it starts smelling nutty and turning slightly brown, about 2-3 minutes. (If you don’t stir frequently it will burn, so be careful!)
Add water, bring to a boil.Cook for about 6 minutes, or until the couscous is still chewy, but not hard in the center.
Meanwhile, combine the onion, cucumber, herbs, feta, olives, lemon juice, remaining olive oil, salt and pepper and set aside.
Once the couscous is cooked, wash thoroughly with cold water.
Toss the couscous and the rest of the ingredients together, and add salt, pepper and lemon juice to taste.
And – that’s it!
Pearl couscous salad handles itself very well in the fridge, and makes for good leftovers. For the last barbecue of the season or a breezy picnic in the park, you can easily make it a day ahead.


]]>

Spring is in the air, and it’s finally time for local asparagus again! As a kid, I didn’t get asparagus. I didn’t like the taste and I thought it looked weird. Just not interested, thanks. I was a really picky eater as a kid though – my mom still calls me out on the things I wouldn’t even sample that I now can’t get enough of. As an adult, though, I can’t really think of any other vegetables that make me excited about spring. And now I’m the kind of person who gets excited about vegetables, come to think of it. How times change.
It is worth remembering that sometimes kids with the least adventurous appetite can grow up to like asparagus, sweet potatoes and even spinach. There’s hope for the future of picky young people.

Back to the asparagus. Now that it’s finally asparagus season, I’m going to be eating as much of it as possible. I think the easiest ways are the best ways, and this is a pretty easy way to enjoy asparagus. It’s not as straightforward as cooking everything and plopping it on a plate, but it’s pretty close.
If you like asparagus even half as much as I do, this recipe will make you happy.
Tagliatelle with Asparagus, Pine Nuts and Lemon
On the Counter
Serves: 2
5 oz., (150 g) tagliatelle (broken in half)
6 asparagus stalks (3 per serving)
1 tsp lemon zest (about one lemon’s worth)
1/4 cup finely grated Parmesan (or Grana Padano for veggies) cheese
2 cloves garlic, minced
3 tbsp olive oil
1/2 tsp chili/red pepper flakes
pine nuts
lemon wedge
What to Do
Salt 1.5 liters of water and bring it to the boil in a tiered pot with a steamer. While the water is coming to a boil, snap off the tough ends of the asparagus (thanks to food guru Alton Brown for this tip) and cut the spears into 1 inch (2.5 cm) pieces.
Steam the asparagus for 5-7 minutes, depending on thickness.
Meanwhile, in a small skillet over low heat, toast the pine nuts. Put the pine nuts into the pan with no oil and agitate them frequently. It should take about 5 minutes for golden toasted nuts.
Once the nuts are finished, set them aside and heat the olive oil.
Set aside the steamed asparagus, steamer top and add the pasta into the boiling water.
Into shimmering olive oil, add minced garlic and cook for about 1 minute, until fragrant. Add chilli flakes and asparagus and toss to coat in the oil. After a few minutes, add 3 tablespoons of pasta water to the asparagus. Add in the pine nuts and lemon zest, and coat.
Drain the pasta when it’s al dente (cooked for about 6-7 minutes) and add to asparagus and oil. Top with cheese and combine until thoroughly coated.
]]>
 Save Recipe

