Do you like granola? I like granola. But I hate paying £4 for a box with 3 pieces of walnut and one cranberry. If you’re with me, join me by making your own! And might I suggest you give my granola recipe a try…
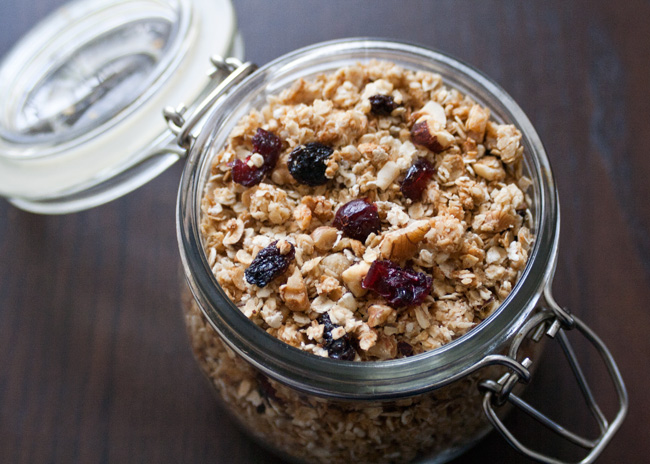
It’s really easy to scale your granola making up or down. You can also create your very own granola blend. Once you have the proportions down, anything is possible. Mine is lightly sweetened, but you can amp it up to your taste. More sweetener will also give you bigger clusters. For a vegan version, sub in maple syrup – but use less, as maple syrup tends to taste sweeter.
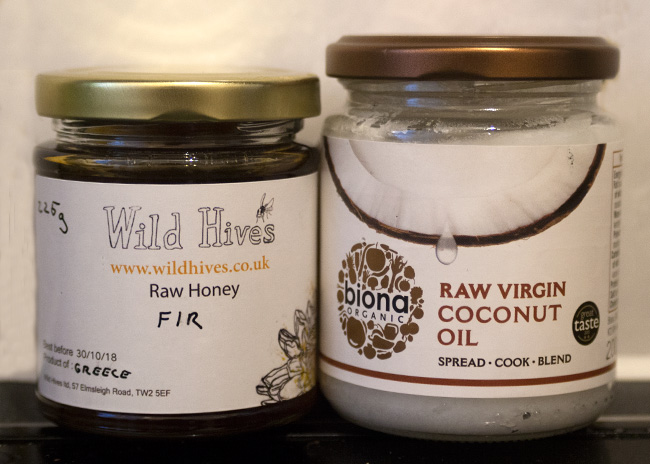
You can use different kinds of nuts, too. I’ve made it with hazelnuts and pecans, Brazil nuts and walnuts, and have even gone as far as a three-nut combo. Crazy, I know.
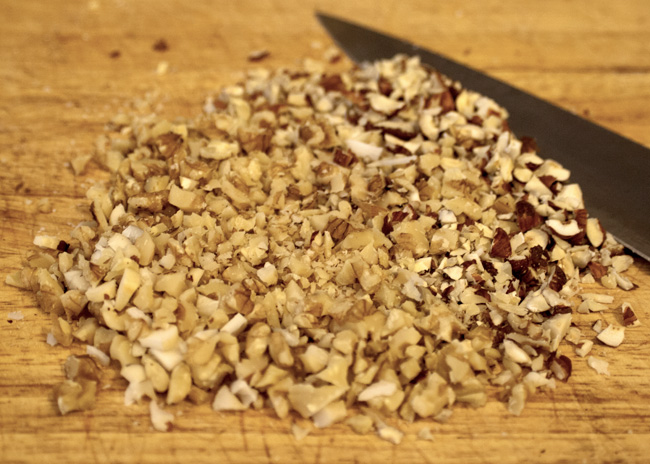
Add in your own flavorings – a sprinkle of cinnamon or a few drops of vanilla go a long way. Get creative with your crunchy granola self!
Once you have a vat of toasted granola, you might wonder what to do with it besides shoving it straight into your mouth.
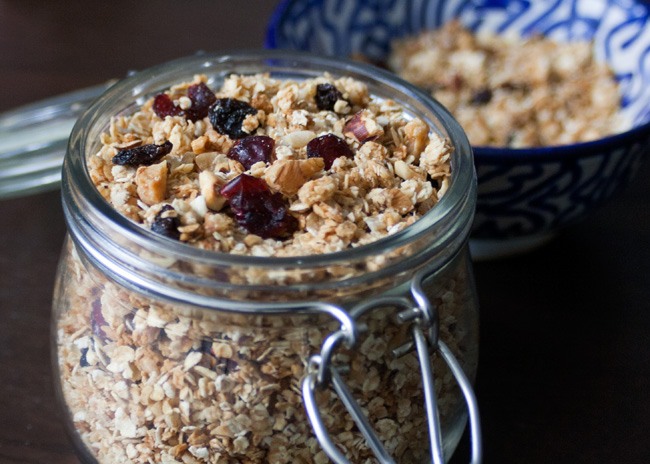
Sprinkle that sweet, nutty, homemade granola on top of plain (full fat obviously) Greek yogurt with jam. Sometimes I go off the deep end into DIY territory, but hear me out. You can turn that yogurt into any flavor you want it to be. Strawberry, apricot, blackberry bourbon… just try telling me dyed-pink yogurt sounds better.
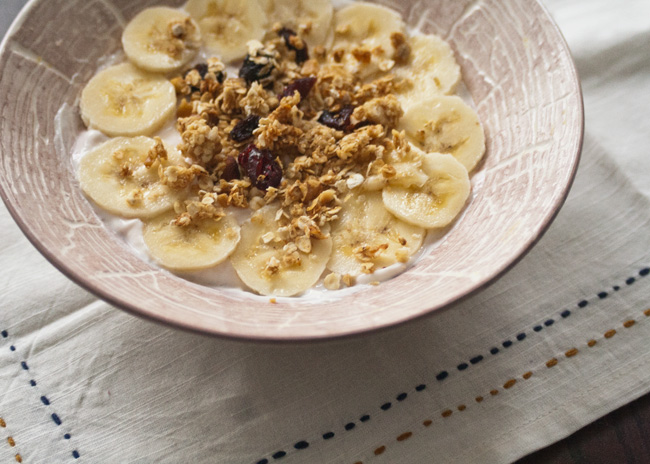
Pour some milk on it, cow or otherwise. Sprinkle it onto ice cream. Put it on a fruit crumble. Tweak your cranachan. (If you have any other suggestions, I’d be happy to try them.)
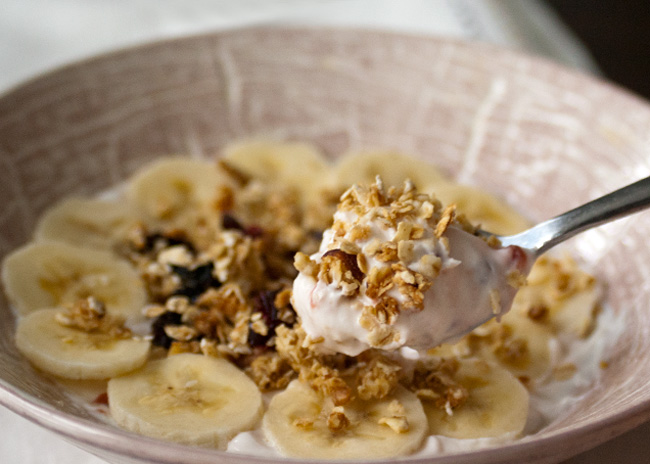
Feel like everything is out of your control? Start small with granola. Then take that slow-release energy out there and tackle the world.
On the Counter
- 200 g oats
- 75 g nuts
- 1 tbsp honey
- 1.5 tbsp coconut oil
- 75 g dried fruit
What to Do
- Optional first step: Sieve the oat dust from your oats.
- Preheat the oven to 160C/gas mark 3/325F.
- Combine the coconut oil and honey. On very low heat, melt them until the mix is thin and runny. This is especially handy if it's cool in your kitchen or your honey is crystallized. Stir to combine.
- Chop the nuts into pieces about the same size (or slightly larger than) an oat.
- In a large bowl, combine the oats and nuts.
- Drizzle the oil and honey on top, stirring the oat mix as you go. Stir until evenly coated. Dig deep!
- Spread the mix evenly onto two baking sheets.
- Bake for 10 minutes.
- Gently mix in the dried fruit and bake for another 10-15 minutes. Don't let it go further than lightly golden brown.
- Cool before storing.
- Mix your granola into yogurt, on top of ice cream, or enjoy it as a cereal with milk.
It has been a busy summer, and I wish I had more time to blog, or truthfully, to actually finish one of the 10 half-posts that have been hanging around. This is my attempt at getting back on the blogging wagon. Recently, I had a request for some gluten-free, meat-free recipes. I immediately thought of this post, patiently waiting in my drafts section. Three (or has it been four?) weeks later, here it is. Spiced up roasted cauliflower and zucchini with tahini dressing. And it’s vegan!
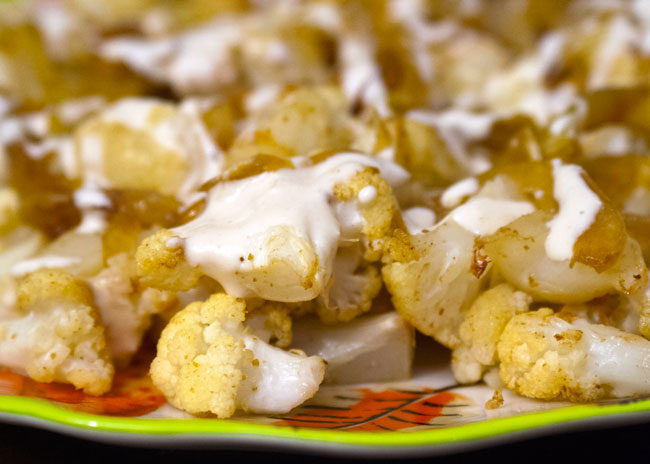
Plant-based foods have a lot going for them. You’re unlikely to have to worry about them poisoning you if they’re undercooked. They’re easy for weeknight meals and generally forgiving of your cooking skills. On top of that, they don’t normally include parts that make you think “ew, I’m not going to eat that” (Here’s looking at you, brains.)
Instead you can eat veggies that look like brains without all the weird thoughts about neurological diseases (yum).
Cauliflower is pretty low on my list of choice vegetables. But sometimes life gives you cauliflower, and you have to accept the challenge. The best way to handle the hardship of cauliflower is to roast and top it with lots of other nice things.
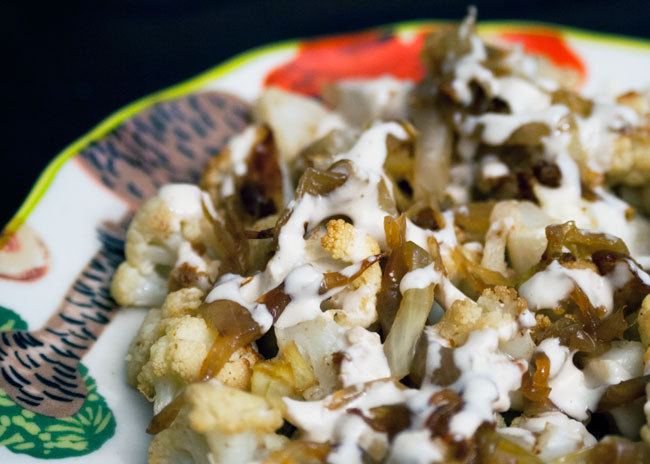 Like almost any veggie, some time in the oven with fat and spices makes everything better.
Add some sweet slow cooked onions and nutty, savory tahini dressing for a winner. I also like to add extra color in the form of courgettes (zucchini, whatever), because it’s (technically still) summer and there are too many of them anyway.
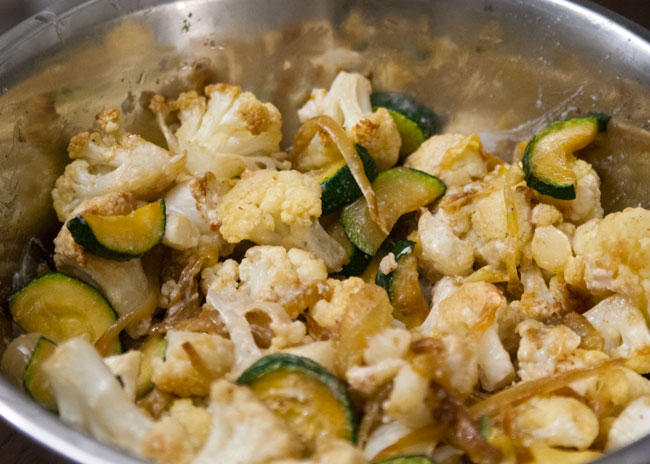
This recipe is adapted from This is a Cookbook: Recipes for Real Life, by Max and Eli Sussman, given to me by a very good friend back in the States.
Serves: 4
15 minPrep Time
30 minCook Time
45 minTotal Time
On the Counter
- 4 tbsp (90mL) olive oil (extra virgin if you have it) plus 1 tsp
- 2 medium onions, thinly sliced
- 1 cauliflower head (300g/10.5 oz), cut into 1 in (2.5 cm) pieces, including the stems
- 2 small, or supermarket sized in the UK, courgettes (zucchini)
- 2 tsp ground cumin
- 2 tsp paprika (sweet, hot, smoked - your choice)
- small handful of fresh flat leaf parsley, chopped (optional)
- 100 g (1/3 cup) tahini
- juice from 1/4 lemon
- 1 tsp cider vinegar
- 1 garlic clove, finely minced
- table salt to taste
What to Do
- Preheat the oven to 230C (450F).
- In a large bowl, toss the cauliflower pieces, courgette/zucchini, 1 tsp drizzle of oil, dash of salt, cumin and paprika together, until the vegetables are evenly coated.
- Heat 1 tbsp olive oil in a saute pan over medium heat, until it's just shimmering.
- Add in the onions.
- Lower the heat, stir in 1 tsp salt, and stir frequently.
- Keep the onions going over low heat until they're soft and sweet, at least 20 minutes. If you want to fully caramelize them, it will be around 45 minutes.
- Meanwhile, on a baking sheet, drizzle the remaining olive oil and spread it along the tray.
- Put the cauliflower and zucchini/courgette pieces in one layer on the tray. Try to ensure they're not piled on top of each other. Season with salt and freshly cracked black pepper.
- Roast the veggies for 10 minutes to start, and check on them. They'll likely need another 5 minutes before they're lightly toasty brown. Once they are, toss them around and roast for another 10 minutes.
- To serve, combine the roasted vegetables and soft onions. Toss them gently to spread the seasoning around. Drizzle the tahini dressing (below) on top, and then sprinkle on the fresh parsley.
- In a small bowl, whisk together tahini, 100mL (1/3 cup) water, 1 tsp salt, lemon juice, vinegar and garlic.
Between this and cauliflower cheese, maybe there’s hope for cauliflower yet.
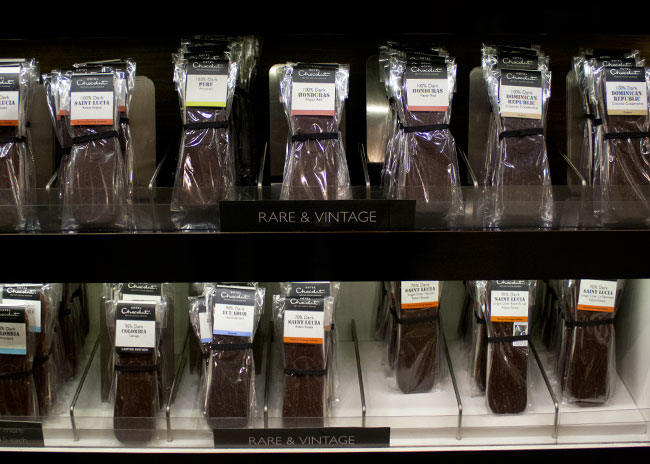
Did you know … ? To be considered milk chocolate in the EU, it needs to be at least 25% cocoa solids. Chocolate is only considered dark at 70%.
Recently, I got a chocolate lesson, plus a whole lot of sweet – and fizzy – stuff at Hotel Chocolat in Victoria, London.

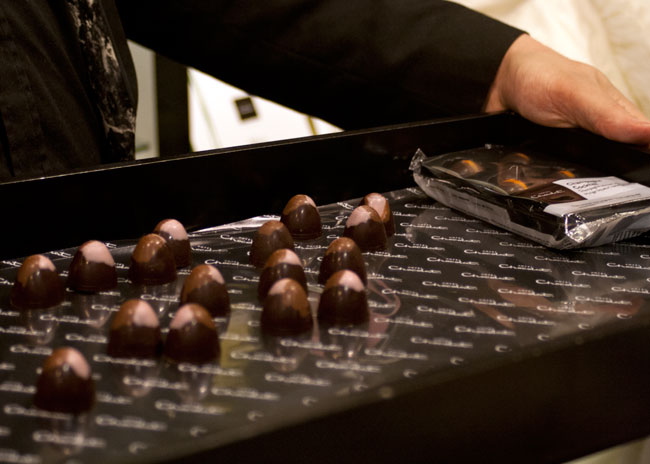
In between samples, we learned about the recent history of chocolate, and how tastes have changed and changed back again.
Historically, chocolate was very different – and by that I mean more bitter – than your average chocolate bar is today. Speaking of, chocolate bars came to be in 1847, in Bristol, England. Did you know chocolate bars were English? Neither did I. (So is the internet – no matter what Al Gore says.)
Until the 20th century, chocolate was considered a luxury, and it was generally heavy on the cocoa solids. It all really changed because of World War I.
Food supplies were a concern, and importing was much more difficult, so chocolate had to change. Companies like Rowntree’s and Cadbury got creative and stretched their cocoa further. Maybe you’ve heard of some inventions from that era, like Snickers, Kit Kats and Rolos.
But little by little, the chocolate experimentation has gone the other way, to more chocolatey dark chocolate, with a higher cocoa percentage.
Which leads right into Hotel Chocolat, where I snapped a piece of chocolate next to my ear, and was offered more samples than I could eat. And they didn’t even ask me to write this post – seriously.

Hotel Chocolat have been making chocolate for 28 years from their factory in Cambridge (how great must that neighborhood smell…) and they are in charge of the whole process, from bean to bar.

Their dark chocolate is heady. Rich and lightly bitter, the taste lingers. Everything about it feels luxurious. Break it in to pieces and listen to the snap. It’s completely different from the average chocolate bar. It fights back against you, just a little, before melting down into chocolately bliss.

Milk chocolate? Still rich. Sweet and creamy. Still snaps. So luxurious that you don’t even need a whole bar before you’re satisfied. Does that make it lighter calorie? Let’s say yes.

White chocolate, meanwhile – still not my favorite, but Hotel Chocolat’s contains 36% cocoa, which is the same amount as in a bar of Dairy Milk. Yep.
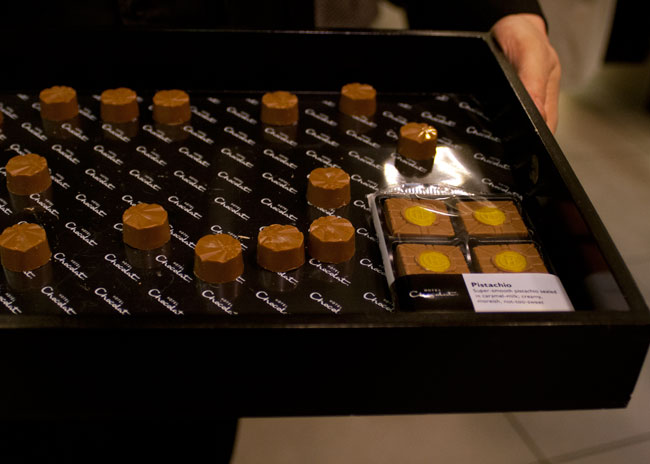
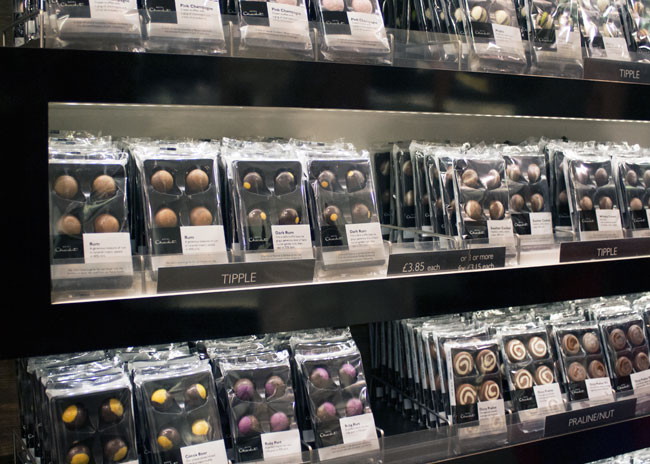
Oh and before I forget. Did you know you could get a cocoa pesto? And a cocoa gin? When you’re out picking up bars of chili chocolate and Mississippi mud pie, don’t forget the cocoa bitters for your cocktails.
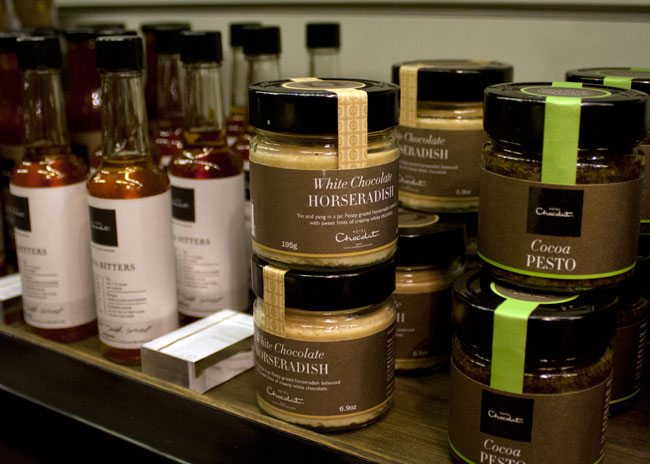
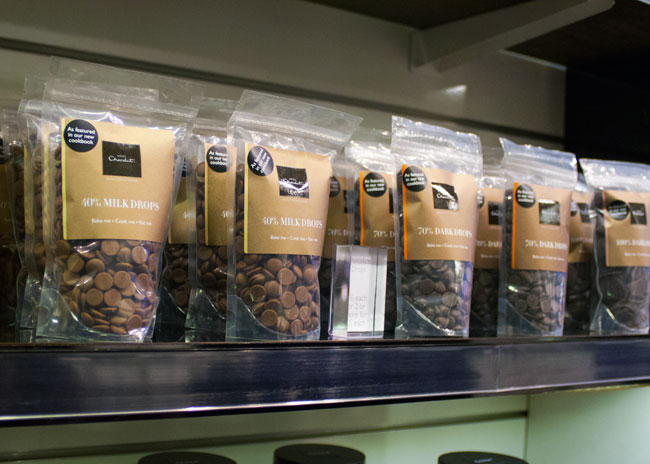
Soon enough, I’ll be turning some 100% chocolate into a Mexican mole sauce. Wish me luck. And if I can get it right – you might just see it turn up here.
Happy greens season! It’s that time of year when all the foodie instagrams, newspaper articles and veg boxes are talking about the stinky green leaves of wild garlic (known in the US as ramps).
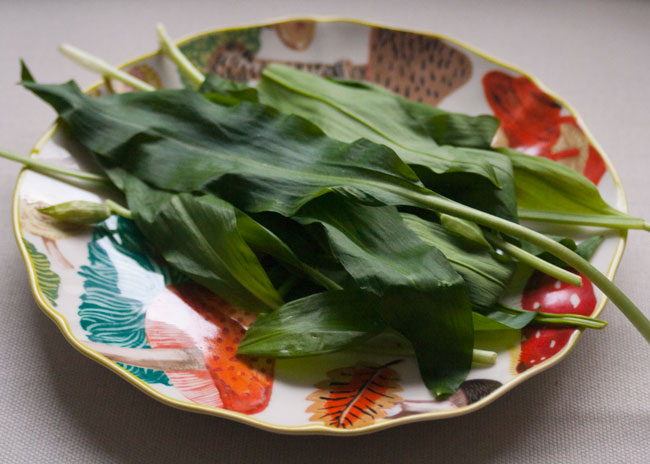
The cynic in me notices the apparent trendiness and members-club-feel of foraged greens. My more charitable side wants to justify the excitement.
These are the first edible, native plants that we are seeing and it’s easy to get over-enthusiastic. It’s been a long winter of potatoes, carrots and Chilean vegetables that have traveled further than I ever have. (Future post: are your veggies better traveled than you?)
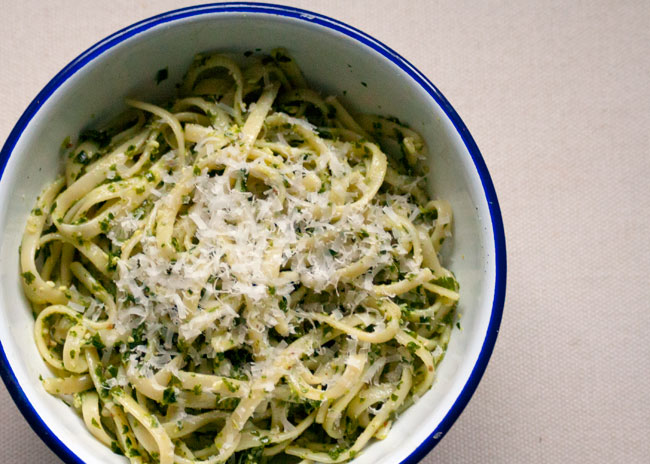
I’m going choose to be excited – and run with it. This is a recipe for wild garlic pesto made entirely with British produce. From the hard cheese to the oil… everything in it can be grown, harvested or produced within the UK.
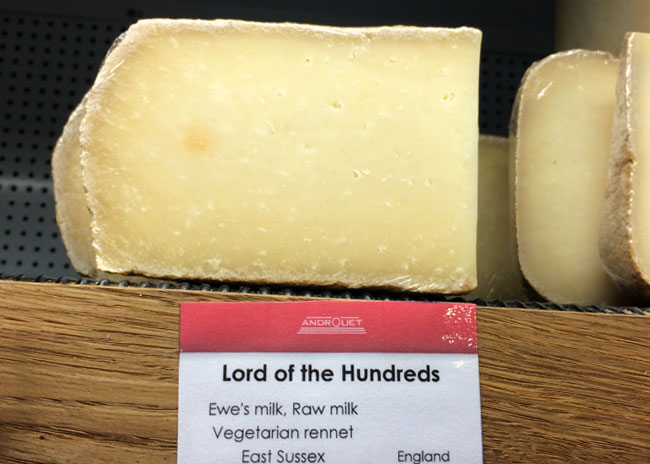
I was directed to a hard sheep’s cheese at Androuet in Spitalfields, London. I think it’s even tastier than Parmesan(!). Instead of citrus I use cider vinegar, and I lightened the garlickiness with steamed kale.
A big inspiration for this whole recipe came from a recent event where a professor of food policy insisted Britain should grow more nuts. I went for hazelnuts – unfortunately of mixed origins.
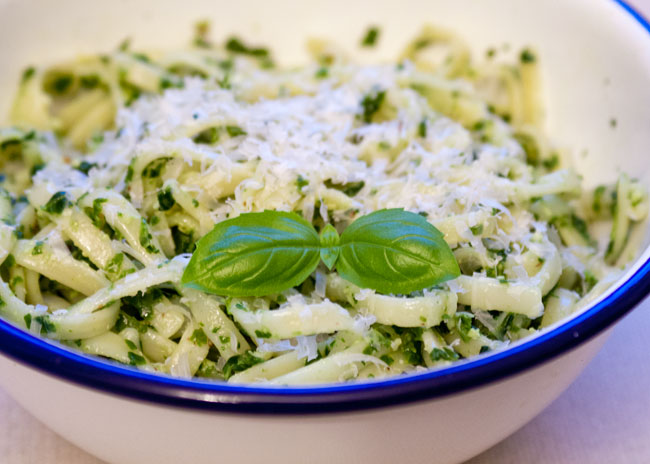
As with any pesto, you can swirl it into pasta, mix it into cream cheese and make a dip, add it to mashed potatoes or toss some roasted vegetables in it. Or just eat wild garlic pesto straight out of the bowl. Your choice.
I have never tried to make this with US produce, but with it being the largest exporter of walnuts in the world, and the existence of the California olive oil industry – I’m sure it’s can be done. If you are in the US and take on the challenge… please let me know!
On the Counter
- 50 g kale, after being stripped from stems
- 30 g wild garlic
- 15 g hazelnuts
- 10 g hard sheep's cheese
- 2.5 tbsp cold-pressed rapeseed oil
- 1 tbsp cider vinegar
- 1/2 tsp salt, and more to taste (Cornish sea salt if you want to go all out)
What to Do
- Steam the kale for 5 minutes
- Roughly chop the hazelnuts.
- In a food processor, or mortar and pestle, break up the hazelnuts even more, then add kale and wild garlic in bunches, pulsing between.
- Add in the oil, vinegar and salt.
- The last step is to add in the cheese.
- If you're freezing the pesto, convention says you should freeze it without the cheese and just add it when you serve it. I freeze it with cheese and haven't noticed a change in quality.
- Break the cheese into small pieces (or pre-grate it), and add it to the food processor/mortar.
I have to admit, I surprised myself when I first tried this recipe from the Able & Cole cookbook. It’s not what I’d normally go for, and I’d never try it if it was on a restaurant menu. But we had every ingredient (and not much else), and it was actually really good.

Thinking back though, it shouldn’t be a huge surprise that I’ve been scared off from anything orange flavored.
About 6 years ago, I went to Rome for the first time. There was some really amazing food, but there was also some really dreadful food. One of those meals included the absolute worst dish I’ve ever eaten in a restaurant, and maybe even ever. Tortellini and salmon in a peppercorn sauce.
Doesn’t sound too bad, I know. Bear with me.
So we chat, we drink wine, we watch fellow tourists roam the cobblestone alleys around the Spanish Steps. (Note: don’t eat so close to the big tourist spots.) Dinner comes out.
What’s that? Is that my dish with the 3 shredded pieces of smoked salmon? And a gloopy orange sauce? Well, I’ll give it a try. What have I got to lose?
Except maybe a tooth because… yep… those are whole peppercorns trapped in thick, gooey bright orange sauce, like future fossilized amber.
And what does the goo taste like? Imagine the cheapest, fakest orange flavored marmalade in the world. And then put the saltiest cheap cuts of smoked salmon in it.
You can understand why it’s taken me a while to embrace oranges again.
Thankfully, for whatever reason, my mental aversions to orange flavor is fading slightly. After all that, I hope I haven’t put you off trying this easy weeknight meal, because it really is good. I promise.
Some recipe notes: You can cut down on the amount of chicken you use if you’re going to bulk it up with sides, like rice and vegetables. I tend to include steamed broccoli, or green beans, and maybe rice if it’s a small portion of chicken.

Adapted from the Abel & Cole Veg Box Companion
Serves: 4
Prep time: 10 minutes
Cook time: 30 minutes
On the Counter
4 (free range) chicken breast pieces, about 900g or 2 lbs, total
2 garlic cloves
1 tbsp honey
1 tbsp olive oil
2 oranges, cut into 4 segments each
1 red chilli pepper
pinch of milled rock salt or kosher salt
few grinds of fresh black pepper
handful of fresh parsley
What to Do
Preheat the oven to 200 C/390 F.
Season (aka rub up on) the chicken with oil, then salt and pepper. Put the chicken pieces in a roasting tray, not touching. Lay the orange segments around it.
Bake the chicken for 15 minutes.
Meanwhile, chop the chile and mince or crush the garlic. Chop the parsley, too, but set it aside for the end.
When the 15 minutes are up, drizzle honey over the chicken, then sprinkle the garlic and chilli pepper over it.
Put it back into the oven and cook it for another 10 minutes, or until the internal temperature is 80 C/180 F.
Squeeze one or two of the orange segments onto the chicken. Remove it, stir up the juices in the roasting tray, and top the chicken with sauce and parsley.
PS: What was your worst restaurant meal ever?
]]>
Just a little peek…
You never know when inspiration will strike. I seem to like the absurd challenge of figuring out what to make for dinner when I get home and root through the fridge and freezer.
This time, the carrots, carrot greens and a summer cabbage made me think “stir fry”, and the salmon made me think “crispy skin”. Sweet potato noodles that I’d picked up in a past life at a Korean supermarket finished it off. Though since my go-to Korean supermarket has been demolished thanks to the addition of a new train line in London, I’m not sure where to go to replace them. (Any suggestions out there? …Bueller?)
If you haven’t tried sweet potato noodles (in Korean: dang myun), they’re like glass noodles but thicker. They’re chewier and slipperier than wheat noodles, and are really light in flavor so you can enhance them with whatever you want – plus they’re gluten free!
I’ve half-heartedly tried meal planning before, but it just doesn’t seem to work. Sometimes plans come up, or Main Ingredient is missing or has gone off…
But maybe that’s how it should be. I don’t think I would’ve thought of this in front of a google doc spreadsheet. I needed to see to be inspired. Thank you, wizened carrots of the crisper drawer.

Serves: 2
On the Counter
Stir-Fry
320 g (12 oz) salmon, scaled (80 g/3 oz piece per serving)
1 tbsp neutral oil, such as peanut, rapeseed or sunflower
2 large carrots (about 300 g or 2 cups)
2 big handfuls of leafy green vegetables, your choice
1 medium onion (about 110 g or 1 cup)
2 cloves garlic
200 g (7 oz) Korean sweet potato noodles
Dressing
2 tbsp sesame oil
1 tsp red chili flakes
1 tbsp naturally-brewed soy sauce (Kikkoman is my preferred)
What to Do
Combine the sesame oil, chili flakes and soy sauce, and set it aside.
Slice the carrots into matchstick sized pieces, and chop the onion. Chop or tear the greens into bite-sized pieces.
Pat the salmon filets dry and lightly salt them on each side. Make sure it’s been scaled or you definitely won’t want to eat the skin.
Heat the oil in a flat, cast iron or non-stick pan on medium heat until shimmering and hot enough to make a drop of water jump out.
Place the salmon in, skin-side down. Don’t touch it for at least 4 or 5 minutes. You’ll need patience. When it’s ready, you won’t have to put in any effort to get the salmon and its skin out of pan. If it’s not easy to pick up with a spatula, leave it alone. That’s how you get the best crispy skin.
Once your skin is crispy, flip it over and cook for another 2 minutes. Set it aside, covered, or in a low-heat oven.
Cook the noodles in boiling water for 5-6 minutes, until they’re a texture you’re happy with. Immediately rinse them in cool water to stop the cooking process.
While the noodles are cooking, stir fry the vegetables in the pan you used for the salmon. It should take about the same amount of time to cook as the noodles. At the very end, add in most of the spicy soy dressing, and combine it with the vegetables. Save the rest to drizzle on top of the salmon.
Once everything is done, you can mix the noodles into the saucy stir fry, and give your crispy skin salmon a place of pride on top.
]]>Steamed asparagus is a beautiful thing. Actually, asparagus in all forms is delicious. One of my favorite sneaky ways to bump up the excitement of steamed asparagus is to add some finely minced (or pressed) garlic and a little bit of salt before cooking it.
Get ready for next-level steamed asparagus. Did you know that asparagus is a great source of fiber? It also has lots of vitamins A, C and E… which is all the proof you need that asparagus is great, really.

By the way, if you want to save your lovely little spears from untimely wrinkling, wrap the ends in a damp paper towel and store them in the refrigerator.
Except for the asparagus, this is a one-pot meal, which means not only is there less cleaning to do, but you get all the delicious flavors and healthy (and not so healthy) bits together in a luscious sauce.


Serves: 4
Total time: 45 minutes
On the Counter
2 large free-range chicken breasts, split or 4 small chicken breasts
100 mL (1/2 cup) chicken stock or white wine
200 g (1/2 lb) white mushrooms
1 tbsp butter (or olive oil, if you’re dairy-free)
handful of chopped fresh parsley
Juice from 1/2 lemon
1 large or 2 medium garlic cloves
1 shallot
16 spears of asparagus, tough ends snapped off
1/2 tsp salt
1/2 tsp fresh ground pepper
What to Do
Season the chicken liberally on both sides with salt and pepper.
Slice the mushrooms, chop the shallots and mince the garlic. Set 1/4 of the garlic aside. Slice the asparagus spears longways, either in half or quarters, depending how thick they are. You can then chop those pieces in half (or not!).
In a wide, flat bottomed pan, like a frying pan or skillet, heat the butter until it’s melted and bubbly.
On medium high, sear the chicken breasts (skin side down if it’s skin on) until it’s browned, about 4-5 minutes but have a peek underneath to confirm. If it’s sticking to the pan, give it more time. Flip the chicken and do the same again.
Remove the chicken and set it aside, covered.
Add a little more butter if needed, lower the heat and fry the shallots for 2-3 minutes, until they’re soft, stirring occasionally. Then the garlic goes in for 1 minute, until fragrant. Add in the mushrooms, and sautée. They’ll release a lot of liquid. Stir frequently until they’re soft. Season with salt and pepper.
Turn up the heat, stir in the wine or stock and deglaze the bottom of the pan, scraping (with a wooden spoon) the bottom.
Return the chicken to the pan and simmer it for about 10 minutes, until the chicken is at 65C/ 144 F degrees, or isn’t pink in the middle.
With about 5 minutes left on the chicken, set a 2-tiered steamer pan boiling. Add in the asparagus, 1/4 of the garlic and a pinch of salt. Steam for 2-3 minutes until bright green. Don’t let them go further or they’ll be too soft.
Once the chicken is done, remove the pan from the heat and stir in lemon juice and parsley.
Serve on its own, or with a salad or brown rice. It’s also good as leftovers!
]]>At a time in the not-too-distant past, some friends and I were looking for a place to for dinner before a gig, and found ourselves at Prawn on the Lawn, a fishmonger/tiny restaurant in Islington, north London.
All their seafood is sourced from Britain, and they use some of that delicious local production for a small menu of dishes in an even smaller space.
Our table was a barrel (literally), and we squished together, 3 of us, slurping oysters and sampling each others’ main dishes. PS: If you go, have the expensive but absolutely delicious soda bread and butter.
The monkfish and chorizo stew was the inspiration for this recipe, and I have come up with my own version based on what I remembered it tasting of and what I like to eat.

Don’t mind the low-light iPhone photo, but this was some good seafood
In the UK, monkfish are a sustainable species, though they were in trouble for a while. It’s been an interesting ride for the monkfish as a food source. It went from a “trash fish” to “poor man’s lobster” to a delicacy that needed to be protected, and now it’s a sustainable, meaty and generally easy to find fish.
PS: Did you know that monkfish is a type of angler? No wonder you never see a whole one at the fishmonger, they are pretty ugly fish.

This is what happens when you have the time and light to take a reasonable photo.
This stew is hearty and warming, but not so hearty that you can’t enjoy it in the spring… though if you’re enjoying a spring that’s more like summer, you might want to save this recipe for the inevitable cooler days.

Serves: 2 hearty portions/4 with a starter or bread
Cook time: 35 minutes, not including prep
On the Counter
350 g monkfish cut into chunks
50 g chorizo
1 (400 g/14.5 oz) canned tomatoes
600 mL vegetable or fish stock
50 g carrots, about 1 large carrot
1 yellow or orange pepper
1 medium onion
1 stalk of celery
2 garlic cloves
2 tsp vegetable oil
1 tsp smoked paprika
1/2 tsp red pepper flakes
1 tsp salt
fresh parsley, chopped for serving
What to Do
Dice up the vegetables into bite-sized pieces, and mince the garlic. If you’re not very fond of celery, chop it smaller. Also dice the chorizo into 1 cm (1/4 inch) pieces.
Meanwhile, turn the oven on to broil/grill and roast the pepper on each side for 1-2 minutes, until blackened. Once it’s ready, put it in a bowl and cover with a cloth until it’s cool enough to touch. Peel it, removed the seeds and chop it.
In soup pot or casserole pot, heat the oil over medium-low until it shimmers. Add in the celery, carrots and onion until they start to soften, about 5 minutes. Push the vegetables to the side of the pan and add in the chorizo. Fry it, stirring, until it starts melting and browning, another 3-4 minutes.
Stir in the tomatoes, breaking up the large pieces with a wooden spoon. Add in the roasted pepper, stock, paprika, red pepper flakes and salt. Stir. Simmer, covered, on low heat for 10 minutes.
After the 10 minutes are up, add the monkfish pieces and cover the pot again. Let it cook for another 15 minutes.
Sprinkle fresh parsley in each bowl and serve.
]]>For someone who absolutely despises the taste and smell of anything remotely like aniseed or liquorice, I’m surprisingly coming to appreciate ingredients like fennel seed and caramelized fennel root. I can even tolerate fennel that isn’t cooked down to the point where it just tastes of sweetness!
My slowly growing tolerance for the fennel family is where these meatballs come in. When I first tried them at Polpo, one of my top London restaurants, I was really reluctant, but my dining partner was eager to sample them. I gave in and I’m really glad I did… they were delicious.

They were so good that I have even tried replicating them at home. While my pork and fennel meatballs are not exactly the same (for one thing I make mine a lot smaller), they’re easy to make and delicious. Just as an aside, I haven’t bought the Polpo cookbook (yet), so these are my own recipe, rather than from the book, but I’m eager to compare them.

My favorite way to eat these is with a slow-cooked tomato sauce and spaghetti, though they’re pretty good as Swedish meatballs, too. One of the best things about meatballs is making a big batch and freezing the leftovers for future quick and easy weeknight dinners.

I’ve tested regular and gluten-free versions, which I’ve included in the recipe below. Next trial: egg-free meatballs.
Serves: 8
On the Counter
500 g ground pork
1/2 tsp fennel seeds, lightly crushed
1 small onion (1/2 cup or 75 g), very finely diced or blitzed in the food processor
1 egg
50 g breadcrumbs or blitzed gluten-free oats
1 clove garlic, finely minced or blitzed
1 tsp salt
What to Do
Combine all ingredients and squish them together until thoroughly combined. Take enough of the mix to make 2.5 cm/1 in diameter meatballs into your hand, and roll them into a ball. (If you’re worried about the meat sticking to you, rub just a drop of vegetable oil onto your hands before rolling.)
Once you’ve rolled all your meatballs, set 4-5 per person aside if you’re using them for pasta or Swedish meatballs with sides. Take the rest and lay them on a flat baking sheet, then cover it tightly with plastic wrap and freeze them overnight. (The next day, you can just throw them into a zip-top bag and back into the freezer.)
There are 2 ways to go forward with meatballs now. You can sear them in a very hot pan with a little oil, turning them so they brown on all sides. The other option, and my preferred, is to lay them all on a baking sheet in 1 layer, and bake them in the oven (200C/390F) for at least 5 minutes per “side” to ensure browning and consistent texture.
Once you’ve browned them, you can try them in Swedish meatballs, or cooked low and slow in a tomato sauce.
]]>I cannot tell you that this is the recipe that convinced me cauliflower is the best vegetable out there. Unfortunately I don’t think there’s a recipe out there that can really make me love cauliflower. I can, however, tell you that this is miles ahead of boiled cauliflower, is quick and easy and can do a pretty reasonable job replacing couscous for a wheat-free and nutrient-rich alternative.

And listen, I’m not going to pretend that you won’t notice the difference between regular couscous and the cauliflower version, so don’t come in expecting it to taste like a wheat product. But, it does taste nutty, have just a little bit of crunch and give you a good feeling about your dinner choice.
Cauliflower is a great source of vitamins, way more than pasta and rice could even dream of. It’s a great source of vitamin C, vitamin B6, dietary fiber and omega-3 fatty acids (for all you non-fish eaters).
Try it for a boost of extra vitamins and a low-calorie, gluten-free and low-carb substitute for white rice with a stir fry, or loaded with harissa and lamb for a Moroccan-style couscous.
All you need to do to make cauliflower rice, and couscous, is chop your cauliflower head into florets. (You can use the stems in soup or a veggie stock.) Put them all into a food processor and blitz!

Serves: 4
On the Counter
1 large head of cauliflower (about 850 g or 2 lbs)
2 tsp olive oil
1/2 tsp salt
Equipment
food processor
skillet or frying pan
What to Do
Chop cauliflower into florets, setting the stems aside for stock or soup.
Add them into a food processor and blitz for a few seconds for “rice”. For “couscous”, scrape down the sides and blitz for a few more seconds/pulses.
To cook, heat olive oil over medium heat in a skillet or frying pan until shimmering. Season the cauliflower with salt and sauté it, stirring frequently, until it just starts to toast, about 2 to 3 minutes. If you would prefer it crunchier but less nutty tasting, cook it for less time.
—
You can do a lot with cauliflower rice/couscous. Stir fry some veg and make a peanut sauce, or turn it into a couscous salad. You could even add some spices in while you’re cooking to amp up the flavor. Maybe some Chinese 5-spice for a cauliflower rice stir-fry or cumin to make your cauliflower the accompaniment to a curry.
Do you have any favorite uses for cauliflower rice or couscous?
]]> Save Recipe