It has been a busy summer, and I wish I had more time to blog, or truthfully, to actually finish one of the 10 half-posts that have been hanging around. This is my attempt at getting back on the blogging wagon. Recently, I had a request for some gluten-free, meat-free recipes. I immediately thought of this post, patiently waiting in my drafts section. Three (or has it been four?) weeks later, here it is. Spiced up roasted cauliflower and zucchini with tahini dressing. And it’s vegan!
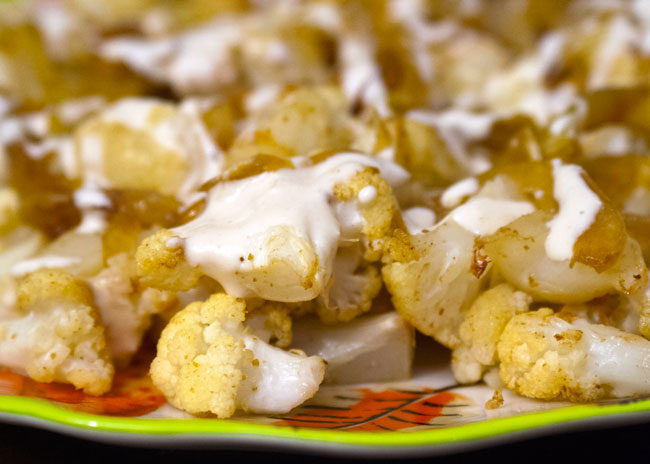
Plant-based foods have a lot going for them. You’re unlikely to have to worry about them poisoning you if they’re undercooked. They’re easy for weeknight meals and generally forgiving of your cooking skills. On top of that, they don’t normally include parts that make you think “ew, I’m not going to eat that” (Here’s looking at you, brains.)
Instead you can eat veggies that look like brains without all the weird thoughts about neurological diseases (yum).
Cauliflower is pretty low on my list of choice vegetables. But sometimes life gives you cauliflower, and you have to accept the challenge. The best way to handle the hardship of cauliflower is to roast and top it with lots of other nice things.
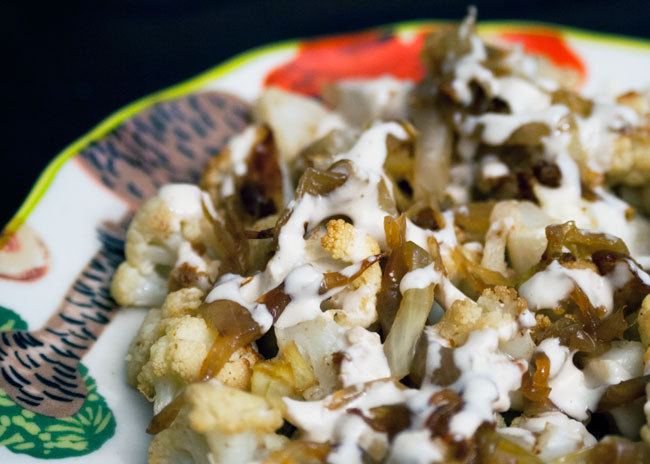 Like almost any veggie, some time in the oven with fat and spices makes everything better.
Add some sweet slow cooked onions and nutty, savory tahini dressing for a winner. I also like to add extra color in the form of courgettes (zucchini, whatever), because it’s (technically still) summer and there are too many of them anyway.
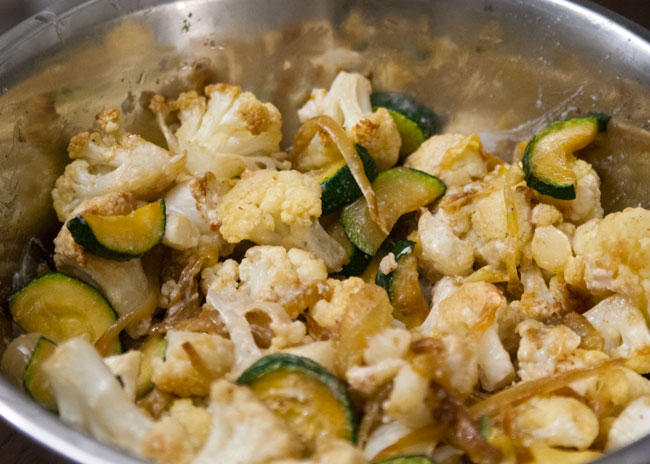
This recipe is adapted from This is a Cookbook: Recipes for Real Life, by Max and Eli Sussman, given to me by a very good friend back in the States.
Serves: 4
15 minPrep Time
30 minCook Time
45 minTotal Time
On the Counter
- 4 tbsp (90mL) olive oil (extra virgin if you have it) plus 1 tsp
- 2 medium onions, thinly sliced
- 1 cauliflower head (300g/10.5 oz), cut into 1 in (2.5 cm) pieces, including the stems
- 2 small, or supermarket sized in the UK, courgettes (zucchini)
- 2 tsp ground cumin
- 2 tsp paprika (sweet, hot, smoked - your choice)
- small handful of fresh flat leaf parsley, chopped (optional)
- 100 g (1/3 cup) tahini
- juice from 1/4 lemon
- 1 tsp cider vinegar
- 1 garlic clove, finely minced
- table salt to taste
What to Do
- Preheat the oven to 230C (450F).
- In a large bowl, toss the cauliflower pieces, courgette/zucchini, 1 tsp drizzle of oil, dash of salt, cumin and paprika together, until the vegetables are evenly coated.
- Heat 1 tbsp olive oil in a saute pan over medium heat, until it's just shimmering.
- Add in the onions.
- Lower the heat, stir in 1 tsp salt, and stir frequently.
- Keep the onions going over low heat until they're soft and sweet, at least 20 minutes. If you want to fully caramelize them, it will be around 45 minutes.
- Meanwhile, on a baking sheet, drizzle the remaining olive oil and spread it along the tray.
- Put the cauliflower and zucchini/courgette pieces in one layer on the tray. Try to ensure they're not piled on top of each other. Season with salt and freshly cracked black pepper.
- Roast the veggies for 10 minutes to start, and check on them. They'll likely need another 5 minutes before they're lightly toasty brown. Once they are, toss them around and roast for another 10 minutes.
- To serve, combine the roasted vegetables and soft onions. Toss them gently to spread the seasoning around. Drizzle the tahini dressing (below) on top, and then sprinkle on the fresh parsley.
- In a small bowl, whisk together tahini, 100mL (1/3 cup) water, 1 tsp salt, lemon juice, vinegar and garlic.
Between this and cauliflower cheese, maybe there’s hope for cauliflower yet.
Last year, when I was in Marrakech with a good friend, we had a Moroccan carrot salad among other mezze before a delicious chicken and olive tagine. My first bite of these tart, tender carrots gave me heart-eyes. I was in food love. The other salads, all made of cooked and marinaded veggies and pulses like zucchini, roasted peppers and lentils.
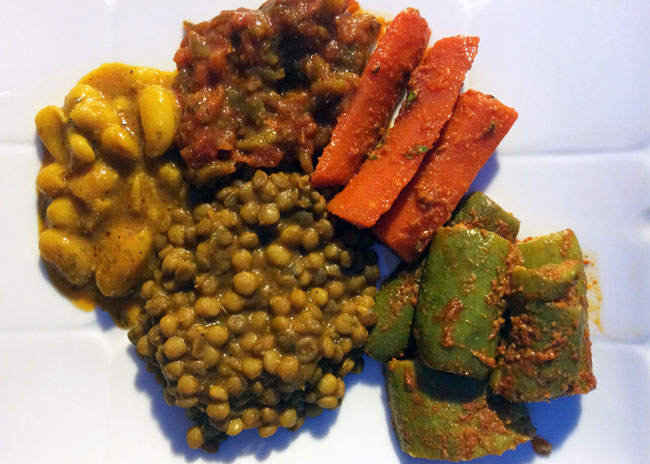
I’ll be working on some of them in the future.
Sometimes the cold starter plates are the best part of the meal. Just enough to pique your hunger, they’re often addictive flavor-bombs. Spicy Korean kimchi, creamy Mexican guacamole, smoky Turkish baba ghanoush… and earthy, zesty Moroccan carrots.
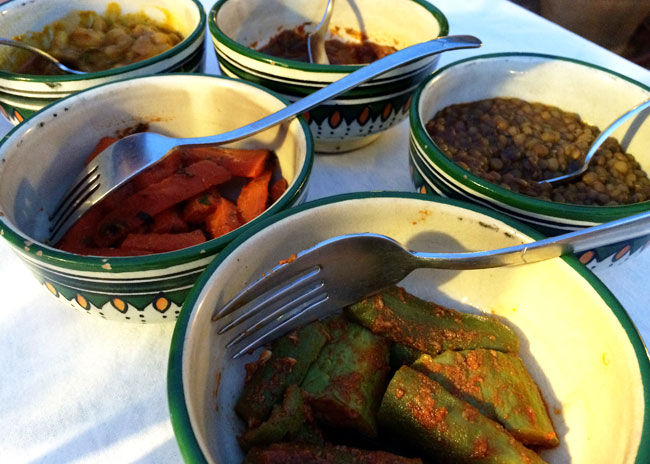
Even in the still heat of Morocco in August, it was hard to stop myself from gorging on tangy, spiced vegetables and stay level-headed about the tagine to come.
I’m still not sure mine will ever live up in my mind to the carrots we enjoyed on a Marrakesh rooftop on that hot summer’s night, but I don’t want them to. Traveling is about oversized memories of otherwise mundane moments.
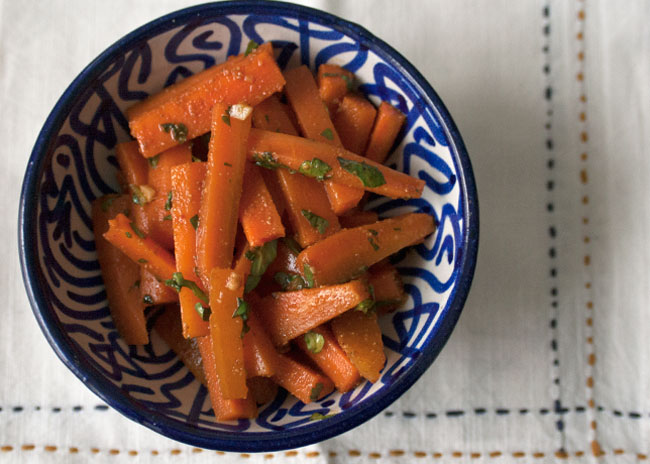
You don’t need a full on North African meal to enjoy your own Moroccan carrot salad – it’s a lovely side to have for lunch with a sandwich, or with a roast beast (or veggie beast) for dinner.
The carrots need at least a few hours to soak up all that spice and tang. It’s worth it to be rewarded with complexity that’s hard to find in a typical cooked carrot.
I compared a few different ways of making these, and steaming and boiling gave me the same results in texture and flavor, so I prefer to steam them to keep nutrients from being thrown away with the boiled water.
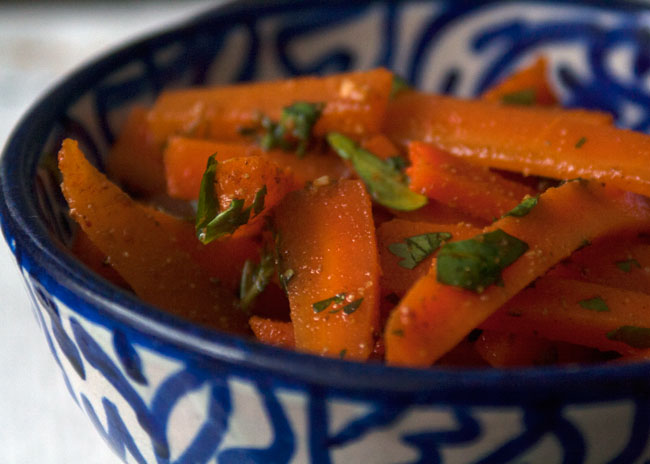
This recipe was adapted from one in a Moroccan cookbook that, unfortunately, I don’t know the name of. (But thanks to Mimouna for sharing it with me!)
Serves 4
10 minPrep Time
10 minCook Time
2 hr, 20 Total Time
On the Counter
- 500 g (~1 lb) carrots
- 1 tbsp lemon juice
- 1 tbsp cider vinegar
- 1 tbsp olive oil
- 1 tsp ground cumin
- 1 tsp sweet paprika
- 1 clove finely minced garlic
- fresh parsley, chopped finely
- 1/2 tsp milled or table salt
What to Do
- Lightly salt the carrots.
- Steam them for 5-7 minutes, until crispy-tender.
- Mix up a dressing with the olive oil, cumin, paprika, garlic, salt, lemon juice and vinegar
- Rinse the carrots under cold water, then shake them as dry as you can.
- Toss them with the dressing and fresh parsley.
- Let the carrots marinade in the refrigerator for at least an hour, but they will taste better if you can leave them in for longer. I actually prefer them even more the next day.
Happy 2016! My resolution for the first week of this year is to share this post, so I’m going to start the year on a high note.
Blogging is fun, but it can also be tough sometimes.
I could have started one of those stream-of-consciousness sites where people write about whatever it is they’ve done over the weekend, with photos of a soap dispenser in a restaurant bathroom, or deep insights into their favorite Instagram memes.
But I didn’t, so here I am.
The reason I’m even getting blog-osophical is that I ended 2015 with blogger’s block. Cooking is still happening, and some of it has been fun and very successful (some less so) but it just doesn’t make it online. No photos (ok maybe a few), no testing, no tweaking.
Instead I’m going to round up some of my favorite recent recipes from the big sites like BBC Good Food (seriously the best) and fellow bloggers.
Here’s what I’ve been making lately:
Cod with Lemon and Tarragon (Nigel Slater)
I found this recipe in Eat, a Nigel Slater cookbook, but lots of his recipes are published in the Observer/Guardian. It’s really easy but looks and tastes much more complex. I got the best cod I could. It makes a difference.

Char Siu (Burp Appetit)
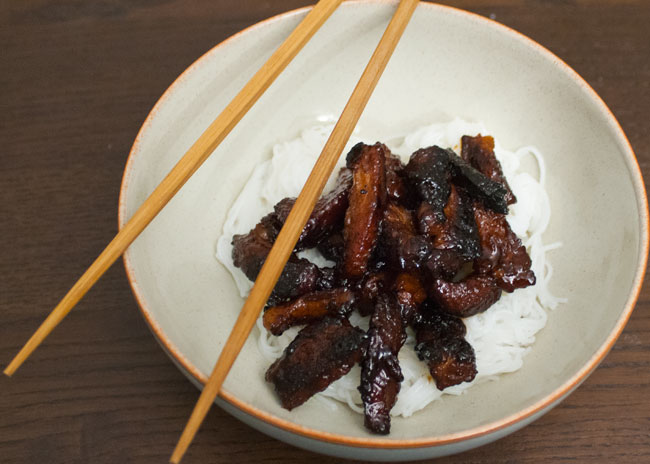
When it was time to release the pork belly from its freezer hibernation, I tried this. I had no idea char siu could be so easy at home! Next time, there will also be buns.
Vegan White Bean Chili (Bon Appetit)
Warm and full of winter veggies. I add a lot less water so it’s less like soup, and use canned beans instead of dried, because I am not organized enough to soak beans a day in advance.

Blueberry Crumble Traybake (Holy Crabness)
This one first came into play for a summer barbecue, back when blueberries were in season. Though mine weren’t nearly as pretty as Emma’s, they were gobbled up without any hesitation.

Apple Cider Doughnuts (NY Times)
There is no craving like a homeland craving, and I decided I wanted cider doughnuts. Keep in mind cider doesn’t even mean the same thing here as it does in the Northeast US, and I’d never made doughnuts before…
But doughnuts I got. Delicious, cidery, imperfect doughnuts. (Props to Brambletye Farms, who make an unfiltered apple juice that worked so well in this.)

I’ve been lucky to be exposed to Caribbean food through friends back home in the US (specifically amazing dishes from the Dominican Republic), and it reminds me of home when I get the chance to recreate some of it, and use the same flavors and ingredients.
While a lot of Caribbean food has meat, there are some amazing side dishes that don’t, and you can easily turn a humble side dish into the main star. This time, I’m going to share one of my favorite comforting rice dishes – it’s really easy, and you can bump up the complexity with just 5 extra minutes of time, by starting the coconut milk off with a few bonus flavors.

You might have already guessed from the photos and the title, but this not-so-mystery dish is Jamaican coconut rice with black beans. You could also make it with kidney beans or pigeon peas (the traditional Jamaican way) but I had black beans in the cupboard, and I really like them, so in they went.
With a few cupboard staples, you can pull this together about 20 minutes. It’s rich and savory, comforting and exotic, versatile and unmistakable. You can serve it alongside spicy baked chicken, or make it into a vegetarian meal with some spiced up sauteed peppers and onions, and maybe a salad, on the side.

Thanks to Grace Foods for providing the rich, silky coconut milk and the super flavorful and heavenly-smelling hot curry powder in a great basket of treats to celebrate Caribbean Food Week. I also used Grace black beans, but they just happened to be in my cupboard, because they have a great texture and are a great price. The recipe, and the feelings about what I’ve made and used, are entirely my own.
Serves: 4
Time: 5 minutes preparation, 20 minutes cooking
On the Counter
200 g (1 cup) dried white, long grain rice
1 400 mL (14 oz) can of Dunns River coconut milk
1 400 mL (14 oz) can of Dunns River black beans, drained and rinsed
1 large clove garlic, chopped finely
1/2 tbsp Dunns River Jamaican Hot Curry Powder
1 dried bay leaf
2 tsp coarsely ground salt (or kosher salt)
What to Do
Combine the coconut milk, garlic, hot curry powder and bay leaf in a medium sauce pan, and simmer it on very low heat for at least 5 minutes. It shouldn’t get anywhere near boiling.
Give the rice one quick rinse and drain, and then add it to the coconut milk. The rice should be 1/2 the volume of the coconut milk. Add in a little more water if you think it needs it. I use the can, so I can make sure to get all the coconut into the pot. Stir in the salt.
Cook the rice in the coconut milk, covered, on medium/low heat for between 10 and 12 minutes, testing it. You can stir it occasionally to make sure it doesn’t stick. When the liquid is mostly absorbed and the rice is still very slightly chewy, stir in the rinsed and drained black beans. Heat it all up for about 5 more minutes, until some of the black bean-ness incorporates with the rice, and everything is hot.
And that’s it! Spoon it onto the plate or into a big bowl for family-style sharing.
Join me in sharing the Caribbean Food Week fun on Twitter and Facebook.
]]>International blogger woes: Should I use the American names for ingredients or the British names? There’s a lot to consider (believe it or not), including what people will search for, and if I lose out on people because you might not know what I’m talking about.
And, on a totally unrelated note … fava beans, known in the UK as broad beans, are finally back in season. Whatever you call them, they are delicious and full of goodness.
Fava beans/broad beans are high in fiber and iron, and low in sodium and fat. They’re also loaded with protein – so much so that in Sicily, they were called poor man’s meat.
I actually used to hate them, until I realized that you could (and should, really) remove the outer thick shell. The difference in taste is dramatic.

The shells are edible, but they give broad beans a bitter taste and hide the natural sweetness of the inner bean.
Getting these little suckers out of those shells is the most time-consuming part of the whole process, and it’s the only thing that keeps this from being a 10 minute start-to-finish recipe. I’d suggest putting on a podcast and/or getting someone to pitch in.

In this incarnation, I’ve paired broad beans / fava beans with similar ingredients to a pesto, and served it on toasted homemade bread. Definitely don’t bother using sliced supermarket bread, get out there and get a nice crusty loaf from the bakery.
Have it as a snack or a starter. It keeps well in the fridge, and I like having it when I get home from work, especially if dinner is a long way away.

Serves: 4
Time: 20 minutes from start to finish
On the Counter
500 g fresh broad beans (fava beans) in their pods
1 small clove garlic, pressed or minced
Juice from 1/4 lemon
2 tbsp extra virgin olive oil
1/2 tsp salt, plus more to taste
Small handful of parsley, chopped
4 slices crusty bread
What to Do
Take the beans out of their pods.
In a pot of boiling water, cook them for 2 minutes. They shouldn’t need any more time. Drain and rinse them with cold water to cool them down and stop the cooking process.
Remove the bright green bean halves from their shells. (It doesn’t matter if they break along the way.) Discard the shells, and add the beans, salt, lemon juice, garlic, parsley and olive oil into a wide-bottomed bowl or a food processor bowl and stir.
Crush everything lightly with a potato masher or use a food processor, though I prefer using a potato masher. Don’t mash it into a pulp, as some texture makes it look (and taste) better.
Meanwhile, if you’re serving it immediately, toast a few slices of crusty bread. You can drizzle it with more olive oil if you’re feeling decadent, but it’s good without, too.
You can also store it in the fridge for several days. After a few hours in the fridge, the lemon and garlic will be more pronounced.
]]>I cannot tell you that this is the recipe that convinced me cauliflower is the best vegetable out there. Unfortunately I don’t think there’s a recipe out there that can really make me love cauliflower. I can, however, tell you that this is miles ahead of boiled cauliflower, is quick and easy and can do a pretty reasonable job replacing couscous for a wheat-free and nutrient-rich alternative.

And listen, I’m not going to pretend that you won’t notice the difference between regular couscous and the cauliflower version, so don’t come in expecting it to taste like a wheat product. But, it does taste nutty, have just a little bit of crunch and give you a good feeling about your dinner choice.
Cauliflower is a great source of vitamins, way more than pasta and rice could even dream of. It’s a great source of vitamin C, vitamin B6, dietary fiber and omega-3 fatty acids (for all you non-fish eaters).
Try it for a boost of extra vitamins and a low-calorie, gluten-free and low-carb substitute for white rice with a stir fry, or loaded with harissa and lamb for a Moroccan-style couscous.
All you need to do to make cauliflower rice, and couscous, is chop your cauliflower head into florets. (You can use the stems in soup or a veggie stock.) Put them all into a food processor and blitz!

Serves: 4
On the Counter
1 large head of cauliflower (about 850 g or 2 lbs)
2 tsp olive oil
1/2 tsp salt
Equipment
food processor
skillet or frying pan
What to Do
Chop cauliflower into florets, setting the stems aside for stock or soup.
Add them into a food processor and blitz for a few seconds for “rice”. For “couscous”, scrape down the sides and blitz for a few more seconds/pulses.
To cook, heat olive oil over medium heat in a skillet or frying pan until shimmering. Season the cauliflower with salt and sauté it, stirring frequently, until it just starts to toast, about 2 to 3 minutes. If you would prefer it crunchier but less nutty tasting, cook it for less time.
—
You can do a lot with cauliflower rice/couscous. Stir fry some veg and make a peanut sauce, or turn it into a couscous salad. You could even add some spices in while you’re cooking to amp up the flavor. Maybe some Chinese 5-spice for a cauliflower rice stir-fry or cumin to make your cauliflower the accompaniment to a curry.
Do you have any favorite uses for cauliflower rice or couscous?
]]>It’s still autumn, if you check the calendar, even though it seems like the weather is trying to skip ahead.
Most of the days in London now are gray and rainier than they were a few weeks ago, and I am finding it harder and harder to convince myself to go out for a run or take the long walk home… especially when it gets dark in mid-afternoon. But this does mean it’s time for wooly socks, bourbon cocktails and delicious orange vegetables. All at once if you can make it happen.

Toes in boots, wet streets and yellow leaves. Definitely November.

A few weeks ago, when running outside was still fun, and you could see the sun set.
Long enough ago, I was at the supermarket and I was 100% convinced that I’d seen a recipe I wanted to try that included tahini. I do have a habit of stocking our pantry with ingredients for projects that don’t necessarily ever happen, but this time I thought I really had it. Well, apparently I didn’t, because it sat in the cupboard, until the first time I made this. The old recipe that asked for tahini? I guess it’s lost to the sands of time. But now I have tahini hanging around, and it’s … really good. It’s good with sweet potatoes and chick peas, it’s good with flatbread (reminds me a bit of peanut butter), and it goes a long way to making a mediocre store-bought hummus into what you imagine hummus should taste like.
I feel like I could probably write a love letter to tahini. But if you’re not in the mood to wander around the supermarket to find it… you can use Greek yogurt instead. It won’t be the same, but it will still be good.
The original recipe, from the New York Times Diner’s Journal, first popped up in my blog feed, a long time ago. They call it a salad, but I don’t really serve it like a salad. I think the vegetables should be hot, the spinach a tiny bit wilted, and the dressing should be made of tahini. Try it and see what you think!

A bit of autumn on a plate … before it’s all gone.

On the Counter
- 1 can (15 oz or 400 g) chickpeas, drained and rinsed
- 1/2 tsp chili powder
- 1/2 tsp cumin
- 1 1/4 lbs or 500 g sweet potatoes, peeled and cubed into bite-sized pieces
- 2 medium carrots, peeled and sliced diagonally, about 1/2 inch or 1.25 cm thick
- 3 tbsp olive oil
- 1 tsp dried thyme
- salt
- freshly ground black pepper
- 6 oz or 150 g spinach, rinsed and torn (if not baby spinach)
- 1 shallot, thinly sliced
- 1 clove garlic, minced
- 3 tbsp tahini
- 1 tbsp fresh lemon juice
- 1/2 tsp table salt
What to Do
- Heat the oven to 400F or 200C.
- Dry your chickpeas. Line a large baking sheet with 2 layers of paper towels (kitchen roll). Spread the chickpeas out so they lay in one layer. Dry them with more paper towels. If you have the time, you can let them drain for an extra 10 minutes before starting. They should be as dry as possible for optimal crunch.
- Toss the chickpeas with 1 tsp olive oil, chili powder, cumin and 1/2 tsp table salt (slightly more if using kosher). Remove all the paper from the baking sheet, and spread the chickpeas out in one layer.
- Roast the chickpeas, tossing occasionally, for 40 minutes, until crispy and golden brown. Check them starting at 30 minutes to see if they are crispy enough. (This will depend on how dry they were when they went in.)
- Toss sweet potato and carrots with 2 tsp olive oil,1 tsp kosher salt or 1/2 tsp table salt, thyme and a few grounds of black pepper. Roast for 40 minutes, until golden brown and soft.
- When the roasting vegetables and chickpeas have 1 minute left...
- Flash-steam the spinach for 30 seconds, until slightly wilted.
- Combine the steamed spinach, roasted vegetables, chickpeas and shallots. Toss with the tahini dressing (below) and serve.
- Mash the minced garlic with 1/2 tsp salt, until it forms a paste, or something close to it. Mix with tahini, lemon juice and 2 tbsp water. Stir and test for consistency. If too thick, add more water 1 teaspoon at a time.
Nothing takes the wind out of your sails more than losing a blog post just as you’ve finished writing it, especially when it’s been a few months since a post has gone from “draft” to “published”. (One day that recipe will make the blog – when I can look at the title without wanting to cry.)
It has been quite a busy few months, with moving, weddings, pre-wedding parties, traveling, conferences and language courses… just writing it is stressful! It’s been a lot of fun, but I’m looking forward to more time to sit down and write about all the food I’m cooking.
Today’s post is inspired by something that arrived in the mail recently…
Thanks to Riverford Farms, I was chosen to receive a few vampire chilies to try out a potential new crop. Anyone who received them was tasked with coming up with a recipe (or in this case – 3) that we could try these pretty chilis in. As an aside, I’m not sure why they’re called vampire chilies, and the internet didn’t seem to have any good reasons, either.
I wanted to try a bunch of different recipes – and with only 4 chilis, they needed to do a lot of work. In the end, I used them to fill in for jalapenos, which can be hard to find in the UK (and happen to be my favorite chilis).
In the end – the verdict on vampire chilis is that if it happens to be a spicy one, there’s a nice kick to them. However, they’re really not the most exciting peppers – they taste like green bell peppers when they’re not very spicy. If you’re looking for something that adds spice without too much other complexity, these seem to be good for that, but as a strongly flavorful ingredient, they didn’t really shine.
The gentleman and I joined forces to get these three recipes out – and I deferred to him for the guacamole, since he makes a pretty great guac. The recipes are salsa, guacamole and baked vampire “poppers”.
If you get a chance to try out these beautiful dark purple peppers, let me know what you think!
Vampire Chili Salsa
8 small plum tomatoes
1/2 onion
1 vampire chili
1 medium garlic clove
3 tbsp fresh coriander, chopped
salt
1/2 tsp cumin
juice from 1/4 lime
4 flour tortillas
olive oil
salt
Halve tomatoes, remove seeds. Dice tomato flesh and onions. Have and slice chili, don’t remove the seeds and ribs.
Combine all vegetables and coriander, and season with salt, cumin and lime juice. Toss to combine. Set aside for at least 5 minutes before serving.
Heat oven to 200C. Meanwhile, brush each tortilla with olive oil on both sides. Season with salt. Cut the tortillas into triangles. Lay the triangles in one layer onto a baking tray. Bake in 5-minute intervals until lightly golden.
Vampire Chili Guacamole
1 slightly squidgy avocado
1 tasty tomato
1 red onion
1 vampire chilli
Juice of 1 lime
Salt to taste
Halve avocado, remove pit, scoop out of skin. Squish avocado a bit in a bowl. Roughly chop tomato, throw it into a bowl. Finely chop onion, throw it in. Roughly chop chilli, throw it in. Add some salt to taste. Add lime juice. Stir to combine.

Baked Vampire Poppers
2 vampire chilies, sliced, with stems intact
panko crumbs
3 tablespoons cream cheese
1 oz cheddar, crumbled
2 green onions, chopped into small pieces
2 tablespoons fresh coriander, chopped
1 slice smoked bacon, cooked until crispy and crumbled (optional)
1/2 tsp smoked paprika
salt
Preheat oven to 200C. Remove seeds from chilies, put into bowl. Add cream cheese, cheddar, green onions, coriander, bacon, paprika. Combine until all ingredients are well integrated and cream cheese is creamy. Stuff cheese mixture into each pepper half. Roll top of each pepper in panko crumbs.
Bake for 15-20 minutes, until crumbs start to brown. Serve.
]]>
I know, another pasta-based recipe, but it’s summer! For me, warm weather and fresh vegetables means as little time and effort as possible and as much tasty fresh vegetable goodness as I can get. Plus, today was the perfect day for a light and easy pasta lunch.
The gentleman and I spent the first half of today, a perfectly amazing example of summer, swimming, bobbing and sunning at an outdoor pool.
It might have looked like this…
After a few hours in the pool, lunch had to be the right combination of filling but not too heavy. Swimming works up quite an appetite, but I was interested in spending as little time as possible near the stove.
A quick dig around in the fridge and I had a pile of mushrooms and some green onions. Paired with fresh basil, fresh pasta and some parmesan cheese, we were in the running for lunch. I’d like to try this with some walnut pieces tossed in, but unfortunately there weren’t any at home so … next time.
If you’re using fresh pasta, sauteeing the mushrooms and cooking the pasta will take the same amount of time. If not, start the pasta, and with about 5 minutes left, start heating up the oil. The whole thing, including chopping, should take about 10-15 minutes.
After lunch it was time for some homemade iced coffee and the Wimbledon final. I may not be from the UK, but it’s not hard to get swept up in the Andy Murray fever, and to watch Britain win its first men’s Wimbledon final in 77(!) years. Pretty exciting, especially when paired with caffeine.
It’s quite possible that I wrote this sitting on the balcony; the smell of basil, the sounds of the neighborhood and the touch of a gentle breeze made this one of the most pleasurable posts to write. Days like this just don’t happen often enough.

Serves: 2
On the Counter
7 oz (200 g) fresh tagliatelle
4 medium portobello mushrooms, halved and sliced
2 cloves garlic, thinly sliced
2 green onions (scallions), sliced, separated into 2 piles
1/2 tsp red pepper (chili) flakes
6 fresh basil leaves, chopped
2 tbsp olive oil
2 tbsp extra virgin olive oil
freshly grated parmesan, (optional) to taste
What to Do
Heat a skillet or cast iron pan with 2 tbsp olive oil to medium-high heat. Once it’s shimmering (but not yet smoking!) add 1/2 of the green onions and mushrooms. Salt lightly and stir.
Meanwhile, add the tagliatelle to a pot of salted boiling water and cook for 4 minutes (or less depending on pasta) until al dente.
After 2 minutes of cooking the mushrooms, add in garlic and chili flakes, turn down the heat to medium. Stir until the mushrooms have darkened and softened, but not turned mushy.
Drain the pasta and mix with 2 tbsp extra virgin olive oil and the mushrooms. Top with basil, toss and onto the plate with it. Top with parmesan if desired.
(And also use a jam jar for drinking because all the glasses are in the dishwasher.)
I don’t think this needs any meat, especially since the mushrooms do a lot of that hearty umami work in this meal, and I just don’t like heavy lunches on hot days. And… without the parmesan, it’s vegan. If you’re skipping the parmesan, I might add a tiny bit of sea salt at the end, just for bit of texture and some of the seasoning that the parmesan offers.
]]>Right now, I’m what you might call “between vacations”. Two weekends ago, the gentleman and I were in Barcelona, where we enjoyed our share of tapas, gin and wine. (There are some truly great gin bars there.) This past weekend, I trekked over to Wales to visit a friend there, and ate even more.
Of course, with nearly every holiday, there’s plenty of eating and indulging. In my case, definitely too much, and all the walking in the world just isn’t enough to combat it. So, in this “between vacations” time, I’m working on cleaning up my eating a bit.
This recipe came to me in the middle of a craving for cheese, of all things. I have some smoked cheddar hanging out in the fridge, and it nearly made this recipe… until I realized I’d forgotten it and hadn’t missed it at all.
I want this recipe to be the start of me keeping track of the nutritional information for everything I make, even if sometimes I think I’m better off not knowing.
For me, this best parts of this recipe are how amazingly fulling and well-rounded the flavors are, and how even with a ton of ingredients, it’s still an easy and straightforward meal. Oh yeah, and it’s loaded with vitamins. Skip the cilantro cream and it’s vegan!

Serves: 4
On the Counter
1 tbsp olive oil
1 medium onion, julienned
2 bell peppers, thinly julienned
2 tsp paprika
2 cloves garlic, thinly sliced
1/2 tsp (or more!) cayenne pepper
1 can (260 g, drained) black beans
2 cups (460 g, or 2 medium sized) cubed sweet potatoes, boiled
1/2 cup plain nonfat Greek Yogurt
2 cloves garlic, chopped
leaves from 10-12 stalks of cilantro (de-stemmed)
juice from 1/4 lime
salt
8 cherry (Piccolo, in my case) tomatoes
1 Hass avocado
juice from small lime wedge
4 whole wheat tortillas
What to Do
Heat the olive oil on med-low heat in a cast iron pan or non-stick skillet. Once shimmering, add onion and cook for about 5 minutes, until soft. Add in peppers, stir. Mix in paprika, cayenne pepper, and a pinch of salt Cook until peppers are soft and release some liquid.
Meanwhile, combine yogurt, garlic, cilantro, lime juice and 1 tsp salt in food processor. Process to combine. Taste and adjust seasoning accordingly. Set aside.
Quarter tomatoes, cut avocado into chunks and combine both in a small bowl. Sprinkle a pinch of salt and the lime juice on top. Set aside.
After peppers are finished, put everything into a bowl and set aside.
Put tortillas into the oven on 80C/175F heat (no need to preheat, unless your oven is ancient), and warm them.
In the skillet, add beans, cooked potatoes and 2 tbsp water. Stir and heat until hot. Add additional cayenne pepper if desired.
In the center of each tortilla, spoon beans and sweet potatoes (about 8 cubes), then top with peppers, jalapenos, fresh deconstructed guacamole and 1 tablespoon cilantro cream.
Wrap your burritos and enjoy!
Nutrition per serving
Calories: 488
Total fat: 10.7 g
Saturated: 2.5g, Unsaturated: 7.5 g
Cholesterol: 0 mg

 Save Recipe


