On one of my visits back to the US, I walked into a bagel shop and bought cream cheese to take back to London. Yes, I’m serious. Scallion cream cheese, specifically. What you might call spring onion and Philadelphia if you’re not American (or Canadian?). It was a really good scallion cream cheese. And it was $5 for a small carton that I wasn’t even sure would survive an 8 hour flight.
Once I’d finished every last speck, the mourning process began. Wistful flight searches. Daydreams about when I could next get a creamy, oniony, freshly made smear onto my bagels. Then I started thinking big. What if I could make my own scallion cream cheese?
Something to rival those neighborhood bagel shops from back home.
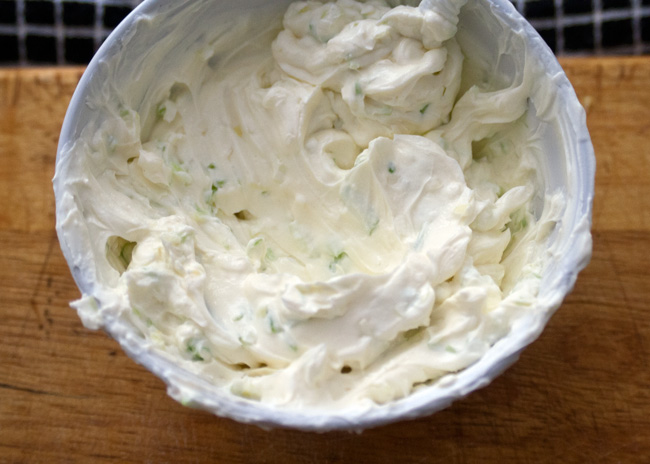
And so I set out to whip up a scallion cream cheese recipe for those of us who can’t get this wonder spread.
The fridge stable 8 month old pre-packaged stuff is not the same and I’m not going to pretend it is. Keep on keeping on if you love it, I don’t want to stomp on your flower garden. But really, this is so much better.
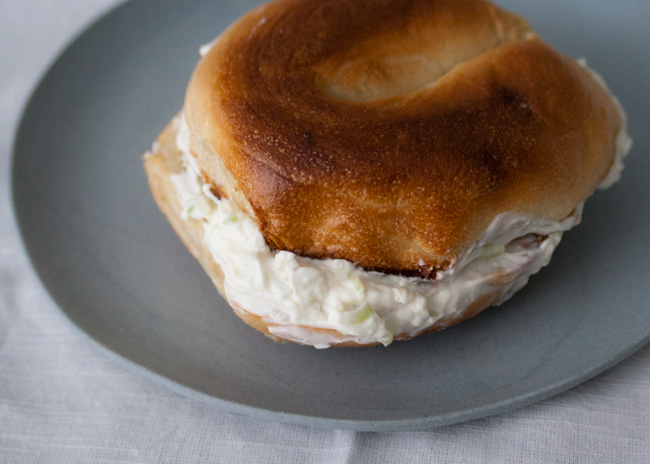
Put me, this scallion cream cheese and a few bagels in a room together, and I can guarantee there won’t be any left. But I know everyone isn’t like me, so I’ve come up with other easy ways to polish off your pot of scallion cream cheese.
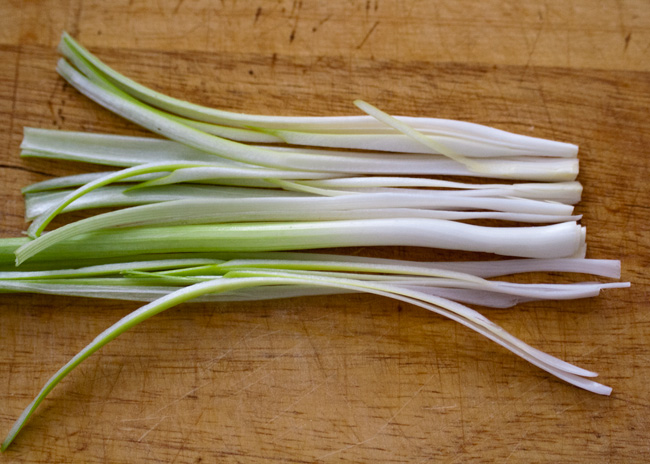
Quarter scallions lengthwise, then finely chop them. Combine with milk, salt and cream cheese and that’s it! If you have the patience, let it sit in the fridge for a few hours before digging in.
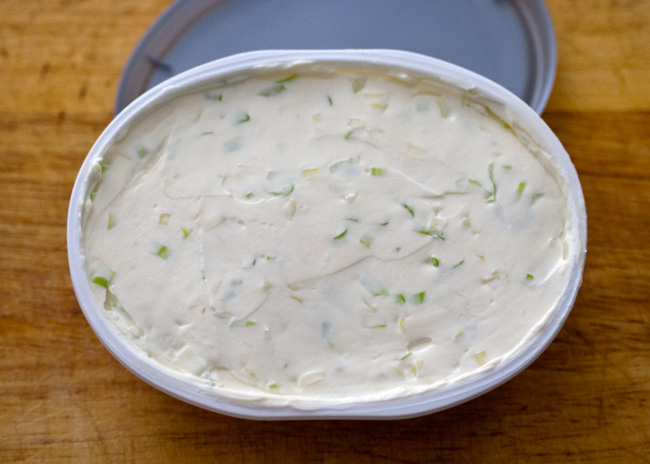 Bonus: Rainbow bagel, because it was so ridiculous I just had to.

Ideas for using up your scallion cream cheese
Stir it into a quiche. Stir it into the eggy quiche mix, then layer it with your favorite quiche ingredients. Maybe spinach or ham, or whatever you have in the fridge.
Layer it into your 5-6-7 layer dip and break out the tortilla chips.
Stir it into vegetable pasta.
Option 1: Cook up some asparagus or tender stem broccoli (or both) in garlic, then add a squeeze of lemon juice and lemon zest. Stir the cream cheese into pasta, gently incorporate the green vegetables and top with grated parmesan.
Option 2: Pump up a super-easy lasagne-style pasta bowl.
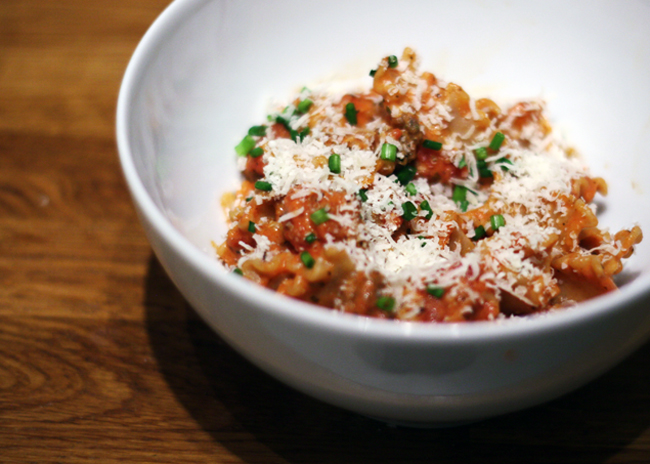
Pile it onto a baked potato, sweet or otherwise. Top with chopped bacon, pan fried mushrooms or just fresh herbs.

Stuff it into chiles, cover them in bread crumbs and bake for pepper poppers.

Serves 2 tbsp
5 minPrep Time
5 minCook Time
10 minTotal Time
On the Counter
- 180g (8 oz) container of cream cheese (I use Philadelphia)
- 2 scallions/spring onions
- 1 tsp milk
- 1/4 tsp salt
What to Do
- Quarter the spring onions, lengthwise. Slice them finely
- Scoop the cream cheese into a bowl, and add the milk. Break up the cream cheese then stir to combine and thin out the cheese.
- Add in the salt and spring onions, and stir until the spring onions are evenly distributed.
- Put the cream cheese back into its container and refrigerate.
- It's good right away but tastes a lot better if you let it chill for at least a few hours.
Do you like granola? I like granola. But I hate paying £4 for a box with 3 pieces of walnut and one cranberry. If you’re with me, join me by making your own! And might I suggest you give my granola recipe a try…
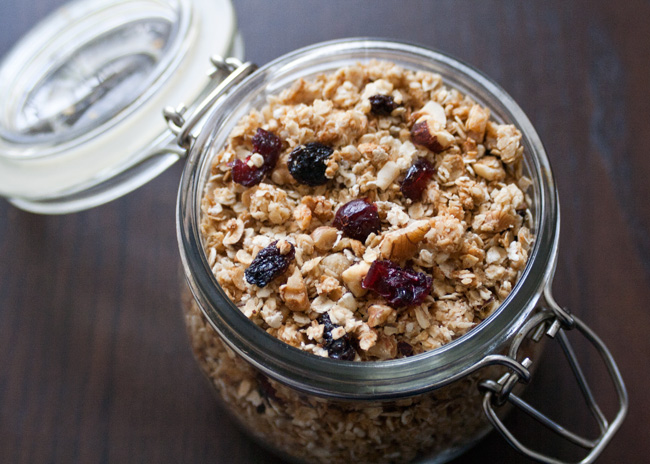
It’s really easy to scale your granola making up or down. You can also create your very own granola blend. Once you have the proportions down, anything is possible. Mine is lightly sweetened, but you can amp it up to your taste. More sweetener will also give you bigger clusters. For a vegan version, sub in maple syrup – but use less, as maple syrup tends to taste sweeter.
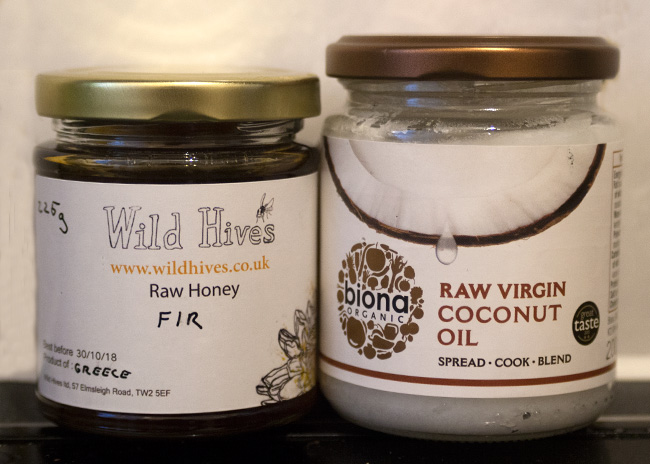
You can use different kinds of nuts, too. I’ve made it with hazelnuts and pecans, Brazil nuts and walnuts, and have even gone as far as a three-nut combo. Crazy, I know.
Add in your own flavorings – a sprinkle of cinnamon or a few drops of vanilla go a long way. Get creative with your crunchy granola self!
Once you have a vat of toasted granola, you might wonder what to do with it besides shoving it straight into your mouth.
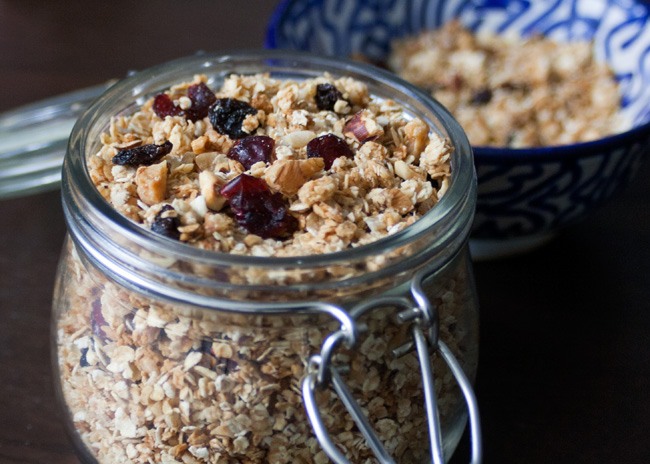
Sprinkle that sweet, nutty, homemade granola on top of plain (full fat obviously) Greek yogurt with jam. Sometimes I go off the deep end into DIY territory, but hear me out. You can turn that yogurt into any flavor you want it to be. Strawberry, apricot, blackberry bourbon… just try telling me dyed-pink yogurt sounds better.
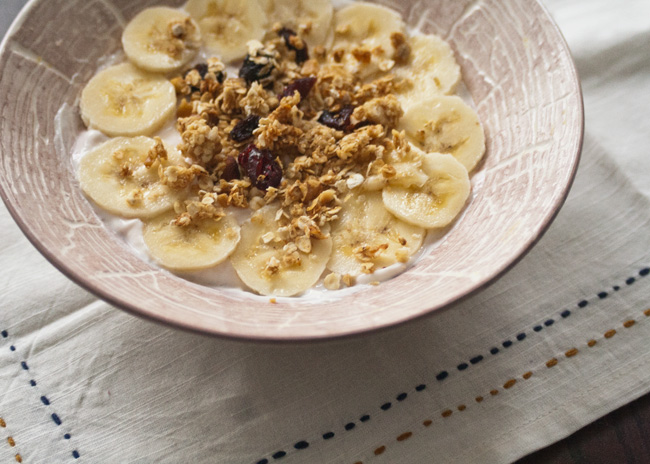
Pour some milk on it, cow or otherwise. Sprinkle it onto ice cream. Put it on a fruit crumble. Tweak your cranachan. (If you have any other suggestions, I’d be happy to try them.)
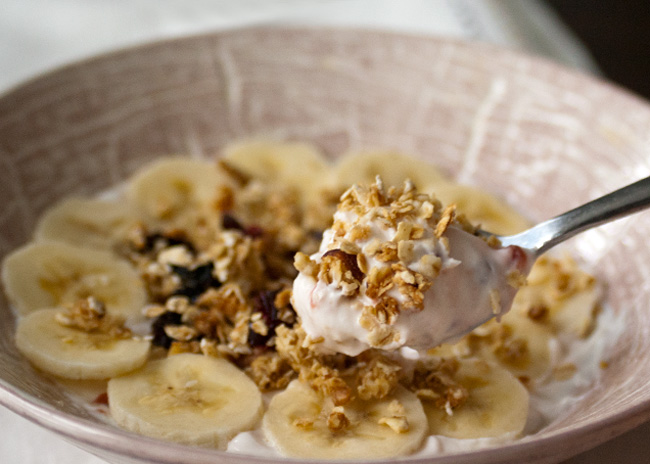
Feel like everything is out of your control? Start small with granola. Then take that slow-release energy out there and tackle the world.
On the Counter
- 200 g oats
- 75 g nuts
- 1 tbsp honey
- 1.5 tbsp coconut oil
- 75 g dried fruit
What to Do
- Optional first step: Sieve the oat dust from your oats.
- Preheat the oven to 160C/gas mark 3/325F.
- Combine the coconut oil and honey. On very low heat, melt them until the mix is thin and runny. This is especially handy if it's cool in your kitchen or your honey is crystallized. Stir to combine.
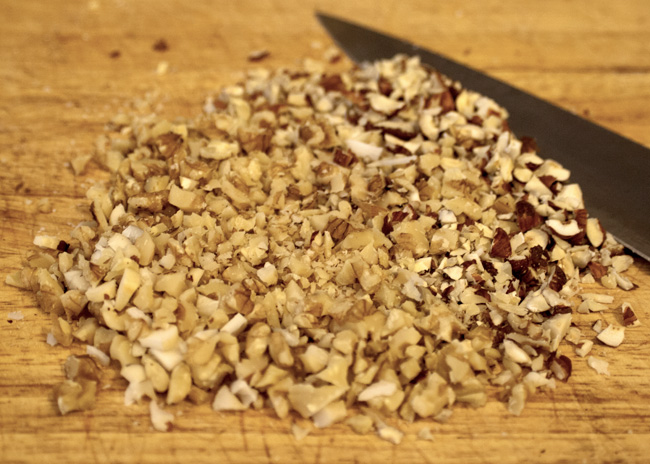
- Chop the nuts into pieces about the same size (or slightly larger than) an oat.
- In a large bowl, combine the oats and nuts.
- Drizzle the oil and honey on top, stirring the oat mix as you go. Stir until evenly coated. Dig deep!
- Spread the mix evenly onto two baking sheets.
- Bake for 10 minutes.
- Gently mix in the dried fruit and bake for another 10-15 minutes. Don't let it go further than lightly golden brown.
- Cool before storing.
- Mix your granola into yogurt, on top of ice cream, or enjoy it as a cereal with milk.
Happy greens season! It’s that time of year when all the foodie instagrams, newspaper articles and veg boxes are talking about the stinky green leaves of wild garlic (known in the US as ramps).
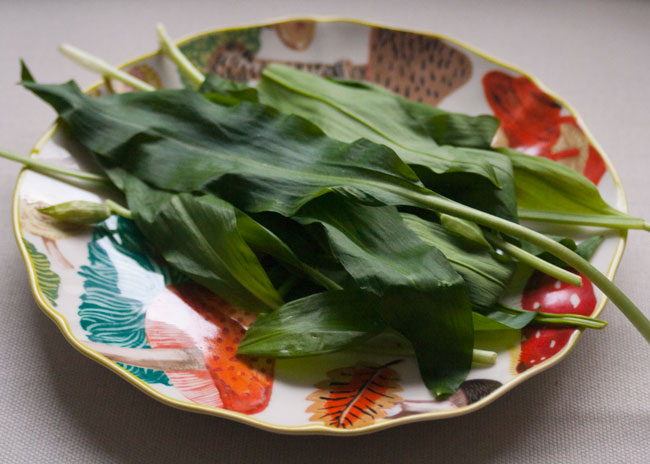
The cynic in me notices the apparent trendiness and members-club-feel of foraged greens. My more charitable side wants to justify the excitement.
These are the first edible, native plants that we are seeing and it’s easy to get over-enthusiastic. It’s been a long winter of potatoes, carrots and Chilean vegetables that have traveled further than I ever have. (Future post: are your veggies better traveled than you?)
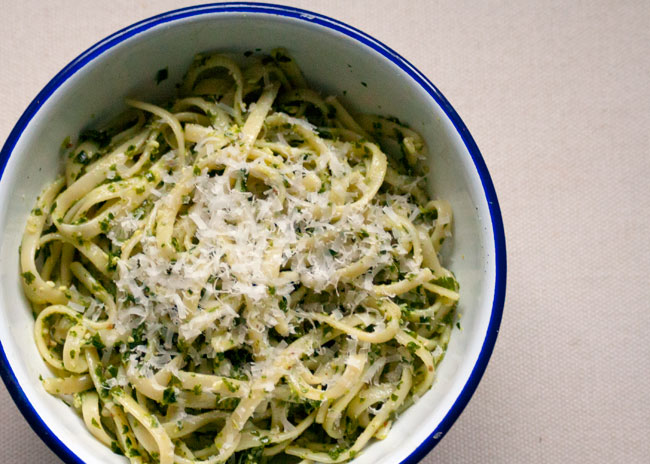
I’m going choose to be excited – and run with it. This is a recipe for wild garlic pesto made entirely with British produce. From the hard cheese to the oil… everything in it can be grown, harvested or produced within the UK.
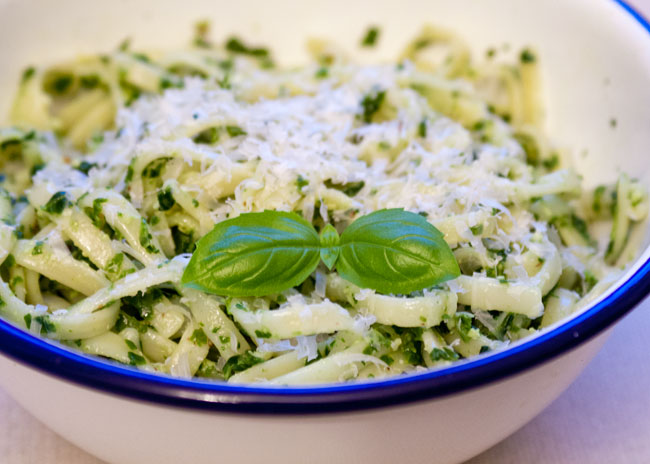
I was directed to a hard sheep’s cheese at Androuet in Spitalfields, London. I think it’s even tastier than Parmesan(!). Instead of citrus I use cider vinegar, and I lightened the garlickiness with steamed kale.
A big inspiration for this whole recipe came from a recent event where a professor of food policy insisted Britain should grow more nuts. I went for hazelnuts – unfortunately of mixed origins.

As with any pesto, you can swirl it into pasta, mix it into cream cheese and make a dip, add it to mashed potatoes or toss some roasted vegetables in it. Or just eat wild garlic pesto straight out of the bowl. Your choice.
I have never tried to make this with US produce, but with it being the largest exporter of walnuts in the world, and the existence of the California olive oil industry – I’m sure it’s can be done. If you are in the US and take on the challenge… please let me know!
On the Counter
- 50 g kale, after being stripped from stems
- 30 g wild garlic
- 15 g hazelnuts
- 10 g hard sheep's cheese
- 2.5 tbsp cold-pressed rapeseed oil
- 1 tbsp cider vinegar
- 1/2 tsp salt, and more to taste (Cornish sea salt if you want to go all out)
What to Do
- Steam the kale for 5 minutes
- Roughly chop the hazelnuts.
- In a food processor, or mortar and pestle, break up the hazelnuts even more, then add kale and wild garlic in bunches, pulsing between.
- Add in the oil, vinegar and salt.
- The last step is to add in the cheese.
- If you're freezing the pesto, convention says you should freeze it without the cheese and just add it when you serve it. I freeze it with cheese and haven't noticed a change in quality.
- Break the cheese into small pieces (or pre-grate it), and add it to the food processor/mortar.
In case you haven’t heard, kale will probably save your life. If you’re drowning, kale will swim out and rescue you. If you’ve fallen and you can’t get up, kale will call an ambulance and get you a pillow while you wait.
Luckily, kale can also be pretty tasty. Is there nothing you can’t do, kale?
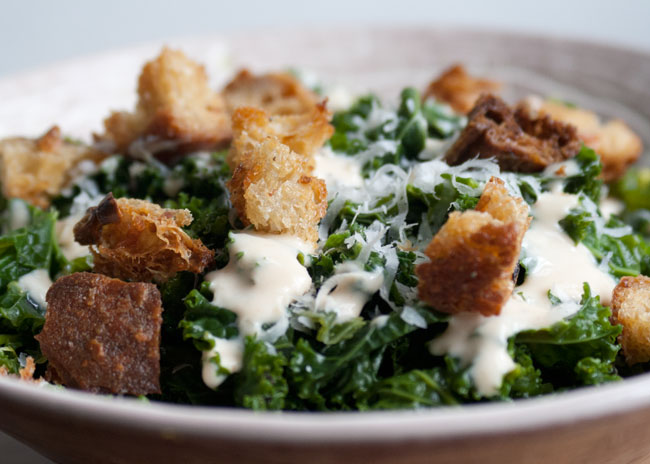
Kale also does great work as a counselor. If you’ve had too many, oh, I don’t know, Cadbury eggs recently, a bowlful of kale with a zingy dressing will assuage your guilt.
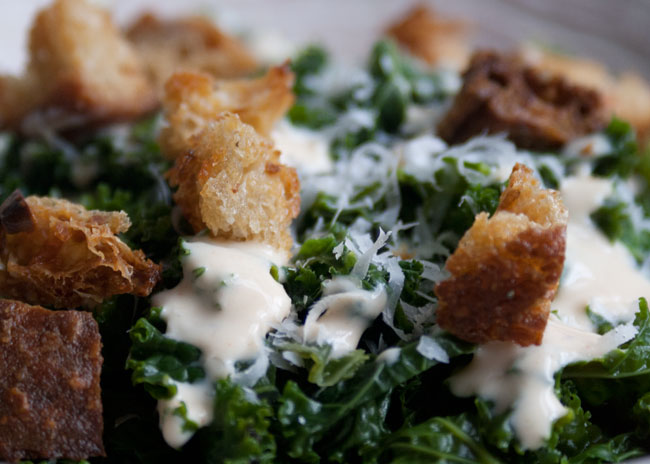
It’s a simple concept, a kale Caesar salad. Strip it, steam it, dress it, eat it.
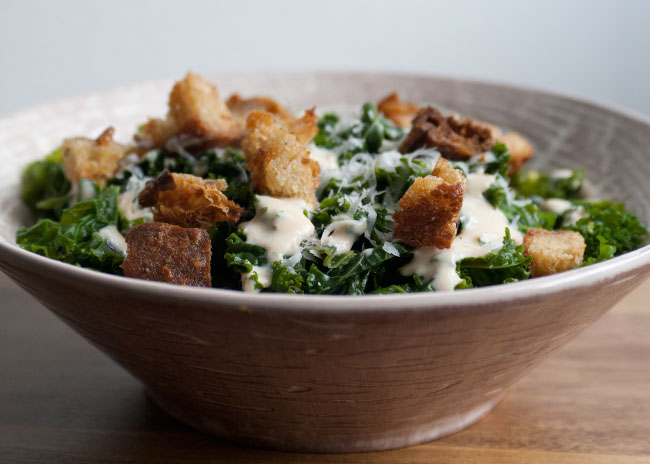
A kale protip I only learned recently: After thoroughly washing it, you can strip the leafy parts from the stems. Just tear it off from top to bottom easily.
Skip the croutons if you’re gluten-free, or just make them with GF bread. I’ve never used it for croutons myself, but apparently it works.
Psst… If you’re looking for a dairy-free (or vegan) version, you can always substitute the yogurty Caesar for this tahini dressing. Just saying…
Serves Serves 2
15 minPrep Time
20 minCook Time
40 minTotal Time
On the Counter
- 2 slices of barely-stale loaf bread, ideally sourdough, and ideally not sliced bread
- 2 tsp olive oil (extra virgin if you have it)
- 1/4 tsp salt
- a few grinds of fresh black pepper
- 100 g kale without stems
- 1/4 tsp table salt
- 1 tbsp olive oil
- Juice from 1 lemon wedge
- Parmesan or vegetarian hard cheese
- 2 tbsp plain unsweetened yogurt
- Lemon juice from about 1/4 of a lemon
- A dash of Worcestershire sauce, or 1/8 tsp vegetarian miso paste
- 1 medium clove garlic, minced finely. (Don't use a garlic press as it will be too strong)
- Pinch of ground sea salt or table salt
What to Do
- Chop your bread into about 2 cm (0.5 in) cubes. If it's very stale, you might need to drizzle oil on it to start and give it a few minutes to soften before chopping. If you do, skip the oil in the next step.
- Preheat the oven to 180C (350F). Toss the bread cubes, pepper and salt together.
- On a rimmed baking sheet or dish, spread the cubes out so they're one even layer.
- Bake for 5 minutes.
- Toss them around so other sides get exposure.
- Bake for a few more minutes, until golden brown, but check on them frequently.
- Thoroughly rinse and dry the kale.
- From the bottom strip the leaves from the stems in as few tears as possible.
- Lightly salt the torn kale leaves.
- In a steamer over a boiling pot of water, steam the kale for 5 minutes or until tender and still a vibrant green.
- Once it's ready, rinse it under cold water or give it an ice bath. You don't want to cook it any longer.
- Now, either rub (or toss if you're feeling lazy) the leaves with olive oil, then add a few squeezes of fresh lemon juice and toss it together.
- You can make the dressing in advance, or while the kale is steaming.
- Combine yogurt, lemon juice, garlic, salt, Worcestershire sauce. Stir together thoroughly.
- Once it's finished, top the kale with dressing, croutons and some freshly grated Parmesan or vegetarian hard cheese.
I don’t know how you feel about French onion soup.
Honestly, sometimes I don’t know how *I* feel about French onion soup. It can be delicious. Warming, rich, sweet and savory all at once. Sometimes it’s hugely disappointing. Flat, overly sweet, only passable because of the cheesy bread on top.
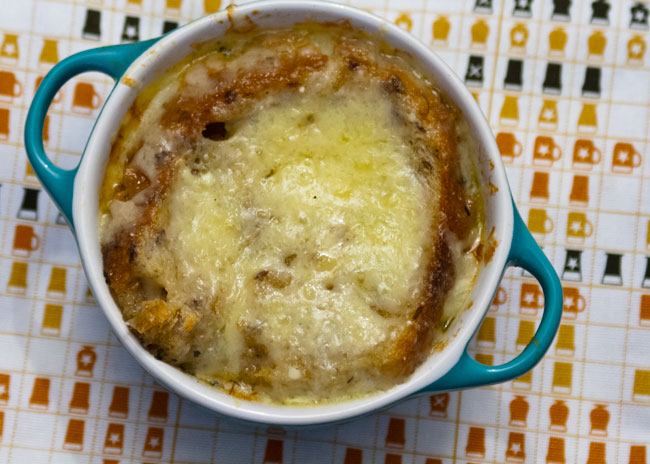
Generally speaking, the ingredients are pretty cheap. Onions, stock made from leftover bones. A few herbs or spices. So maybe it’s a lack of love, or an over-reliance on bad ingredients that has made so many French onion soups lackluster.
It’s easy to understand why you wouldn’t bother making it at home. It takes an age to caramelize onions, and there’s no point in making it with beef stock if it’s not real stock. (No cubes… seriously.)
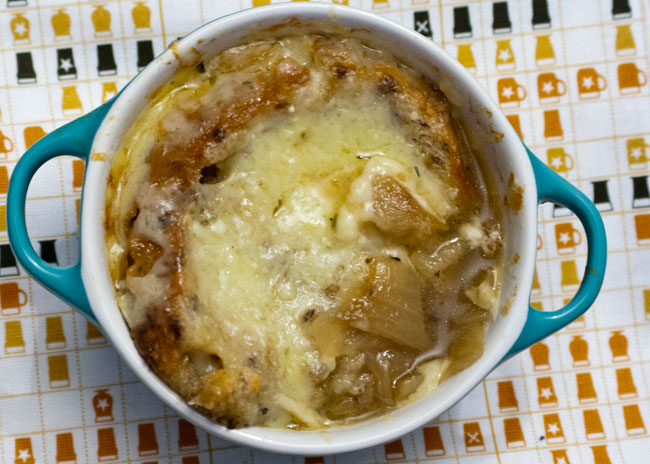
But I’m going to turn it all upside down. I offer you my totally-not-traditional French onion soup made with chicken (!) stock and roasted (!!) onions. (If you don’t believe me on the chicken stock, what about Serious Eats?)
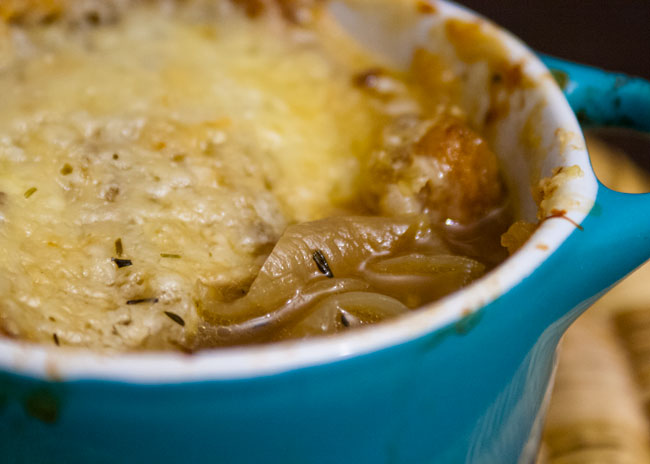
After comparing the taste of lovingly (read: impatiently) caramelized onions versus casually roasted onions, I can tell you there are differences. But they’re not deal-breakers, especially if you would rather make a soup without staring at onions cooking for an hour. The roasting takes the same amount of time, but it’s hands off. You could even boil a quick chicken stock while you wait.
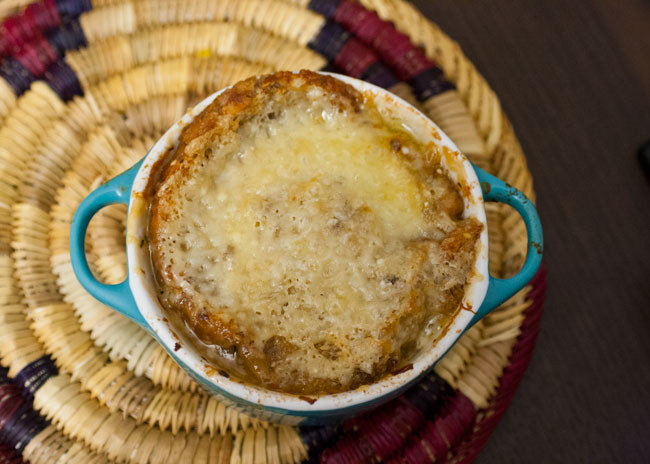
So while this cold weather hangs around at the party for too long, why not make yourself a steamy pot of cheaty French onion soup, and think about all that effort you didn’t spend on it?
4 portions
On the Counter
- 900 g onion
- 1.5 L (6 cups) chicken stock, preferably homemade
- 1 tbsp olive oil (separated)
- 1 tbsp butter
- 1 tsp Worcestershire sauce
- 100mL dry (NOT sweet) vermouth (You can substitute this with 3x as much dry white wine)
- 1 tsp dried thyme
- 2 bay leaves
- 1 teaspoon salt
- 1/2 teaspoon freshly ground black pepper
- 1 slice of crusty baguette or sourdough bread per person
- 25g (1 oz) of freshly grated gruyere cheese per person
What to Do
- Remove the outer layer of onion skin from each onion, keeping just the inner layer of papery skin. Cut off the pointy top of the onions so that just a small amount of onion is visible. Keep the root side on.
- Place the onions in a baking sheet, cut side up. Drizzle each onion with a total of 1 tbsp olive oil and top with a small knob of butter.
- Roast for an hour at 150C (300F)
- Let the onions cool slightly, then peel and slice them from pole to pole into thin strips.
- In a large soup pot or Dutch oven, melt 1 teaspoon butter over medium heat.
- Fry the onions on medium heat for 5 minutes, stirring constantly.
- Add wine/vermouth. Raise the heat to high, and let it bubble away until almost all the liquid has evaporated. This should take 5 or 10 minutes (depending if you used vermouth or wine), but keep an eye on it.
- Add the chicken stock, thyme, bay leaves and Worcestershire sauce. Give it a good stir.
- Bring it to a boil, then lower the heat so that the soup is just simmering. Cook uncovered, until some of the liquid has evaporated, about 30 minutes. Taste it to be sure it's as flavorful as you want. Stir in a pinch or two of salt if needed.
- PS: Don't forget to fish out the bay leaves.
- If you're using slightly stale bread, don't worry about the next step.
- Lightly toast the bread slices under the grill (broiler). Turn once to ensure both sides are just crisp.
- Ladle soup into your bowls.
- If you have oven-safe soup bowls or big ramekins, put the bread slices on top and generously sprinkle the cheese on top. Carefully transfer the bowls to a rimmed baking sheet and put it all under the grill.
- Melt the cheese until it's bubbly and lightly golden.
- If you don't have oven safe bowls, sprinkle the cheese on top of your toast slices, and put them back under the grill (broiler) until bubbly and lightly golden. Transfer them on top of the soup bowls.
]]>
Last year, when I was in Marrakech with a good friend, we had a Moroccan carrot salad among other mezze before a delicious chicken and olive tagine. My first bite of these tart, tender carrots gave me heart-eyes. I was in food love. The other salads, all made of cooked and marinaded veggies and pulses like zucchini, roasted peppers and lentils.
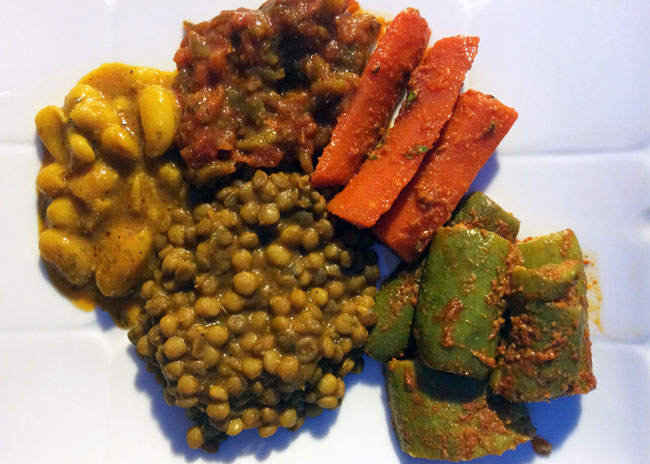
I’ll be working on some of them in the future.
Sometimes the cold starter plates are the best part of the meal. Just enough to pique your hunger, they’re often addictive flavor-bombs. Spicy Korean kimchi, creamy Mexican guacamole, smoky Turkish baba ghanoush… and earthy, zesty Moroccan carrots.
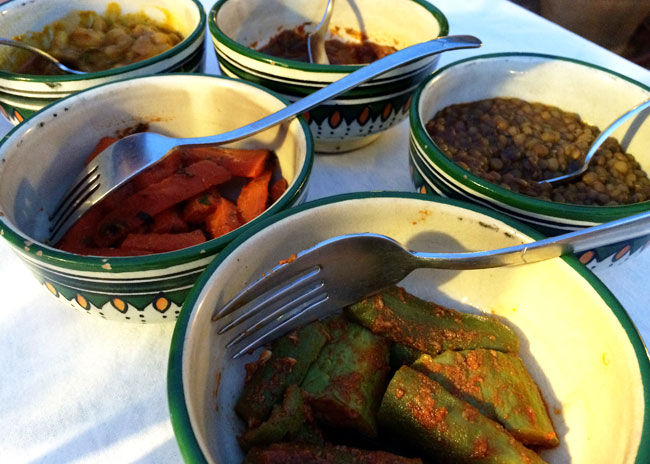
Even in the still heat of Morocco in August, it was hard to stop myself from gorging on tangy, spiced vegetables and stay level-headed about the tagine to come.
I’m still not sure mine will ever live up in my mind to the carrots we enjoyed on a Marrakesh rooftop on that hot summer’s night, but I don’t want them to. Traveling is about oversized memories of otherwise mundane moments.
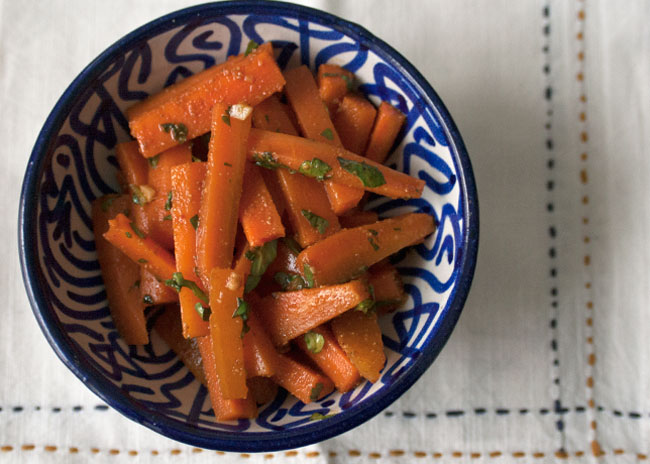
You don’t need a full on North African meal to enjoy your own Moroccan carrot salad – it’s a lovely side to have for lunch with a sandwich, or with a roast beast (or veggie beast) for dinner.
The carrots need at least a few hours to soak up all that spice and tang. It’s worth it to be rewarded with complexity that’s hard to find in a typical cooked carrot.
I compared a few different ways of making these, and steaming and boiling gave me the same results in texture and flavor, so I prefer to steam them to keep nutrients from being thrown away with the boiled water.
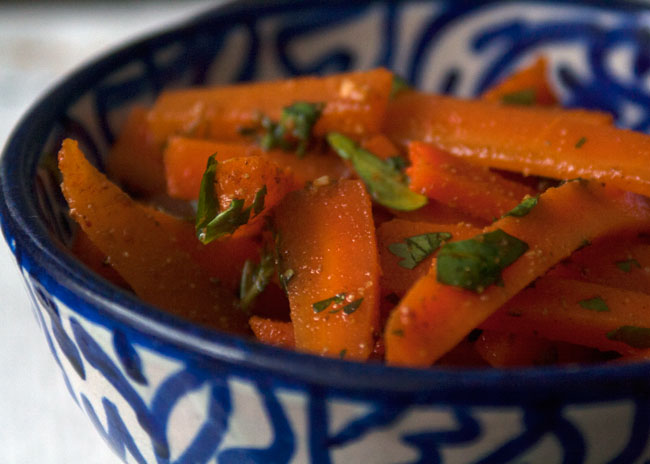
This recipe was adapted from one in a Moroccan cookbook that, unfortunately, I don’t know the name of. (But thanks to Mimouna for sharing it with me!)
Serves 4
10 minPrep Time
10 minCook Time
2 hr, 20 Total Time
On the Counter
- 500 g (~1 lb) carrots
- 1 tbsp lemon juice
- 1 tbsp cider vinegar
- 1 tbsp olive oil
- 1 tsp ground cumin
- 1 tsp sweet paprika
- 1 clove finely minced garlic
- fresh parsley, chopped finely
- 1/2 tsp milled or table salt
What to Do
- Lightly salt the carrots.
- Steam them for 5-7 minutes, until crispy-tender.
- Mix up a dressing with the olive oil, cumin, paprika, garlic, salt, lemon juice and vinegar
- Rinse the carrots under cold water, then shake them as dry as you can.
- Toss them with the dressing and fresh parsley.
- Let the carrots marinade in the refrigerator for at least an hour, but they will taste better if you can leave them in for longer. I actually prefer them even more the next day.
I’m not the biggest American football fan (except… go Jets!). But I love Super Bowl parties. Because of the time difference, it’s a lot harder to justify hosting a party for a game that starts at 11pm (British time) on a Sunday. And it’s even worse when it’s hosted on the West Coast. Woe is me, I know.
Don’t worry about me, though. It is not going to stop me from feasting, especially since Super Bowl food is so good.
Im going to admit to enjoying some of the finer “junk” foods in life, including saucy wings and 7 layer dips. I’m also going to admit that I don’t have a deep fat fryer, and something about dumping that much oil into anything feels … expensive.
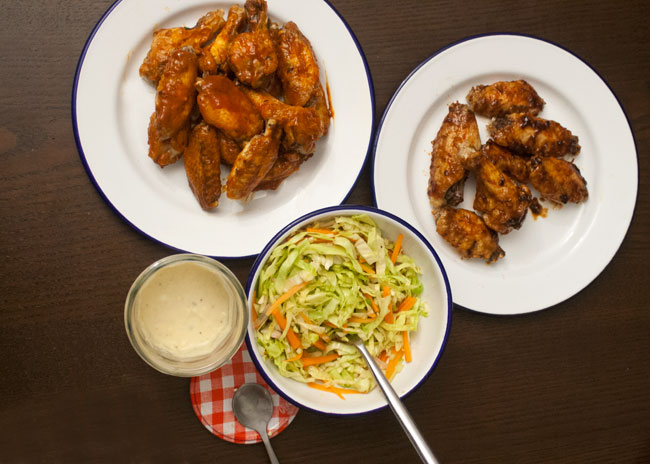
So here’s a recipe for those of you who want wings but don’t want a vat of sizzling oil hanging around. Or for anyone who wants to feel a little more saintly by telling everyone these are baked chicken wings, rather than fried.
I learned the tip that makes this recipe from one of my favorite food celebs, Alton Brown. It’s clever, it’s easy and it works. Steam your wing pieces to render out the fat, making for crispy oven-baked skin. Don’t worry, you won’t dry them out, because the steaming helps with that, too.
It’s worth noting that the steamed wings must sit in the fridge for at least an hour to cool off and dry.

Crispy baked chicken wings will be yours before you know it.
Since I find it hard to make a decision, I make 2 different sauces to keep it interesting. You can go any direction you want. Sweet sticky barbecue, lip-tingling spice, deep and smoky…
Well … on to the recipe.
Technique based on Alton Brown’s buffalo wings.
5
Serves 4
30 minPrep Time
45 minCook Time
2 hr, 15 Total Time
On the Counter
- 10 chicken wings, or 20 wing pieces
- salt
- freshly ground black pepper
- 4 tbsp (about 50 g) butter
- 3 tbsp chipotle paste
- 2 tsp honey
- 1 tsp cider vinegar
- salt to taste
- 3 tbsp (50 mL) cayenne sauce, like Frank's RedHot (my personal choice)
- 1/4 tsp garlic powder
- 1 tsp cider vinegar
- salt to taste
What to Do
- If you're starting with full wings, segment them into 3 pieces, at the joints. You can save the wing tips for chicken stock, but you won't need them for this recipe.
- Set water boiling in a steamer pot. Once the water is at a boil, place the wing pieces, in one layer, in the steamer. Cover. Steam them for 10 minutes, turn them over, and steam them for another 5-10 minutes to render out the fat.
- Take pot off the heat, and carefully remove the wings. With paper towels, dry them and set them onto a cooling rack, sitting above a tray.
- Refrigerate the steamed wings for at least 1 hour.
- Meanwhile, make or prepare your wing sauce, or sauces.
- Heat the oven to 200 C (390 F).
- Cover a tray with foil, and lay out the wing pieces. Season them with salt and pepper.
- Set the tray on the oven's middle rack and bake the wings for 15 minutes, skin side up. Flip them and roast for another 10 minutes. They should be at least 74 C (165 F) internally and the skin should be golden.
- Meanwhile, melt the butter and put it in a small bowl or jar.
- Brush the chicken wings with butter, and then toss them in with the wings sauce or sauces.
- In a medium bowl for each sauce, combine all the ingredients. If the sauce needs to be thinned out, add some water, 1 teaspoon at a time and stir it together.
If you want a veggie-friendly Super Bowl snack, why not try vegetarian nachos instead?
]]>Cranachan (pronounced cran-ock – apparently). It’s a lightly creamy, slightly crunchy, sweetly tart Scottish dessert. It’s built for summer. The thing is – it’s definitely not summer, and it’s absolutely not raspberry season. But with Burns Night around the corner, I’m not letting that stop me. This is my Winterised Cranachan.

If you know what I mean by Burns Night, you’re welcome to just skip on down the post. It’s a celebration of the life and work of Scottish poet Robert Burns, whose birthday is on January 25. Dinner usually involves haggis, Scottish whisky, poetry and dessert (obviously).
A traditional cranachan combines fresh raspberries, whipped cream and toasted oats. For Burns Night, I’ve combined a few of my favorite Scottish things into a seasonally appropriate, rich and boozy version. It combines a whisky-spiked custard, macerated frozen raspberries and crumbled shortbread cookies into a winter cranachan fit for a chilly evening.

You don’t have to use whisky for the custard but … why wouldn’t you? My preference is Glenmorangie 10 year. Its floral, delicate flavor doesn’t overpower the creaminess of the custard or the tartness of the raspberries. Even though I love everything smoky, in this case I would steer clear of a peated whisky, as you risk the taste of barbecued dessert.
You can make everything in advance and construct it just before serving.
Note: I know a few people who can’t eat eggs (understandable) or hate custard (not understandable), so I’ve included a little note about a substitution if you fall into either of those categories.
Winter cranachan
Serves: 2-4, depending on how generous your portions are
Whisky-soaked raspberries
100 grams frozen raspberries
1 tsp honey (heather honey if you have it)
20 mL (just over 1 tbsp) Scottish (non-peated) whisky
Mix the raspberries, honey and whisky in a jar and let it sit in the refrigerator for at least an hour and up to 1 day. After the first 30 minutes, crush the raspberries down to ensure they’re all sitting in liquid.
Whisky custard*
2 egg yolks
30 g (2 tbsp) granulated sugar
1/2 tsp vanilla extract
120 mL double (heavy) cream
1 tsp Scottish (non-peated) whisky (optional)
Set a small, heavy bottomed sauce pan on to very low heat. Add the cream and vanilla, and heat it until bubbles start to form or it starts to noticeably thicken. This will take a few minutes, but don’t walk away!
Meanwhile, in a medium sized bowl, whisk egg yolks and sugar together until smooth.
Once your cream is ready, take the pan off the heat. Very slowly pour a thin stream of warm cream into the egg, occasionally whisking, until about half the cream is incorporated into the egg.
Still off the heat, slowly pour the egg/cream mix back into the saucepan and whisk them together.
Put the pan back on the heat and keep whisking.
It’s ready when it coats the back of a spoon, but you can keep cooking for longer for a thicker custard. (It will thicken even more in the refrigerator.)
Off the heat, stir in the whisky and refrigerate until you’re ready to construct.
Construction
50 g shortbread cookies
Crush up the shortbread cookies until you have rough pieces. Don’t turn them into dust.
In dessert dishes or lowball drinking glasses, alternate layers of raspberries, custard and crushed shortbread. Save your bigger pieces of shortbread for the topping.
* Whisky whipped cream
120 mL double/heavy cream
2 tbsp caster (superfine) sugar
1 tsp Scottish whisky
1/4 tsp vanilla extract
Combine the cream, sugar, whisky and vanilla. Whisk by hand or use an electric mixer, until you get stiff peaks.
]]>I can’t promise these will fit into everyone’s New Year resolutions. If you’re planning to waste less food – yes. If you’re intending to read more books… probably not. Vegetarian/vegan for January? Trying to eat healthier? I got you. Want to donate more to charity? You’re probably better off here or here.
These are nachos, but not the kind you get at a baseball game, or from a pub with a loose definition of the term nachos. They can be as home-made (and as healthy) as you want them to be. You can buy most of the ingredients pre-made. You do what you gotta to enjoy your nachos.


Here’s what I do, and I’ll try to clue you in on where you can save time or keep from buying a load of ingredients.
Whenever we have burritos, there always seem to be tortillas leftover from a pack of 8. I hate wasting food, so I often freeze the remainders until they’re ready for future burritos, or turn them into baked tortilla chips. Sometimes it’s hard to keep them for long enough to turn them into nachos because they’re so addictive. You’ve been warned.

Note for vegan eaters: If you can get your hands on a smooth cashew spread, it’s a delicious cheese alternative. And this is coming from an avowed cheese addict! Just dollop some on top of your nachos, or use it on the side as a dip. I first tried Gozo, a great option for those local to London.
New Year’s Resolution Nachos
Serves: 2 as a main, 4 as a snack
baked tortilla chips (see below)
200 g refried beans
5 or 6 pickled jalapenos, chopped (optional)
50 mL (1.5 oz) sour cream (optional)
guacamole or…
2 avocados, peeled, seed removed and chopped
the juice of 1/4 lime
pinch of salt
jarred salsa or… homemade pico de gallo
10 cherry tomatoes, diced
1 shallot or 1/4 medium red onion, diced
a small bunch of fresh cilantro (coriander) leaves, chopped
1 red chile pepper, chopped (leave the seeds in if you like it spicier)
the juice of 1/4 lime
pinch of salt
grated cheddar cheese or… cheese sauce
50 grams (1.7 oz) cheddar cheese, grated
2 tbsp milk
1 tbsp butter
1 tsp flour
What to Do
Mix the pico de gallo ingredients together and set aside. It’ll taste better if it’s had some time to sit.
Combine the avocado, lime juice and salt. Crush it up and set it aside.
Heat the refried beans, either in the microwave or on the stove top. I add a splash of water to loosen them up a bit. On the stove top, it should take about 5 minutes on low-medium heat.
In an oven-safe dish, spread your tortilla chips out so they’re in as few layers as possible. Top with hot refried beans, pico de gallo, cheese sauce and guacamole. (If you’re using grated cheese, top with beans, pico de gallo (or salsa) and sprinkle the cheese on top, then put them in the grill/broiler for a few minutes to melt the cheese.)
Top with japalenos and dollops of sour cream. Serve immediately.
Baked Tortilla Chips
4 10-inch (25.4 cm) whole wheat tortillas
2 tbsp olive oil
1/2 tsp salt
What to Do
Preheat the oven to 150C/300F.
Slice the tortillas into triangles, or as close as you can get to triangles. You can get about 10 chip-sized pieces per tortilla.
Put the pieces in a bowl and add oil and salt. Top the bowl with a plate or another bowl, hold tight and shake to coat the tortilla pieces.
Spread the tortilla pieces in one layer on a baking sheet (or a few, depending how big your sheets are).
Bake for 5 minutes, then check on them. If they’re not brown and crunchy yet, check on them every 2 minutes. They go from perfect to burned in no time.
]]>Happy 2016! My resolution for the first week of this year is to share this post, so I’m going to start the year on a high note.
Blogging is fun, but it can also be tough sometimes.
I could have started one of those stream-of-consciousness sites where people write about whatever it is they’ve done over the weekend, with photos of a soap dispenser in a restaurant bathroom, or deep insights into their favorite Instagram memes.
But I didn’t, so here I am.
The reason I’m even getting blog-osophical is that I ended 2015 with blogger’s block. Cooking is still happening, and some of it has been fun and very successful (some less so) but it just doesn’t make it online. No photos (ok maybe a few), no testing, no tweaking.
Instead I’m going to round up some of my favorite recent recipes from the big sites like BBC Good Food (seriously the best) and fellow bloggers.
Here’s what I’ve been making lately:
Cod with Lemon and Tarragon (Nigel Slater)
I found this recipe in Eat, a Nigel Slater cookbook, but lots of his recipes are published in the Observer/Guardian. It’s really easy but looks and tastes much more complex. I got the best cod I could. It makes a difference.

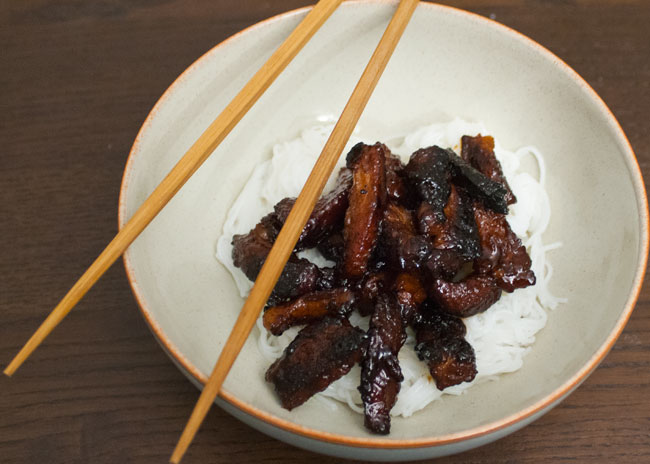
Char Siu (Burp Appetit)
When it was time to release the pork belly from its freezer hibernation, I tried this. I had no idea char siu could be so easy at home! Next time, there will also be buns.
Vegan White Bean Chili (Bon Appetit)
Warm and full of winter veggies. I add a lot less water so it’s less like soup, and use canned beans instead of dried, because I am not organized enough to soak beans a day in advance.

Blueberry Crumble Traybake (Holy Crabness)
This one first came into play for a summer barbecue, back when blueberries were in season. Though mine weren’t nearly as pretty as Emma’s, they were gobbled up without any hesitation.

Apple Cider Doughnuts (NY Times)
There is no craving like a homeland craving, and I decided I wanted cider doughnuts. Keep in mind cider doesn’t even mean the same thing here as it does in the Northeast US, and I’d never made doughnuts before…
But doughnuts I got. Delicious, cidery, imperfect doughnuts. (Props to Brambletye Farms, who make an unfiltered apple juice that worked so well in this.)

 Save Recipe